The last four days have been nutzo in Patio Land for us (not to be confused with Temptation Island- remember that show?). The good news is that it’s nearly done. Like 90% done. But since I’m a bit low on energy at the moment (and we have to wait for better light to take more pictures), I’m gonna cover as much of our four-day patio-extravaganza as I can muster. The rest will come a bit later when we’re 100% finished (and have a chance to take about a million after shots from every angle).
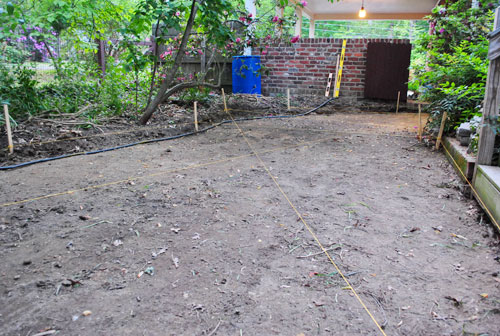
To recap: as of last Monday the area was all marked, leveled, and dug up.
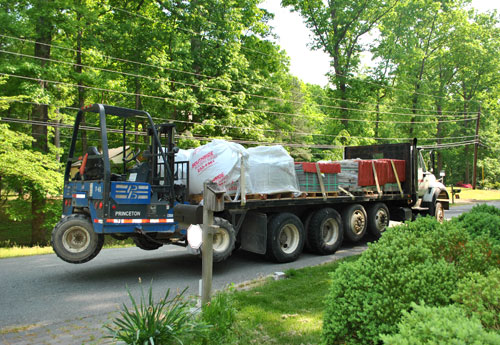
Then on Tuesday our nearly 10-ton delivery arrived via flatbed (300 square foot patios apparently weigh more than two elephants). As far as deliveries go, it wasn’t that eventful – except that the forklift (seen hooked to the back of the truck below) got a flat tire halfway through, so it delayed things a bit while the guy left to repair it.
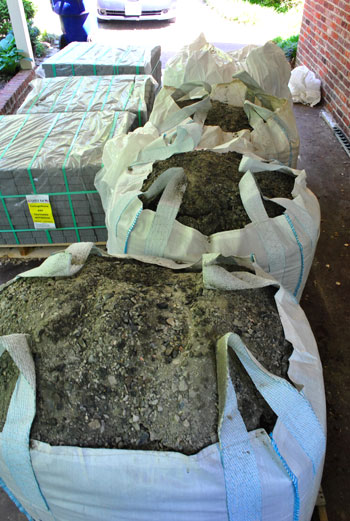
But eventually everything made it into our carport in one piece. If you’re keeping track, that’s three giant bags of fill gravel, one giant bag of sand, and three pallets full of cobblestone pavers (two of the rectangular variety and one of the square kind).
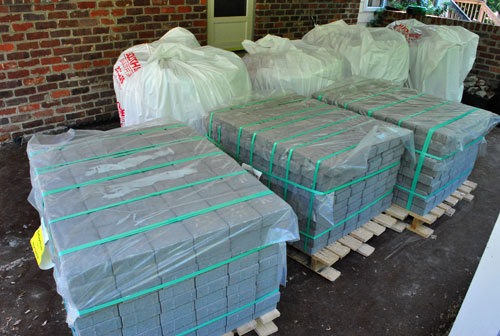
We picked a paver called CottageStone by a local company named Eagle Bay. Yup, it’s manufactured right here in Richmond and we discovered it just by asking for the most affordable paver cobblestones at a local stoneyard called Southside Builders Supply (it came out to be around $2 a square foot, which beat both Lowe’s and Home Depot prices by around 75 cents, which really adds up over 300 square feet). The color is a gray-ish tone that they call “Jefferson” (amongst other Virginia-tastic color names like “Blue Ridge,” “Chesapeake,” and even “Richmond”). It was pretty easy to make our color choice because we decided to do our best to roughly match the gray cobblestone pavers that are already in our driveway. So that’s how we picked our poison- er, pavers (read more about the cost of the whole project here). But enough about design decisions and money – let’s get back to the physical labor.
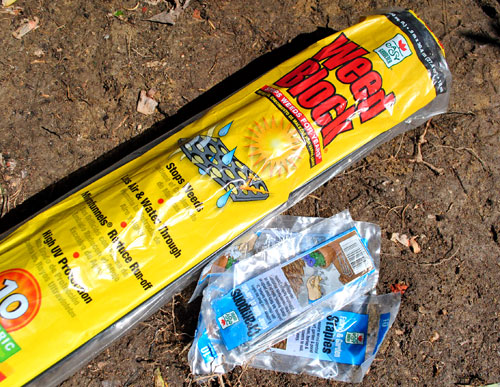
We took Wednesday off Project Patio because it rained, so Thursday was my next work day (while Sherry tended the blog, the baby, and brought me granola bars and water by the hour). As my trusty Lowe’s video and the saleswoman at the stone yard had directed me, the next step was to put down my weed blocker. I picked up this 300 square foot roll of Weed Block and ground staples to hold it down (weirdly called “Crampons”) from Home Depot.
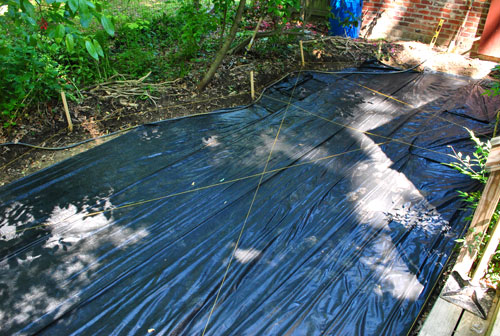
Since we know from experience that weeds and grass love to sprout up between paver stones, we wanted to at least discourage their appearance (although we’re huge rebels… just kidding… we like to follow directions or we start to hyperventilate). Here’s the area all covered in the Weed Block sheets just as recommended. It was pretty easy to cut it to size with scissors and then just stab each row into place with my crampons, so this step only took me about forty five minutes.
Next up: gravel. And not just any gravel – THREE EFFING TONS of it.
Laying this gravel basically consumed my entire Thursday. My wheelbarrow wouldn’t fit through the gate separating the carport and the patio area, so I resorted to carrying the gravel bucket by bucket (thanks to a spare 5-gallon paint bucket that we had on hand) back and forth all day. It was exhausting and disappointing (only because I fully expected to look like Hercules when I was done, but still found myself staring at my usual spaghetti arms). But in the end I was glad that I went the bucket route instead of using the ol’ wheelbarrow, because it allowed me to keep my nylon strings in place, which were invaluable when it came to ensuring that everything was nice and level with a slight slope away from the house (which is really important for drainage reasons).
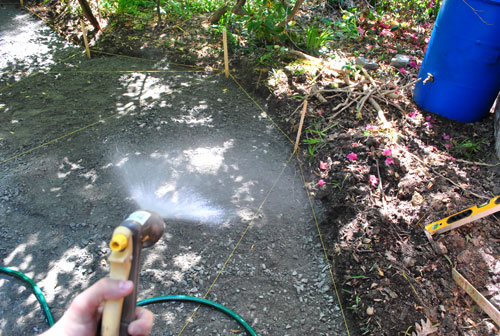
But my workout for the day wasn’t complete, because the gravel had to be tamped down. First I lightly misted the whole area, which started to turn the loose gravel into more of a cement-like consistency. I paid close attention to the Lowe’s video at this point in the process, which instructed me to make it moist enough to clump, but not to go overboard and get it too wet. So my advice would be not to go spray crazy and just look for that cement-like clumping action and then step. away. from. the. hose.
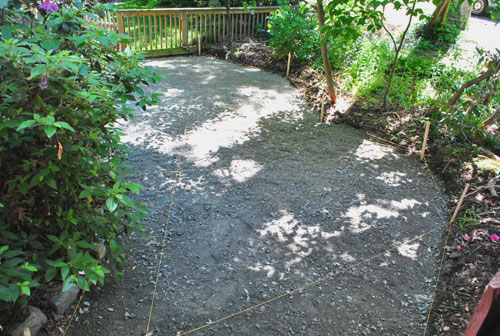
The tamping was a manual task again (sigh) because we opted to purchase a $30 hand tamper instead of going through the trouble / expense of renting a plate compactor (our car is small, we’re cheap, and I may have already mentioned that I wouldn’t mind bigger biceps). It wasn’t a particularly enjoyable task, but honestly at that point my arms were sorta operating on autopilot. And it was actually really gratifying. You can see how it turned my gravel pit into a flat, semi-solid, and ready-for-sand surface below. It almost looked like asphalt in the end. But sand would have to wait for Friday. Over seven hours of Project Patio was enough for me (and the sun was starting to set anyway).
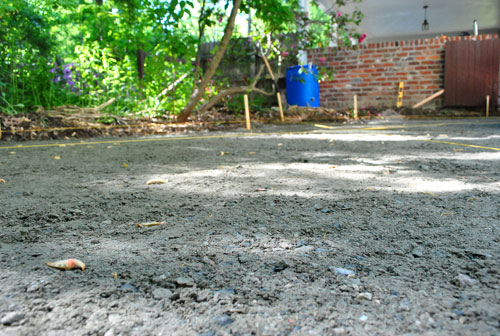
After taking Clara’s 51-week photo on Friday morning, I threw my patio pants back on and got to laying down a 1″ layer of sand. I couldn’t have done this part without the brilliant tip from the Lowe’s video involving two pieces of 1″ PVC pipe. Praise google.
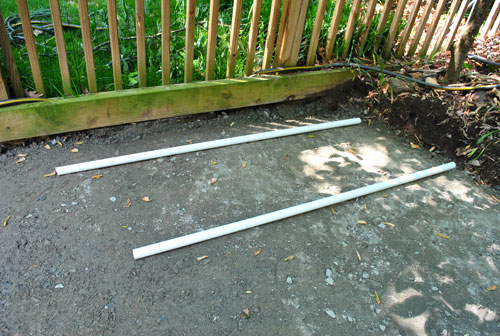
You basically lay them down side-by-side and then dump your sand over them.
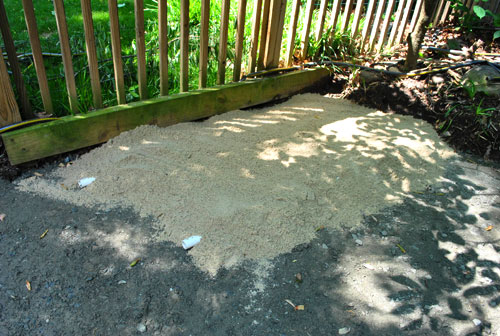
Then using a spare piece of 2 x 4 (or in my case, some extra trim molding) you scrape off the excess sand which leaves you with a flat, paver-ready surface of sand (which is exactly an inch deep thanks to the pipe “spacers”).
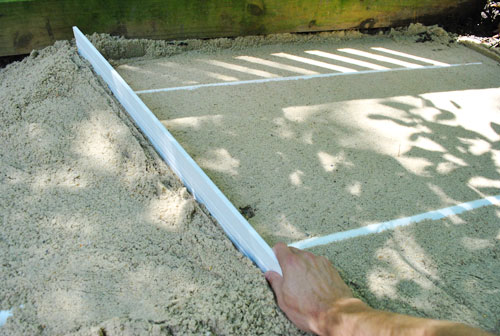
Then you carefully pull out the pipes and fill the empty “pipe lines” with a little bit of excess sand (by hand) for a totally flush look. Let’s just say it was a much faster process than the gravel was (since it only had to be an inch deep instead of three, which made it a lot faster to haul). Here it was half-complete:
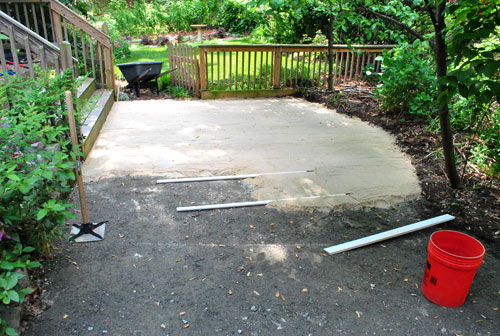
I would’ve finished faster had I not run out of sand at the very end. But fortunately a quick trip to Lowe’s for a few extra bags did the trick (notice the color change at the far end of the area?).
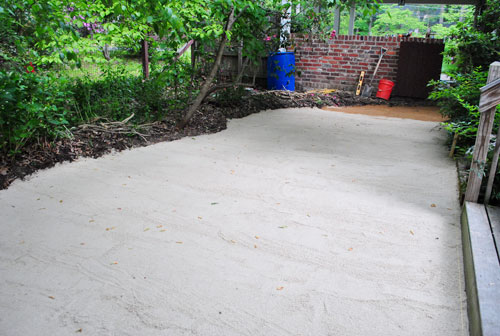
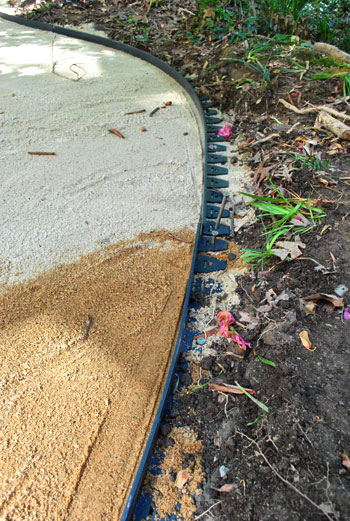
The last step before we could fiiiiiinally get to putting down stone was to install the plastic edging to hold all of our pavers in place (which will end up being virtually invisible once we backfill it with dirt/mulch on one side and pavers on the other). We had heard different theories about whether you should do this before or after you put your stone down (apparently it can work either way) but we thought it’d be easier to plan our curves with the flexible edging than with the heavy stones themselves. And we can tell you from experience that it was the right way to go for us – definitely consider adding the edging first if you’re doing any sort of curve and would appreciate a nice set guide to follow.
By this point it was about 4pm on Friday. I really wanted to call it a day, but Sherry and I were determined to get some of the pavers down so that we could at least start to see the patio come to life. So I charged forward and promised myself that I’d just put down the entrance area. A couple of hours later (yes, it was slow going at first), I had this:
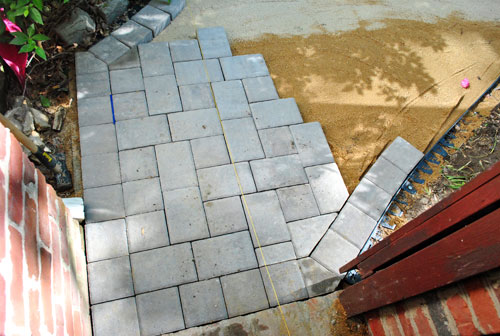
I’ll get into the ins and outs of cutting and laying the pattern in the next post, but below you can see things progressing slowly but surely. Sherry snapped this pic right after she put Clara down to sleep for the night (hooray for a 7:15 beanette bedtime, which gave us some daylight to work together on it- enabling us to move twice as fast during that narrow evening window). And thankfully we didn’t hear a peep from Clara (you know Sherry had the baby monitor outside on high, just in case). But Clara must have known we were busy making a patio for her birthday bash. Smart kid.
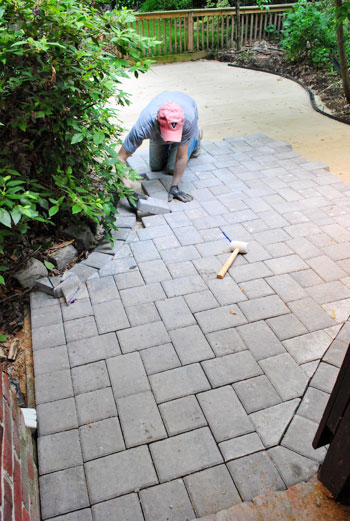
We both decided to put all the cuts on hold for the night so that we could focus on just filling the central patio area with as many whole pavers as our arms could carry (and avoid operating a wet saw in partial darkness as the sun began to set).
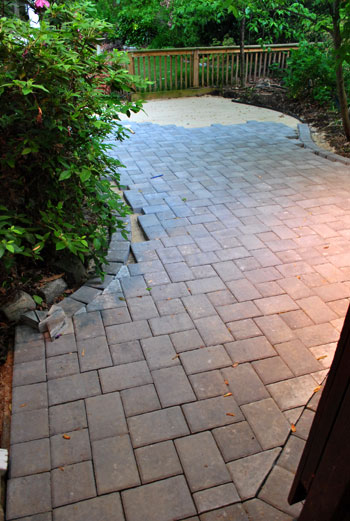
By some miracle, our energy held out ’til about 9:30, when we finally laid the last full paver at the far end of the patio. So you can sort of start to see how things are coming together, despite the darkness and all those missing stones around the borders that we still have to cut.
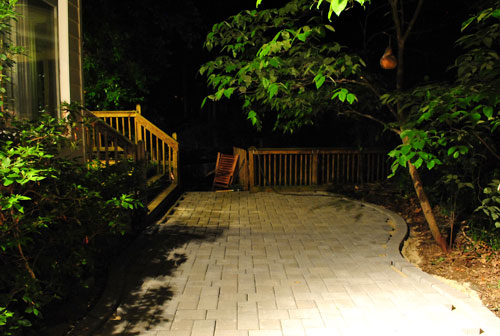
Our camera batteries only lasted long enough to attempt to snap a few totally normal pics of us “conquering” this task. So we just got a few blurry shots like this winner before the camera shut itself down:
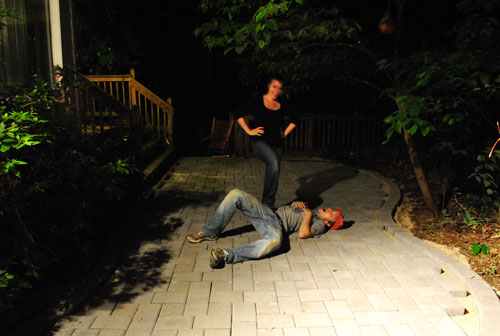
Notice how I chose the role of laying down and looking exhausted? I plead that so-tired-you-feel-drunk phenomenon that occurs after a loooong day (when everything makes you die laughing and you kind of lose your mind for a minute).
So now you know how the Petersiks spend a Friday night. Actually, we did cap it off with a Netflix movie (after a much-needed shower, of course). We saw Love & Other Drugs if you’re wondering. And we thought it was just as naked as the critics said, but not bad. Just don’t rent it with the extended family over the holidays or anything (awkward).

Rebecca says
You’ve inspired me to build my own patio….when I have some money, and own land.
jeannette says
i am so impressed. you. are. teh. man.
Beeya says
You guys are seriously AWESOME!!!
Angela says
Applauding! You guys are amazing!
Chrissie says
That is an amazing job, great work both of you for making it happen! I shall be referring back to this frequently when we’re ready to build a new front path.
John, I can totally sympathise with the “so tired everything’s funny” feeling – it’s when it gets beyond that, and a giant pile of concrete rubble starts to resemble a large, soft bed that I start to worry… though those pavers do look comfy in that last picture!
Annie says
Looks great!!! On a side note, my husband and I saw Love and Other Drugs over Thanksgiving with his 90 year old grandmother, father and step-mother!! YIKES. clearly we didn’t read the reviews.
YoungHouseLove says
Wow. That sounds especially awkward!
xo,
s
Diana Y says
Totally amazing!!
Jennifer says
Wow! Just the flatbed truck alone was intense!! Well, lol, for me that is… I don’t like showing neighbors what I am up too :D Either way, awesome! I could see how some of that adrenaline was helping too. Great job you two
KiTX says
This is amazing. You guys are total rock stars. Clara is going to have so much fun on her big bday!
Paula/adhocmom says
omg. Did you have to take like several dozen advil this weekend? This is seriously crazy. . good crazy.
YoungHouseLove says
There were a few thrown back over the last few days for sure! Haha.
-John
Geri says
Congratulations guys!! What a monumental effort – but well worth your hard labour John, as it looks absolutely fantastic. Very inspiring! Kudos to both of you :)
Amy says
I’m still amazed that you’re tackling this project so soon after moving in! I’m pretty sure it would take me a good year to work up the guts to tackle something like this. Thanks for showing us that it just takes some hard work and determination. It makes me think tackling a small square patio wouldn’t be too bad!
Jules says
It looks amazing!! +250 points to John.
Deb says
I have done all my home renovations on all our homes and hats off to you…..you have mastered the hardest ,one thing I have not done is tackle a real hardwood floor and its up next in line ,but I would never even attempt what you have just successfully done ,whew ,the savings ,cha ching ,cha ching ,dont cha just love it .Great job !!!
Katie says
Looks fantastic! What a difference it makes I’m sure. I bet if the people that lived there before you saw it they’d think, “Now why didn’t we do that?” What an accomplishment.
Hubby and I are going to attempt this starting next weekend. We’ve already got the deck out and pretty sure we’ve got our stone picked out. We are expecting baby number one in November so we are trying to get lots of things done around our new house.
Keep the posts coming and thanks!!
r8chel says
Wow! You have done a TREMENDOUS amount of work John. It looks great!!
Karla Farrell says
Congrats on going sustainable with your pavers choice. Buying locally made materials minimizes transportation pollution, and supprts local jobs. Nice!
Nancy says
I love posts like this! It looks great – totally worth all the effort.
Liz says
It looks AMAZING so far! How do you two find the motivation to take on such challenging projects? The thought of that job made me tired just reading the post! I look forward to the final post with lots of pictures!
YoungHouseLove says
I think we each help cheer each other on when we’re tired and cranky (like John does for me when I’m painting beams and trim and I do for him when he’s hauling gravel). As long as one of us is the cheerleader we’re ok. If we’re both tired and crabby, then we’re in trouble. Haha.
xo,
s
Caroline says
Cannot wait to see the final shots- looks GREAT!
deena says
I cannot imagine how sore your back was!! dang!
reFresh reStyle says
Looks great, you’re one tough guy! I hope you’re resting!
Debbie
Jean says
Amazing! I’m exhausted just looking at the pictures. You both are incredible.
Liz soon-to-be-Rice says
I’m so impressed! I’m wondering how you guys stuck to the pattern (where did the pattern even come from?). I feel like a curving patio like you guys did would be really hard to match and stay on target with square/rectangular bricks. Magic? Prayer? Ritual sacrifices?
YoungHouseLove says
We’re planning a post about all of the paver cutting and laying details (including info on the pattern we chose). Soon! And we’re happy to share that no ritualistic sacrifices were made during the creation of our patio.
xo,
s
Beth says
Ah! You’re bringing me back! Hubs and I laid two enormous paver walkways at our old house and I have never EVER felt such a sense of DIY pride. They were a total game-changer for our ugly duckling landscape and the blood, sweat and tears that went into them was well-rewarded. We concur with your assessment of laying the plastic edging before the pavers. I was the “marker” and my husband was the “cutter” and I used the plastic edging as my guide. Enjoy your new patio – It already looks spectacular!
Sara says
Hi,
I am so impressed! When I was 10, my whole family paved the driveway, the front porch and back patio. It seemed to take forever and I have refused to carry sand or gravel eversince!
I also want to say I love your blog. I am in Sydney, Australia and on maternity leave (waiting for our first baby to arrive). I am looking forward to having more time to do things around our apartment and will definitely be looking here for inspiration!
Sara xx
YoungHouseLove says
Aw thanks Sara from Sydney! Congrats on your wee one on the way!
xo,
s
Kel says
This looks amazing. I’m so impressed by your commitment to getting it done in a short time frame, amazing what a deadline will do to ya! Now this just makes me wish I was back in the house I own instead of renting so I could rip up the garden Thor style. Instead I’ll just settle for a wall of phto frames held up by 3M. Gotta love 3M hooks, they are a renters best friend!
Wanjiku says
NICE!!!!!! the patio is really coming along very well…the fatigue cum pain is sooo worth it John ;)
Sally says
Will you post a before photo? I’m having trouble figuring out what area exactly this was prior to the project.
YoungHouseLove says
Here’s our post about the area when we started (it was just a grassy side yard where the old owner’s dogs peed- haha): https://www.younghouselove.com/2011/04/the-madness-begins/
We’ll definitely include some before photos with our final after shots in that upcoming post so you can see them side by side!
xo,
s
C Redmond says
Fantastic! You can see how beautiful it’s going to be. Even though you were exhausted, raging on with setting only the whole pavers was a brilliant idea. Even if you’re tired, this is a great way to stay motivated because you get to see ‘nearly’ the whole thing finished. Getting back to the cutting the next day to finish up is much easier. I do this when I lay ceramic tile.
Kasha says
You did a GREAT job! I love it…kind of gives me the push that I can do it too :)
Mercedes says
The patio is looking great! I am hoping to have mine done by the end of the summer (I’m working on interior projects right now) but this gives me the motivation to get it done, and do it right! This is going to be a great place to hold Clara’s first birthday!
Corinne says
The patio looks awesome!
Laurie says
Only someone who has done this, or is married to someone who has done this (we’ve had a tamper and a wet saw going the last few days to finish off a slate patio), can really appreciate the effort. That is butt-kicking hard work. And it looks professional. Beautiful job. Enjoy the ever-loving heck out of it now!
As a person who can’t stand to read the manual for anything, much less to teach themselves how to do a whole freaking patio, I am in awe of you guys, and my husband who built a tree house one year all alone, referring to “The Solo Carpenter” which he took out of the library.
(i did teach myself how to do Venetian plaster, largely from YouTube, though – my proudest house accomplishment)
YoungHouseLove says
Haha, it sounds like you guys are a DIY rock star couple! Haha. Off to beg John to build a tree house someday…
xo,
s
Liz says
I know that “so-tired-you-feel-drunk phenomenon” all too well. While working 17-hour days at a cannery one summer we called that the “Midnight Sillies.”
Dwana says
Wow! So impressed – once again! That really looks great. Makes me think that MAYBE we can do that. Not sure, though. I don’t know if we have that much energy. Great job.
Erica says
Holy sh*tballs guys, this is amazing. I’m getting a major ‘I can do this!’ vibe. Thank you for the detailed pictures and descriptions!
crissy says
Geez, I’m worn out just reading this post!
David says
Did it rain at all while doing this? I have a 300 sq ft patio that I am redoing and worried about it raining while I was in the middle of this process.
By the way, I am most likely doing this on my own, may recruit my brother or dad for some. Do you think it’s possible for 1 person to do this? It seemed like both of you did the work. My wife is not a fan of “manual labor”
YoungHouseLove says
We did have some rain – I think between the digging / leveling the hole phase and when we brought in the gravel. It wasn’t heavy enough to do any damage – just delayed me a bit while I waiting for stuff to dry. I was most worried about rain between putting the sand down and laying the pavers, so I planned that around the weather forecast.
And yes, it definitely is possible for one person to do this. I did the majority of it solo (since we’ve got our daughter to watch over). Sherry was a big help speeding up the paver laying process, but it’s something I could’ve managed by myself had she not been able – it just would’ve gone slower. Good luck!
-John
David says
Thanks for the advice. We have a townhouse right outside DC and will be interesting to see how many wheel barrel trips I’m going to make around my row of homes!
I’ll post photos quite nervous as I have tight space to work in and gas, electric and cable lines to maneuver around.
I think we’re going with a holland brick paver as well. The stone company by me said I only need 2 at most 3 inches of gravel cs-6, and not 4 or 5 inches
YoungHouseLove says
Good luck with everything David!
xo,
s