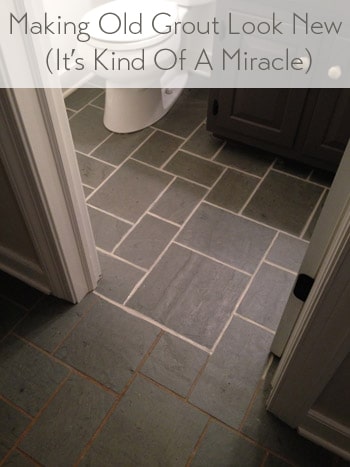
The discolored and dirt-stained grout in the tile floor of our foyer looked super old and gross, but after trying nearly a dozen cleaners and cleaning tricks we nearly gave up. Then we finally find THE SOLUTION to making the grout look white and clean again!
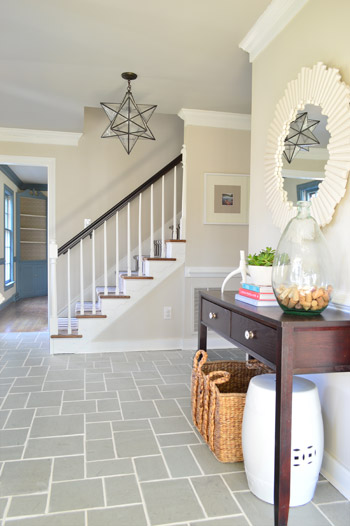
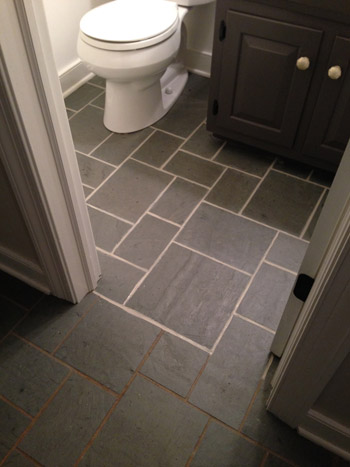
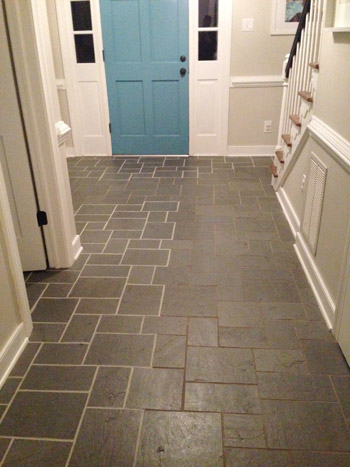
Now that we’re done, you can see how the view just got a heckova lot better around here. The crisp white grout lines play off the white trim and make the whole space feel newer and cleaner.

The funny thing is, it wasn’t actually cleaning that did the trick. So if you’ve got a similar issue with discolored or stain grout, here’s our official intervention: stop scrubbing! Well, maybe give scrubbing a fair shot, but don’t be discouraged if it gets you nowhere. There’s another way!
Cleaning Tricks That DIDN’T Work
As you might recall, for the past six months that we’ve lived here, it has looked like this.
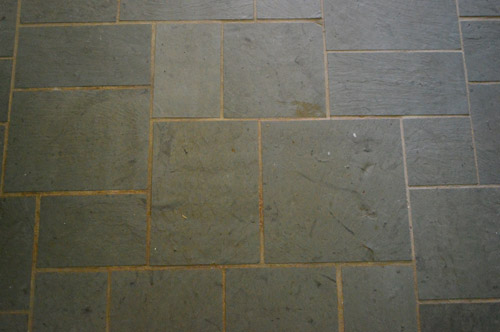
I gave nearly every method under the sun a shot to make that grout look clean. After repeatedly scrubbing the heck out of it, I knew that it was actually very (very, very) clean… it just was so discolored and stained in certain areas, that no amount of blood, sweat, tears, or elbow grease could make it look that way.
Some of my attempts to clean grout included (but weren’t limited to):
- various baking soda paste mixtures
- various white vinegar solutions
- copious magic erasers
- specialty grout cleaning floor sprays/potions/scrubs
- bleach pens
- oxygenating cleaners like Oxiclean
- Mrs. Meyers powdered cleanser + a wire brush
- Barkeeper’s Friend + a wire brush
- a borrowed steam mop
- scrubbing with a stiff bristle brush
- lots and lots of muttered cursing
The Solution To Getting White Grout Again
By this point I did what most people would do. I gave up and ignored it for another few days (what’s a few days after six months of no-dice results?). And then I finally faced facts. The grout either needed to be scraped out and regrouted entirely (which makes for a pretty messy job, especially in the main hallway of our house which connects the entire upstairs to each room downstairs) or it needed to be refinished.
Thankfully a few of you tipped me off to a product you’ve used with success called Polyblend Grout Renew. Let me just skip to the punchline: it worked, and I wish I had tried it before spending six months scrubbing my mind out.
The cost? A cool $12 from Home Depot. (Update: it’s closer to $20 now, but there are more affordable grout pen alternatives available.) Can I get a what what? Note: this might sound like an ad for the stuff, but Grout Renew doesn’t know us from Adam – I’m just beyond grateful that it worked.
Choose Your Grout Paint Color
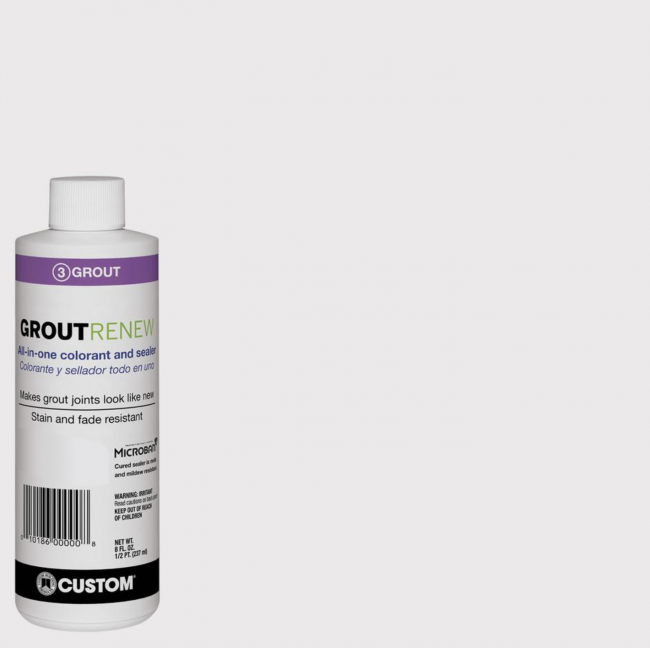
GroutRenew comes in several colors now – over 3 dozen, in fact, including several shades of white and off-white. So you may be tempted to go for the brightest white to get the cleanest, freshest look (that’s “Artic White” pictured below). However, just like paint colors, the brightest, whitest version may not be best for you.
Be sure to take some time to look at your room, your tile, and your lighting to make sure you’re choosing something that blends well with your space. You can always test out a few colors too before committing to one. John and I actually considered two colors – Natural Gray and Oyster Gray, which both look pretty dark compared to the brighter whites. We had seen a neighbor with darker grout in her slate floor, so we thought it was worth considering.

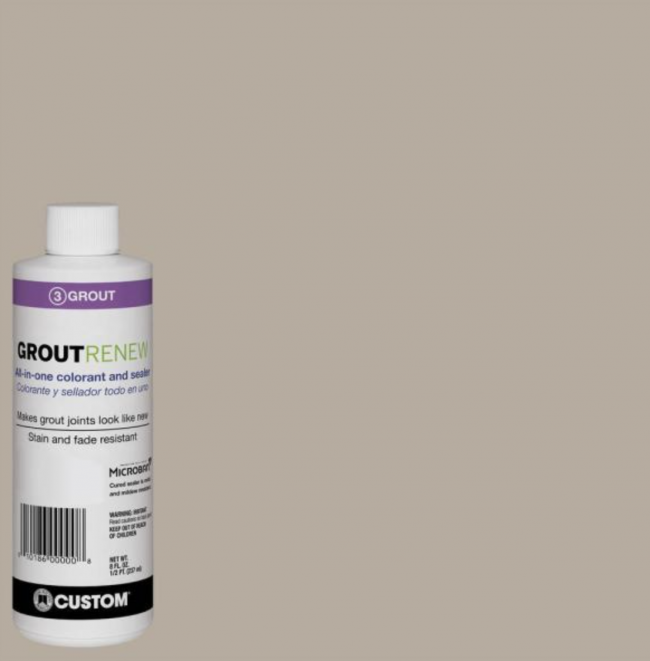
In the end we chose Oyster Gray (shown below) which is still a mid-tone Ivory color – definitely not a bright white. But it looked the most natural and still seemed very bright in contrast to the dark slate tile, without looking artificiall white. Any brighter and we worried it would look like someone in a Crest Whitstrips ad! You know, almost too blinding.
Oh and the Grout Renew was low odor and low-VOC, so this pregnant lady could get down with it. I did wear a respirator, along with opening windows, just because I’m into added ventilation and bad Bane impersonations.
GroutRenew Alternatives
This is the only product we’ve used, but there are some others on the market if this particular one is not available. Lowe’s sells a similar product by MAPEI that comes in a squeeze bottle. Amazon also has a well-reviewed Grout Pen product that comes in a white or beige option. Again, we haven’t personally tried those, but they may be some alternatives to consider if the PolyBlend is not available to you.
How To Apply Grout Paint
The downside to this solution is that it can be time intensive (and patience testing) depending on the size of your surface. For this floor, it took nearly eight hours to apply. But since I had easily spent 25 hours trying various stain lifting methods before resorting to this, well, eight hours with a bottle of Grout Renew was a small price to pay for VICTORY.
Step 1: Clean Your Tile & Grout
I know I said scrubbing wasn’t the solution, but it part of the process. I’ll pause while you laugh since I had already done that TEN MILLION TIMES. But like any surface you’ll be painting, you want to make sure it’s clean of dust and debris. So at least we’re not talking a heavy-duty scrubbing, just your regular washing to remove surface dirt should do.
Step 2: Pick Your Brush Or Application Tool
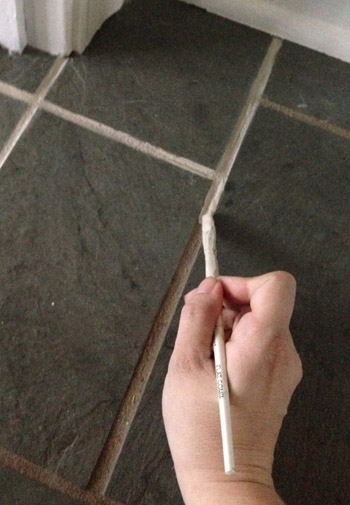
The instructions suggested using an old toothbrush to apply the GroutRenew it into the grout lines and then let it dry for 24 hours. I went with a thin craft brush instead because I had way more control (read: way less mess on the tile surface). The thin paint brush was also easy to dip directly into the bottle when I needed to load up with paint.
Step 3: Plan Your Starting Point & Exit Route
If you’re painting a floor, like we were, you’ll want to sure you don’t paint yourself into a corner (or at least if you do, you can carefully tiptoe across your tile without stepping on the cracks). I started in the half-bathroom because I figured I could work my way out of the room and close the door behind me so it could dry.
It was the opposite of fast. But it worked. Slowly I eked my way out from around the toilet and right out the door, which took about an hour and forty five minutes.
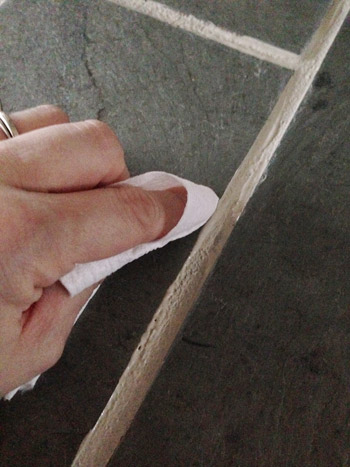
Step 4: Be Ready For Mistakes
Even with a small craft brush there were still times when it got on the surface of the tile, and there was a very short window for wiping it off before it set (and then had to be scrubbed with a fingernail, which was a huge pain) so I literally would do one or two cracks at a time and then quickly follow up to smooth both sides of the seam out with a small piece of toilet paper (this would remove any from the surface of the tile as well as make the sides of each seam nice and straight looking). A paper towel or clean cloth would work as well. That is, if toilet paper isn’t fancy enough for yo?u.
Step 5: Be Patient & Pace Yourself
Being pregnant, the bathroom was all I had energy for on Day 1. Day 2 involved three more hours of line painting and wiping, and I opted to do 50% of the foyer in a strategic way so we could all still walk on the other half of it. Here’s a shot to show you how hilarious John is. I said: ok, get creative with this picture so my giant respirator doesn’t look weird. I like his version of getting creative – just lop off the whole head area.
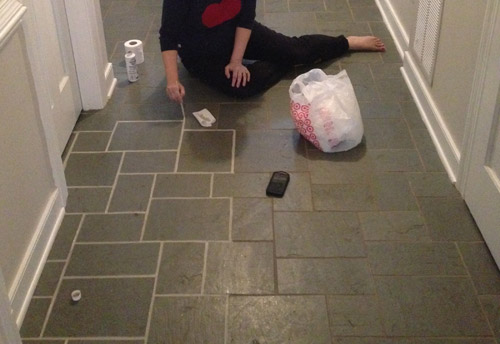
The second day was the hardest day by far, just because I was still kind of sore from contorting my pregnant body around in the small half bathroom the day before, and the little knobby parts of each of my ankles were dragging on the tile as I scooted around like a dog with fleas, but it was all worth it. Worth it and then some!
Day 3 was another three hour process, but it was the most exciting day because I could see the light at the end of the tunnel. The end of the longest-running house battle that I had ever waged was near. I just worked my way around the foyer doing the other half of those pathways that I had done the day before, and I ducked into that last closet while pausing occasionally to fist pump and work on my clean grout acceptance speech (“I’d like to thank the academy, and the grout gods who invented this cheap bottle of miracles and unicorns”).
Step 6: Let It Dry
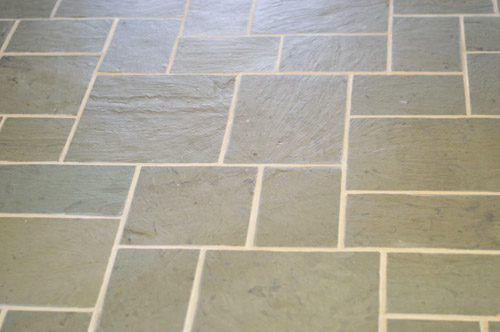
After each application process, we gave that section a full 24 hour drying period and made sure nothing got wet for 72 hours (since that was another warning on the bottle). It’s a good deal lighter than the old grout was, which still makes us say “whoa now” when we walk through the hallway, but we think it’s just our eyes adjusting. Maybe after 6 months our brains just can’t get over the fact that it finally looks clean!
We also had about 1/4 of a bottle left all of this, which was great in case we need some touch-ups down the line. I’ll definitely update you guys if anything funky happens, but so far it has been great. I mean, just look at how far it’s come from the before:

Update: After nearly two years of use, even with semi-frequent moppings, muddy shoes/paws, and a whole lot of foot traffic, our grout still looks identical to when I applied this stuff (you can see an updated picture that we shared after six months of use here). For the folks who can’t find it in stores, here’s an affiliate link to it on Home Depot.com. There are also alternatives like grout pens on Amazon.
Originally Published in 2014
Psst- Wanna know where we got something in our house or what paint color we used? Just click on this button:

*This post contains affiliate links to things we have actually purchased and love*

Melissa says
That looks amazing – also can’t believe how much of a different in your foyer. So pretty and bright now!
Sally says
AMAZING!! You guys are the bomb!!!!
Nicki says
Just because you never mentioned it, I thought I would tell you that I I once cleaned badly stained grout using Muratic acid. But it is very very stinky, you could never use it while pregnant! I am planning to buy some of the stuff you just used though because it seems like a MUCH better option!
Erin says
Is this more of a paint than a cleaner?
Would it damage the tile if it were left on, or just look messy? I have been going down the same unsuccessful path with my 1920’s hex tile bathroom. I would love to finally do something that works, but I don’t know if I can maintain precision over for all those tiny tiles. I’m thinking that maybe I could get away with some mess if I pick the same color as the majority of the (white) tiles, but I don’t want to risk permenantly damaging the original tile, which is still in surprisingly good condition.
YoungHouseLove says
It’s an epoxy, so it’s like a paint but it has polymers in it to bond to the grout and hold on for the long haul (even if it’s wet, under foot traffic, etc). If it got on the surface of the tiles it could leave them looking messy if you left it there, and if they’re super porous (like travertine) perhaps it even could stain them, but if you test a small spot first – and just wipe it off of the surface as you go, it should be pretty straightforward. It takes a LONG time, but being meticulous means better results!
xo
s
Samantha says
haha!
Me last night looking at my kitchen tiles “hmmm… I should clean the grout, I wonder if John and Sherry have a good cleaning process.”
Looks awesome, I’m going to have to try it!
Jeannie says
That looks so fantastic! Great job! Now treat your poor contorted, pregnant self to a pre-natal massage or something! :-)
KAITLYN MCCALL says
Great job! What a difference! I love the blue door inside. Great space.
K.McCall
http://www.TheUrbanFlamingo.blogspot.com
Karla says
This is awesome! Totally going on my “dude, get on that” project list for our house. Our gross stained grout goes through our entryway, laundry room and kitchen, though, so we’ll need to plan carefully for that drying time! And our tiles are smaller, which means more grout. I’m already dreading how long it will take, but am looking forward to having grout as bright and fancy-looking as yours!
Jenny N. says
Yay! I was so happy you were able to spruce up your tile. I could tell from earlier pictures that it was pretty, but needed a little (or a lot of) TLC. I’m a fan of slate tile, anyway, but now your foyer is more “pretty and new” and less “look at me, I’m old.”
Jessica says
Sherry, I can’t thank you enough for this post! It’s so nice to hear of a good solution from a trusted source. Being pregnant also, I’m always worried about fumes so it was nice to know that it’s low odor and low VOC. You are the most ambitious pregnant woman I know – it looks great!
YoungHouseLove says
Aw thanks Jessica! Good luck!
xo
s
Alison says
Do you use gardening knee pads or tiling knee pads or recommend anything similar to make a floor update like this more comfortable or at least less painful? Love the change! Looks great!
YoungHouseLove says
That would have been smart! Definitely padding things under you could absorb more as you work, although you’d need to slide them around with you as you go.
xo
s
ryan says
I love it! Good job!
ryanres1
Halie says
Wow! What a transformation!
Sometime ago you mentioned that you’d like to keep the tile in the foyer, and I winced a little…it was so dark, and not really in a good way (sorry!). However, that light grout really makes the difference, and it’s fantastic!
It’s funny how a small (albeit time consuming!) can make such a big change!
Meg Sluyter @ Lip Gloss and Lumber says
Thank you for saving me from having to re-grout too. I haven’t heard of this stuff before. Now, lets hope it doesn’t take me 8 hours to do it. Thankfully it’s only a shower and not a very large area of flooring. It sure looks amazing, definitely worth the effort. :)
Andrea says
Wow! What a difference. Can you tell me the how you painted all your trim? Brush, roller, sprayer? I’m in the process and your white paint job looks amazing!!!!! Would love any tips. Thanks!
YoungHouseLove says
We used a paint sprayer for the doors and the trim upstairs (if you search Graco on our sidebar search that post will come up). For the trim downstairs, we did it by hand with a primer + semi-gloss paint with a brush. Took tons of coats (two of primer and three of paint) but it was well worth the effort not to have any more blue!
xo
s
Meg says
What a transformation! Absolutely love it.
Sara S. says
How funny! I started using this product on the grout in my kitchen as part of my “Phase 1” on Tuesday! We are on the same wavelength! I love how yours looks and can’t wait to finish mine up! :)
P.S. Thank you so much for all your work on your kitchen Phase 1! It has inspired me to do a Phase 1 rather than waiting even longer for the complete reno…
YoungHouseLove says
Aw thanks Sara! Best of luck with everything!
xo
s
Jana says
Ok it’s crazy to me what a huge difference something so seemingly small can make! It looks great! Plus, I admire you for doing all that work with a preggo belly. Not easy or comfy I’m sure. Go you!
Christy Niebaum says
Ehr-mer-gerd. I’m all “Hey, grout, heyyyyyy.” I love that you can see and appreciate the tile design better now too. I didn’t realize the tile layout was so interesting until the edges were more defined. Bravo, $herdog!
Mel says
This looks so good! I just recaulked my tub and desperately need help on the grout IN the shower. Does it say if it will work there? I did a google search and read a ton of comments before I caved and just decided to ask. I couldn’t find a good answer. Thank you for posting this. I have been so flummoxed by the stained grout…like, wake up in the middle of the night thinking about it. So I’d LOVE for this to be a solution to my problem!
YoungHouseLove says
Some commenters said they used it with luck in their showers! I would read the bottle just to be sure!
xo
s
Lynn says
Well, darn. I could have really used this five years ago, during an epic struggle with my kitchen floor (it won). I will just tuck this info away for the next time I have grout!
binhtheredonethat says
That looks AMAZING! Will have to try it on our flood.
Question, do you still paint while pregnant?
YoungHouseLove says
With no-VOC paint, yes! There’s so much of that now a days, it’s easy to keep painting while pregnant! They even have no-VOC primers, sealers, and caulks!
xo
s
Renee says
I have to say, the transformation of this entry-way is just mind-blowing. Do you ever wonder what the sellers would say if they saw it now? Do you think they would regret selling their home?
YoungHouseLove says
The house had actually been vacant for almost a year so the family was long gone when they finally put it up for sale – so I don’t think they wish they were back here, but they loved this sweet house back in the day. We always smile thinking about how “in its glory” this house was once (it had this cool intercom system in the 80s! crown molding everywhere! a giant back deck!) it just needs a little love to get back there.
xo
s
Terresa says
YES!! That looks beyond awesome! My favorite post ever. Love, love it:)
Deborah Nowland says
Home Depot is going to have a run on this product! I need to get there right away before they run out!
Taurie says
This is totally unrelated, but are you planning on doing an updated video tour any time soon? I’d love to see how all the rooms and design choices flow together!
YoungHouseLove says
YES! We’ve been meaning to do that for months! Now that the kitchen cabinets are put back together, I’m hoping to do one in the next few weeks!
xo
s
Kelly L says
WOW! In pictures, it was hard to see why you were keeping that tile at all..Now I can see each tile & it’s SO pretty!
I have been working on my floors in the main living space with this exact color! Great minds, eh? It is a killer though–I’m ready for a chiropractor visit;)
Christine says
Yes! I LOVE this stuff. I bought some (in Delorean Gray) for our kitchen/hall/bath/mudroom because, like you, I had tried everything under the sun to get the grout back to an unstained look. The problem with ours is that we never sealed it (chalk it up to the fact that we never had a tiled floor before and simply didn’t know!), so high-traffic areas just sucked up grime like a sponge.
What I really like about the Polyblend is that it’s a colorant and sealer in one. Next year I plan on just going over it with a regular sealer, assuming it doesn’t need to be recolored again.
Great post and the result is stunning – the foyer looks incredibly light and airy now!
Mia says
I read all of your comments on all 7 pages before submitting this question. When you did spray seal grout before, how do you keep it on just the grout? I realize if/when you do in the future, there will be more detail but an you give a tip or two?
YoungHouseLove says
In the past you just spray the sealer (it’s clear, not colored like this) and sponge it off the face of the tiles, and then you buff them again dry to get it all off the face of them. At least that’s how it told us to apply it to penny tile and subway tile (might be different with porous tile like travertine).
xo
s
SarahSmile says
I literally had NO IDEA that would make such a difference! It looks absolutely awesome!! You go girl! Those before and afters actually would inspire me to sit on my hands and knees for hours painting the grout – such a change!
Ashley says
I fell in love with grout renew, too. I used it to stage my house and can sympathize with you on the time it took! with all of that sitting, you might want to do some yoga stretches to be sure your pelvis is in line. You don’t want any back pain. Sorry, I’m a doula! And also, do you think that stuff is just watered down paint?
YoungHouseLove says
Oh yes, there was a lot of stretching and a fair amount of bending and shaking things out to loosen up. Haha! As for if it’s just watered down paint, I think it has special polymers that bond to grout and hold a lot better than paint would (for example, it can stand up to wet foot traffic, moisture in a shower, etc).
xo
s
Leah says
Niiiice!!! It looks amazing!
Michelle says
We gutted our bathroom last spring and chose black and white hex tile with white grout and I have been cursing my choice ever since. It never looks clean! I am off to HD this weekend.
Lindsay says
Guuuurl I am about to wage an epic war on the 3 full floor to ceiling walls of PINK tile in my bathroom. I am going to PAINT it. I know sounds crazy but I googled it…and I probably won’t paint the tile that is actually in the shower/tub area behind the shower curtain. Why the previous owners decided to pair 3 walls of pink tile with a BEIGE AND BLUE floor I will never know.
YoungHouseLove says
Wahoo! Good luck Lindsay! I hope it turns out awesome!
xo
s
Osh says
What a fresh and happy entrance! I love it all! What is the paint color you used on the walls?
YoungHouseLove says
That’s Edgecomb Gray by Ben Moore.
xo
s
Melissa Rivas says
I love the wall color in the foyer/hall. Can you tell me the main and trim colors you used?
YoungHouseLove says
Thanks Melissa! It’s Edgecomb Gray on the walls, Revere Pewter on the ceiling, and Simply White on the trim (all by Ben Moore).
xo
s
Jill says
FYI, I had awful results when I tried to seal my Grout Renew! (I used Grout Renew when our new grout dried white instead of the supposed sandstone.) The sealer (from Safecoat) totally washed out the Renew color and the grout went back to white. I had to re-Renew about 100 sq ft. Which you know was not fun, after spending so much time on the 1st coat. I have also had small portions wash out when too much water gets on the grout. Normal mopping is okay, but I don’t let the water sit. Otherwise, the product saved us too, and I recommend w these caveats.
Jill says
There’s a product called Bean-E-Doo. It’s made from soybeans and is non-toxic. I’m not affiliated! It’s a mastic remover – we used it to remove OLD tile glue. I don’t know if it would work in your situation, but maybe worth a shot. We had great results. Plus, it doesn’t smell at all like the normal noxious stuff. Here’s an Amazon link.
http://www.amazon.com/Bean-e-doo-Mastic-Remover-1-Gallon/dp/B0006NL1JA
Jill says
the Bean-e-Doo is for Laura O who has dried on carpet glue.
YoungHouseLove says
Oh no! Thanks so much for the tips Jill!
xo
s
Jude says
I love it! We have the exact same flooring in our foyer. I’d love to have mine look like yours. You guys always inspire me, your style is awesome! If I were to describe your style I would say – “Fresh and modern with a love of color, textures, patterns and total just cuteness, an eclectic in the best way.’ Keep inspiring!
P.S. The cuckoo clock is a favorite for sure! Can’t wait to see Baby Barnicle’s clock when he gets one :)
YoungHouseLove says
Aw thanks Jude!
xo
s
Meredith @ La Buena Vida says
That is an amazing difference! What a big pay-off for a (relatively) small project!
Karen says
I just have to add my two cents. It’s gorgeous, Sherry! It looks like your home is a NEW house!!!
YoungHouseLove says
Thanks so much Karen!
xo
s
Tara says
Holy tamales! I kept thinking “things are coming along and it looks great…but man I hope they do something about the floor soon.” Haha. I couldn’t imagine you even keeping the existing floor before, but it looks beautiful now. Never would have thought! Hooray for awesome products!
Sarah H says
Guys, I LOVE you!! You may have just officially saved my grout sanity. I have been trying everything under the sun for the past few months, trying to clean up the dingy look of my kitchen grout. I just ordered this from Home Depot online, as I am home with a baby and too lazy to drive 5 miles to the Depot up the street. Thank you!!
Michelle @ A Healthy Mrs says
What a difference! It looks great!
Edwina - The Old Post Office says
You know you’re a renovator when you admire the colour of other people’s grout at parties ;-)
YoungHouseLove says
Haha, I know right?!
xo
s
Janine says
Thank you for this timely post! I have been wanting to fix the grout in my bathroom and my kitchen but I had no idea what to do. Please do an update if you do a sealant. This is so awesome!
YoungHouseLove says
We’ll definitely do a little sealer update and share how this wears over time for ya!
xo
s
Rachel says
That looks INCREDIBLE! With that said, something about the sprawling beauty of it makes me want to put a colorful rug on it? Love it!
YoungHouseLove says
I totally would love a foyer rug!
xo
s
Holly says
Amazing! I have to say I just LOVE your blog. It’s the best. I may, or may not, check it daily….. ;)
I haven’t found another DIY/home reno blog that can even come close to how informative and amazzzing yours is. Ok, enough gushing from me. Grout looks great! Definitely keeping this grout trick in mind!
YoungHouseLove says
Aw, thanks Holly!
xo
s
Kelly says
I almost wish I had dirty grout so that I could try it! Looks great!
Peggy says
Wow! I’m so glad you posted this! Our home was built in 1967 and has the same “Vermont Green” slate, including nearly 50 years of stains! We were told by a tile expert that the “grout” used back then was more like concrete. It would be a huge ordeal to change the grout and super expensive to replace all the existing floors. However, as much as I thought I wanted all hard woods, I have come to love the functionality of the slate, especially with a backyard pool and 3 year old twin boys. This post changes my outlook completely. Your results are stunning!
The Yellow Cape Cod says
Hi Sherry, great before and after! Your floor looks amazing. I used Polyblend grout renew on our tile two years ago and blogged about it here: http://www.theyellowcapecod.com/2011/10/31-days-of-character-building-easy-tile.html
Since then, I’ve received a ton of questions regarding how well it has held up. If anyone here would like to know how well this product wears over time, my grout still looks amazing. Enjoy! Sarah
YoungHouseLove says
Wahoo! So glad to hear that!
xo
s