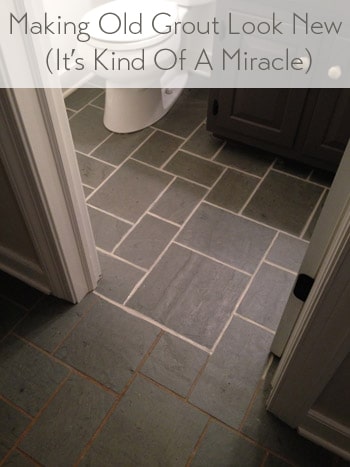
The discolored and dirt-stained grout in the tile floor of our foyer looked super old and gross, but after trying nearly a dozen cleaners and cleaning tricks we nearly gave up. Then we finally find THE SOLUTION to making the grout look white and clean again!
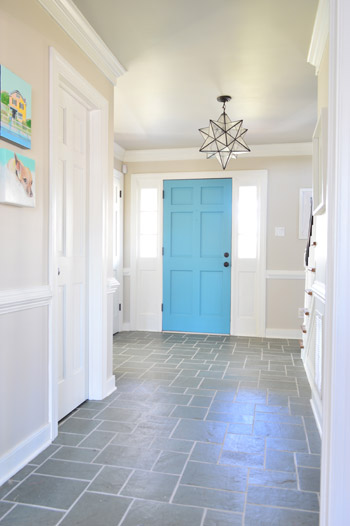
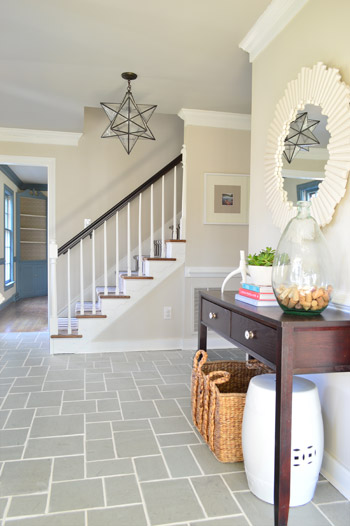
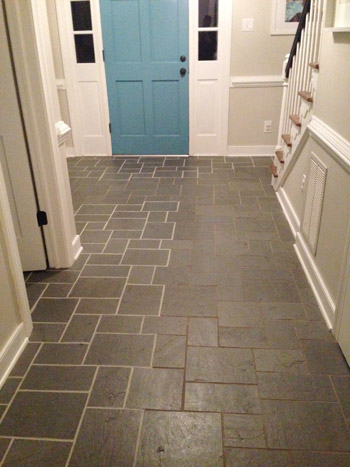
Now that we’re done, you can see how the view just got a heckova lot better around here. The crisp white grout lines play off the white trim and make the whole space feel newer and cleaner.
The funny thing is, it wasn’t actually cleaning that did the trick. So if you’ve got a similar issue with discolored or stain grout, here’s our official intervention: stop scrubbing! Well, maybe give scrubbing a fair shot, but don’t be discouraged if it gets you nowhere. There’s another way!
Cleaning Tricks That DIDN’T Work
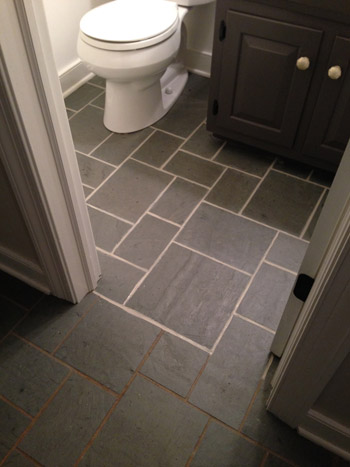
As you might recall, for the past six months that we’ve lived here, it has looked like this.
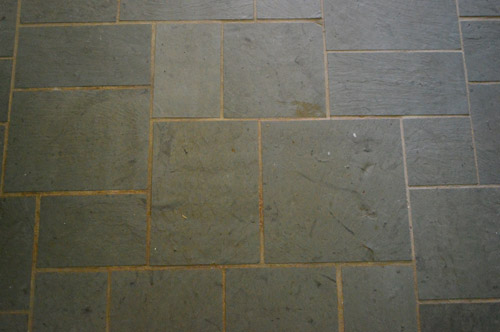
I gave nearly every method under the sun a shot to make that grout look clean. After repeatedly scrubbing the heck out of it, I knew that it was actually very (very, very) clean… it just was so discolored and stained in certain areas, that no amount of blood, sweat, tears, or elbow grease could make it look that way.
Some of my attempts to clean grout included (but weren’t limited to):
- various baking soda paste mixtures
- various white vinegar solutions
- copious magic erasers
- specialty grout cleaning floor sprays/potions/scrubs
- bleach pens
- oxygenating cleaners like Oxiclean
- Mrs. Meyers powdered cleanser + a wire brush
- Barkeeper’s Friend + a wire brush
- a borrowed steam mop
- scrubbing with a stiff bristle brush
- lots and lots of muttered cursing
The Solution To Getting White Grout Again
By this point I did what most people would do. I gave up and ignored it for another few days (what’s a few days after six months of no-dice results?). And then I finally faced facts. The grout either needed to be scraped out and regrouted entirely (which makes for a pretty messy job, especially in the main hallway of our house which connects the entire upstairs to each room downstairs) or it needed to be refinished.
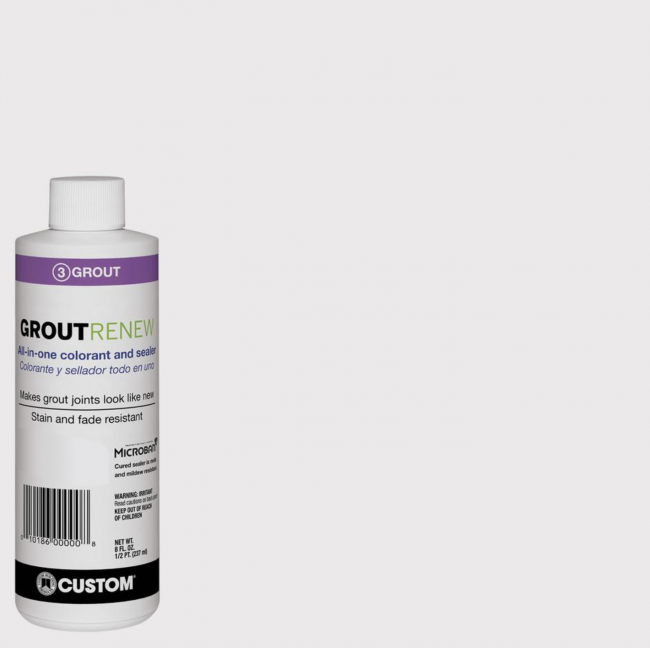
Thankfully a few of you tipped me off to a product you’ve used with success called Polyblend Grout Renew. Let me just skip to the punchline: it worked, and I wish I had tried it before spending six months scrubbing my mind out.
The cost? A cool $12 from Home Depot. (Update: it’s closer to $20 now, but there are more affordable grout pen alternatives available.) Can I get a what what? Note: this might sound like an ad for the stuff, but Grout Renew doesn’t know us from Adam – I’m just beyond grateful that it worked.
Choose Your Grout Paint Color
GroutRenew comes in several colors now – over 3 dozen, in fact, including several shades of white and off-white. So you may be tempted to go for the brightest white to get the cleanest, freshest look (that’s “Artic White” pictured below). However, just like paint colors, the brightest, whitest version may not be best for you.
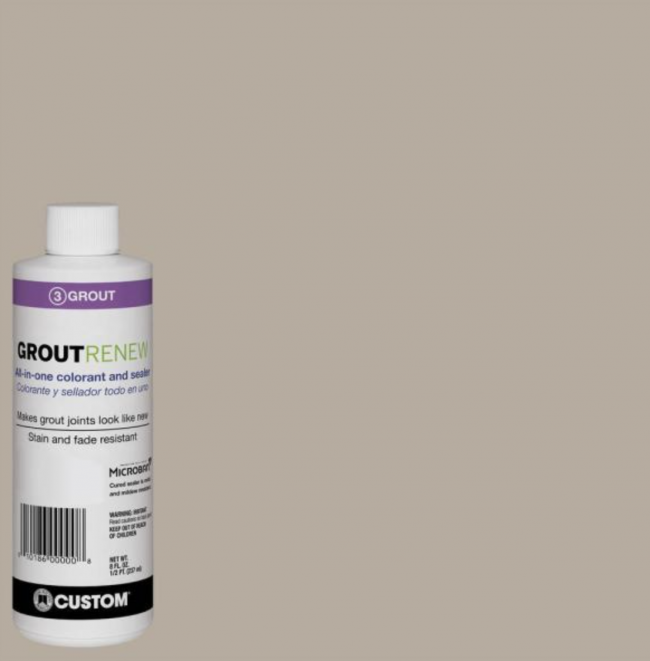
Be sure to take some time to look at your room, your tile, and your lighting to make sure you’re choosing something that blends well with your space. You can always test out a few colors too before committing to one. John and I actually considered two colors – Natural Gray and Oyster Gray, which both look pretty dark compared to the brighter whites. We had seen a neighbor with darker grout in her slate floor, so we thought it was worth considering.

In the end we chose Oyster Gray (shown below) which is still a mid-tone Ivory color – definitely not a bright white. But it looked the most natural and still seemed very bright in contrast to the dark slate tile, without looking artificiall white. Any brighter and we worried it would look like someone in a Crest Whitstrips ad! You know, almost too blinding.
Oh and the Grout Renew was low odor and low-VOC, so this pregnant lady could get down with it. I did wear a respirator, along with opening windows, just because I’m into added ventilation and bad Bane impersonations.
GroutRenew Alternatives
This is the only product we’ve used, but there are some others on the market if this particular one is not available. Lowe’s sells a similar product by MAPEI that comes in a squeeze bottle. Amazon also has a well-reviewed Grout Pen product that comes in a white or beige option. Again, we haven’t personally tried those, but they may be some alternatives to consider if the PolyBlend is not available to you.
How To Apply Grout Paint
The downside to this solution is that it can be time intensive (and patience testing) depending on the size of your surface. For this floor, it took nearly eight hours to apply. But since I had easily spent 25 hours trying various stain lifting methods before resorting to this, well, eight hours with a bottle of Grout Renew was a small price to pay for VICTORY.
Step 1: Clean Your Tile & Grout
I know I said scrubbing wasn’t the solution, but it part of the process. I’ll pause while you laugh since I had already done that TEN MILLION TIMES. But like any surface you’ll be painting, you want to make sure it’s clean of dust and debris. So at least we’re not talking a heavy-duty scrubbing, just your regular washing to remove surface dirt should do.
Step 2: Pick Your Brush Or Application Tool
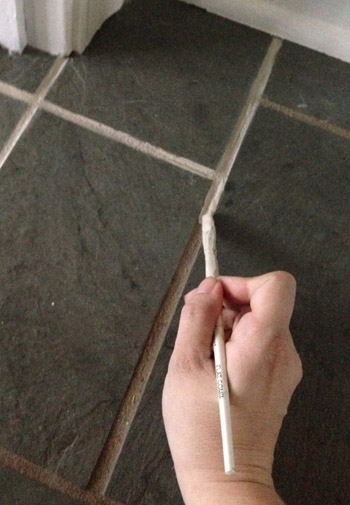
The instructions suggested using an old toothbrush to apply the GroutRenew it into the grout lines and then let it dry for 24 hours. I went with a thin craft brush instead because I had way more control (read: way less mess on the tile surface). The thin paint brush was also easy to dip directly into the bottle when I needed to load up with paint.
Step 3: Plan Your Starting Point & Exit Route
If you’re painting a floor, like we were, you’ll want to sure you don’t paint yourself into a corner (or at least if you do, you can carefully tiptoe across your tile without stepping on the cracks). I started in the half-bathroom because I figured I could work my way out of the room and close the door behind me so it could dry.
It was the opposite of fast. But it worked. Slowly I eked my way out from around the toilet and right out the door, which took about an hour and forty five minutes.
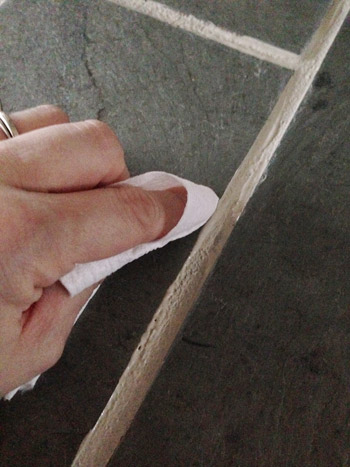
Step 4: Be Ready For Mistakes
Even with a small craft brush there were still times when it got on the surface of the tile, and there was a very short window for wiping it off before it set (and then had to be scrubbed with a fingernail, which was a huge pain) so I literally would do one or two cracks at a time and then quickly follow up to smooth both sides of the seam out with a small piece of toilet paper (this would remove any from the surface of the tile as well as make the sides of each seam nice and straight looking). A paper towel or clean cloth would work as well. That is, if toilet paper isn’t fancy enough for yo?u.
Step 5: Be Patient & Pace Yourself
Being pregnant, the bathroom was all I had energy for on Day 1. Day 2 involved three more hours of line painting and wiping, and I opted to do 50% of the foyer in a strategic way so we could all still walk on the other half of it. Here’s a shot to show you how hilarious John is. I said: ok, get creative with this picture so my giant respirator doesn’t look weird. I like his version of getting creative – just lop off the whole head area.
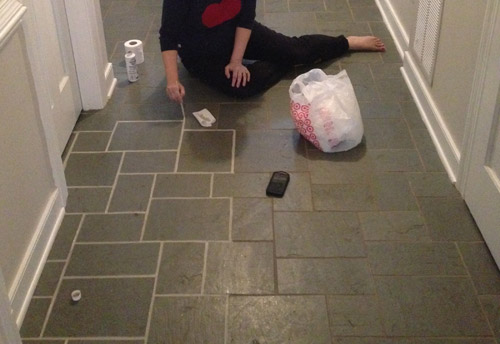
The second day was the hardest day by far, just because I was still kind of sore from contorting my pregnant body around in the small half bathroom the day before, and the little knobby parts of each of my ankles were dragging on the tile as I scooted around like a dog with fleas, but it was all worth it. Worth it and then some!
Day 3 was another three hour process, but it was the most exciting day because I could see the light at the end of the tunnel. The end of the longest-running house battle that I had ever waged was near. I just worked my way around the foyer doing the other half of those pathways that I had done the day before, and I ducked into that last closet while pausing occasionally to fist pump and work on my clean grout acceptance speech (“I’d like to thank the academy, and the grout gods who invented this cheap bottle of miracles and unicorns”).
Step 6: Let It Dry
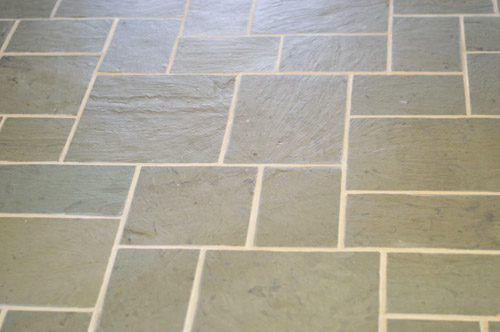
After each application process, we gave that section a full 24 hour drying period and made sure nothing got wet for 72 hours (since that was another warning on the bottle). It’s a good deal lighter than the old grout was, which still makes us say “whoa now” when we walk through the hallway, but we think it’s just our eyes adjusting. Maybe after 6 months our brains just can’t get over the fact that it finally looks clean!
We also had about 1/4 of a bottle left all of this, which was great in case we need some touch-ups down the line. I’ll definitely update you guys if anything funky happens, but so far it has been great. I mean, just look at how far it’s come from the before:

Update: After nearly two years of use, even with semi-frequent moppings, muddy shoes/paws, and a whole lot of foot traffic, our grout still looks identical to when I applied this stuff (you can see an updated picture that we shared after six months of use here). For the folks who can’t find it in stores, here’s an affiliate link to it on Home Depot.com. There are also alternatives like grout pens on Amazon.
Originally Published in 2014
Psst- Wanna know where we got something in our house or what paint color we used? Just click on this button:

*This post contains affiliate links to things we have actually purchased and love*

Lisa says
Clarification — mist with water and it comes right off the TILES. Sticks fine to the rough grout.
YoungHouseLove says
That’s awesome! So lucky!
xo
s
Hannah K. says
WOOOOOAHHHHH! That is amazing! I am about to jump into my car and go to Target and now I will also be making a quick trip to The Depot of Homes and pick up some of this for our upstairs bathroom floors have mocked me and my backache from scrubbing them for the last time! Clean Grout here I come, thanks guys :)
Fran Siefert says
I will definitely be getting this product. I will be following up with a dedicated effort to make my entire downstairs a brighter, more slightly place.
Bailey says
What a difference!! I’m reminded of the old “Ajax was here” commercials – remember those?! Looks like all of your crawling around the floors paid off – this looks fabulous and clean!
Bailey
http://akabailey.blogspot.com
Erin M says
I love how the light grout goes with the white trim and lighter walls. It looks fantastic!!!
Megan says
Thank you SOOO much for posting this! The grout in my kitchen is HORRIBLE!! It’s an old house and someone redid several things around it but at the closing the sellers said the owners previous to them redid everything and wasn’t quite, um, SOBER when he did it. That allll made sense once I got in the house. I won’t go over the entire list but let’s just say that the grout lines in the kitchen floor are AN INCH AND A HALF WIDE!!!!! And of course they didn’t seal it. It’s so dirty and gross I can’t stand it!! I’ve thought about taking out the grout and putting down a small sliver of tile and regrouting around that but oh well. This’ll help me SOOOOO much!!
Brandy says
WOW. That’s a major improvement. I would def seal the tile & grout, just to freshen up the look. Our new house has pebble concrete driveways, sidewalks, and garage floors. Where the elements have gotten to the driveway & sidewalks, the sealer has faded and needs redone but the garage floors are GORGEOUS with the wet-look sealer. Like, I don’t even wanna park in there! I wanna pet the shiny rocks:))) Not that you’ll wanna go with wet-look high gloss sealer, but I can just see the difference here between two surfaces, one sealed and one needing sealer and I just think you would be pleasantly surprised with how a coat of sealer would revive the tile and make it look pretty and newer (more new? whatever.) Also, the tile and grout in my bathroom must have had several coats of sealer bc water just sits on top of the grout (vs my last house, where the grout absorbed the water or dirt particles got stuck in the grout) and is a BREEZE to sweep and mop. Seal it! :)
YoungHouseLove says
That sounds awesome!
xo
s
MG says
Yes, this stuff is amazing. Used it in my kids bathroom and I felt like the floors were new. The other big stores didn’t have it. Only HD. Yours looks great, a huge job for sure. I know how long our not huge bathroom took. Great job and what a difference!
Jan says
Does this stuff level out uneven areas? My bathroom was done before we moved really unevenly and it’s also dirty? Is digging it out and applying new grout best? Can this or something else just go on top?
Looks great! Such a big difference and impressed!
YoungHouseLove says
Nah, it’s just a colorant/sealer that’s as thin as paint, so it wouldn’t level anything. I would apply grout to get it all nice and level, wait for it to dry, and then use this if you need help getting things to match.
xo
s
Lori Anderson says
Wow! The grout looks fantastic! Do you know what kind of stone that is? We have a similar looking slate in our entryway. Our grout is in good condition, but the stones themselves could use a good sealer. We tried one by 511 Miracle, but it made the stones look cloudy. Have you tried any particular sealers on your stone?
YoungHouseLove says
We believe it’s just basic slate. We haven’t tried any yet, but will keep you posted (might look for one that says it’s good for slate right on the bottle).
xo
s
Karen says
Props, Sherry…. it looks great! So much cleaner and brighter, and it looks good with the ceiling color.
MG says
PS. I thought this WAS a sealing product as well?
YoungHouseLove says
Yes, it says right on the bottle that it has a built-in sealer but I’ve heard from folks who have used it and sprayed on an additional clear sealer on it from time to time (maybe twice a year). They said it has held up so well that I figure spraying something is the least I can do a few times a year in the name of “maintenance” (so I don’t have to get back on thef floor and paint anything again – haha!).
xo
s
Stephanie @ Whole Health Dork says
OMG–don’t you love/hate when you finally find a solution to a long-standing issue that was easier than you thought? Not that what you had to do was easy–it was obviously very time-consuming–but the results speak for themself! And the price is right!
YoungHouseLove says
Totally! I’m like “why didn’t I try this five months ago?!”
xo
s
Sarai says
I am shocked at how amazing that looks. I remember the before picture and thinking “What in the world are they ever going to do about the floor?!” I honestly thought you would have to somehow remove all the tile and replace it. But now it looks fantastic! Great job guys!!!
Erin says
Um… amazing! My nesting during my previous pregnancy involved scrubbing our kitchen grout with a baking soda/vinegar solution and a toothbrush. It worked, slightly, but 3 years later our grout is a mess again. I’m sensing a new nesting project coming on with a bottle of grout renew.
Jesyka says
I did this to my bathroom which has tiny vintage tiles from the 40s, and I listened to almost all of Mocking Jay on my phone (rented from the library!) while I did it. It was SO easy to get lost in listening to an audio book while making my 70 year old tile look AMAZING!
YoungHouseLove says
Such a fun way to pass the time!
xo
s
Desirai says
I LOVE how everything you guys do always makes the room look larger, brighter and more heavenly! Here’s hoping one day my tiny house can be as awesome. :)
Athena says
I never comment on here, I guess I’m a lurker of sorts, but MAN, that is an AMAZING transformation. Congratulations! It looks fabulous, props to you for doing that while pregnant. Hopefully you didn’t get dizzy every time you stood up, I always had that issue when sitting while preggo. Take care, love the site!
YoungHouseLove says
Aw thanks Athena! I get dizzy when I’m just laying on the sofa or in bed, but never when I’m running around or jumping up and down… weird huh?
xo
s
Sarah J. says
i’ve liked that tile from day one, but now i love it!
side note for on the floor tasks: i like to hit up the dollar store in the spring and grab a couple of those foam rectangles that you kneel on in the garden. they are great for saving your knees, bum and other parts when you are on the floor a lot. :)
YoungHouseLove says
So smart!
xo
s
Sarah says
looks great!! you may have already answered this in a previous post, but where did you get your entryway table?
YoungHouseLove says
That was from Target about 7 years ago!
xo
s
Cass says
Oh my lord; this product is what I have been waiting for all my life (and by that I mean since I made the mistake of white grout in a rental unit bathroom five years ago). Thank you times a million for bringing my attention to this miracle. What I’m getting from your description and photos is that it’s like a paint/sealer type thing that sits on top of the old grout? And then you seal if for extra…sealing? Amazing.
YoungHouseLove says
Yes, that’s right!
xo
s
Laura O says
This is the perfect post for me currently as we are waging a war with crystalized dried on carpet padding on our floor. We have tried goo gone, scraping with a plastic putty knife, steam, vinegar, absolutely NOTHING is working. Any suggestions??
YoungHouseLove says
Oh no! Anyone have tips for Laura? How about one of those staple scrapers? They’re a pole with a sharp metal end and Home Depot sells them. You get a lot of leverage and can use them standing up.
xo
s
KathyG says
if it’s hardwood, sanding it off should work. try hand sanding then electric hand sander before the big floor sander. that should get the gunk up and make it ready to refinish the floors with a floor sander (these are a bit hard to use too, might consider asking a pro).
love the results sherry! i think you single-handedly changed america’s stained grout situation!
Jill says
There’s a product called Bean-E-Doo. It’s made from soybeans and is non-toxic. I’m not affiliated! It’s a mastic remover – we used it to remove OLD tile glue. I don’t know if it would work in your situation, but maybe worth a shot. We had great results. Plus, it doesn’t smell at all like the normal noxious stuff. Here’s an Amazon link.
http://www.amazon.com/Bean-e-doo-Mastic-Remover-1-Gallon/dp/B0006NL1JA
Sarah says
Holy moly! What a difference!! It looks so… so… CLEAN!! We have a tiny apartment with only 1 small bathroom, but the grout in there is awful! Even though we are moving in the next 3-5 months, Id still like to leave the place looking refreshed. Its been dingy looking since the day we moved in, but we didnt want to regrout since its just a rental. But for $12, we might as well go for it! We wont get to enjoy it for long, but Im sure.future tenants will appreciate clean tile.
Carrie K says
If you took the tile into the kitchen and you’re worried about a height change-we redid our bathroom floor and took out vinyl to replace with tile. It took some doing, but we took the floor down to the subfloor so the height matched with the carpet that’s in the hallway. Maybe taking it down to the subfloor would make it work?
YoungHouseLove says
That’s awesome! Our kitchen’s sheet vinyl is right over the subfloor (there aren’t other layers under it, etc), so we only have the thickness of the vinyl flooring to work with (adding cement board and tile would make it a step up no matter what I think). But maybe once we get to digging around we can come up with something else…
xo
s
Natalie says
Oh my goodness! This is exactly what I needed. We moved to a new/old house a year ago and they recommended sealing the grout, but it was so icky we didn’t want to, and with 5 kids the problem just got worse. This post gives me hope! I hope you document how you seal it too. :)
The other problem we have left over from the previous owners is the completely neglected window tracks. They have been so gross – when we moved in I promised myself I’d get to them when the weather was warmer (we had a record-setting cold spell last January). And when the good weather came back, I couldn’t bring myself to do it! It’s backwards thinking, I know, but the previous owners had these cats that were horrible – they were never cleaned up after so there was cat urine and feces everywhere. Even in the tracks. And I had no idea where to start. So I didn’t.
Well, it’s been almost a year, and I was determined not to let it be an entire year of living this way. So I hired out five of our 20 windows. I watched what the cleaning lady did, and it made me realize – I can do this! I can tackle this nasty job, because she did some of the harder ones, an now I know her tricks and can implement them in my method!
YoungHouseLove says
So smart! I love that!
xo
s
Evelina says
What an amazing transformation! The tile doens’t look blue at all anymore in those photos. And also, I’ve never been pregnant but holy moly Sherry, you are Wonderwoman!
andrea says
HOLY FREAKIN’ AMAZEBALLS!!! And yes I’m over 30 and should probably not use the word “amazeballs” but that looks awesome!!!!
Stephanie says
It looks Ah-May-Zing!! Your sweat and contortion were worth the effort because the end result is beautiful! It really puts a ‘final’ touch on updating that area!!
Melissa says
Love this product too! I used it about six years ago in a third floor bathroom after I picked the wrong grout color for a contractor. I was so upset with myself but then found this product and did the exact same thing… Ignored the directions and used a tiny paintbrush and got to work! I’m embarrassed to admit that I did not seal it (it’s a guest bathroom) but we have not had any issues with it at all!! Congrats on your new found floor love!!
YoungHouseLove says
Wow! Six years later it’s still holding up in a bathroom without sealer! That’s amazing!
xo
s
Kristin says
My entrance, kitchen, & bathroom tile is a medium brown & our grout was very dark. Before I found the grout renew I found the white paint pens so I started with the bathroom & ended up doing two coats over the whole thing since one coast wasn’t dark enough. Once I had done the white I really wanted my tiles to blend with the grout & to be a beige color so I went back to Home Depot & someone suggested the grout renew so I bought a bottle of that. I ended up doing two layers of the beige color because one was just too light & now my bathroom tile makes me so happy! Now its time to start the entrance & kitchen!
Beth says
1.) I admire your patience and dedication.
2.) It never ocurred to me that this could be remedied short of cleaning or retiling. Added to my to do list…thanks for the tip!
Taylor says
I honestly, can’t tell you how happy this post made me! I love those slate floors and was super sad that you were thinking of removing them. I did agree they looked dirty and tragic, but now they look amazing and I wish I had them in my house. I am also gonna grab a bottle for my shower…. I just need to find a time when I can let it dry for 72 hours!!
alyssa says
WoW! We have got the ugliest tile and grout in our front hall/kitchen. The tile is off white but the grout is BLACK. I know from looking in the hall closet it was originally light grey. I’ve also spent HOURS and days scrubbing with bleach, grout cleaner, grout brushes (which just scrubbed away the grout…), you name it. I finally gave up, and resorted to bugging my husband about replacing it (I REALLY hate that tile, too). Now I think I’ll try this in the meantime. The replacing the tile bit isn’t going so well! Thanks!
Emily says
Great results! I love the door and the light fixture! Can you share the color and where you found the fixture?
YoungHouseLove says
The light is from a local shop called The Decorating Outlet but it’s also on amazon.com and joss & main sometimes. As for the door, it’s Blue Lake by Benjamin Moore.
xo
s
Julianne says
Nice work! Looks fantastic! Oh, and thanks for the visual of the dog scooting on the tiles….totally had a good belly laugh with that one! Hope you and the belly are feeling fine. :O)
Pam says
Oh my goodness, I love the way that looks. I was just noticing some ugly grout in our bathroom that needs some love. Perfect timing!!
Shannon [Our Home Notebook] says
Beautiful. What a difference that makes.
Savannah says
Oh my goodness, thanks so much for this post Sherry! I have been struggling with the same yucky looking grout problem in my bathroom, and have had several melt downs over failed attempts to clean it. Lol I’ll be heading to Home Depot for this stuff stat! :)
Mel says
Holy cow, it cracks me up (and makes me raise a fist in solidarity) at how many others besides me were going bonkers over their grout. I woke up thinking about it! Seriously.
Amy M says
I love the grout. We bought a house a year ago and since then the tile in our bathroom floor has become crusty and porous looking. Would this product work on that? Or do you think we should just dig it out and start over. I’m wondering if they didn’t seal the grout but I’m no grout expert. I have spent hours trying to clean the dinginess as well. It became my pet project/nesting project when I was 9 months pregnant to no avail.
I love your blog btw.
YoungHouseLove says
I think this is just for cement grout, so not for tiles themselves. Anyone have tips for Amy?
xo
s
Amy m says
Sorry. I meant the grout not the tile! The tile is fine. It’s just the grout in between the tile and especially up against the tub that is porous looking. Any tips for that?
YoungHouseLove says
Hmm, I would go to a tile shop and get one of those grout scraping tools (you hold it and it has a sharp tip) and just run that along the grout to sand it down to being smooth again and crack anything loose out and hopefully get rid of that flakiness. Then you can regout and use this at the end. If it’s just porous looking but not actually flaky you should just be able to paint over it with this and hopefully it would look nice!
xo
s
Amy m says
I can’t believe you replied and to all the other 100s of comments. Thanks for the tip. You guys are great. Keep on inspiring us.
YoungHouseLove says
Thanks Amy!
xo
s
Haley says
I always wondered why you stressed about the grout look before because it didn’t look TOO bad to me, but after seeing the before and after this looks AMAZING!
Trudy says
Thank you, Thank you, Thank you….the grout in my bathroom looks like a petri dish…..scrubed it with everything possible and it still is disgusting. Will definately give this a try.
Nina says
AMAZING! Can’t wait to try it on my stained grout!
Donna says
Thank you guys SO MUCH for this post!!! Our daughters love to do manicures and pedicures at home and spilled an entire bottle of hot-pink nail polish on their bathroom floor. It came off the tile very easily with nail-polish remover ( it’s a shiny ceramic ), but nothing, I mean nothing, would remove it from the grout. It has been two years and I have been giving it the stink eye every day since. I am RUNNING to the Home Depot!!! So grateful to you guys…
YoungHouseLove says
So glad!
xo
s
Rosie S says
Two words…WOW ZER!!!!!
Shannon says
This may have been asked some other time but I was just curious if your tile floors get very cold? I am looking at installing tile in our entryway and was just curious if you ever found the tile uncomfortably cold. Thanks!
YoungHouseLove says
Our hardwoods are actually colder than our tile (only on the first floor, on the second floor they must be more insulated because the tile is colder). Isn’t that weird?!
xo
s
Laura says
Looks amazing! Do you think this would work in grout around brick, like on a fireplace? We have a 1950’s house with a mostly wood mantle just a little bit of brick around the fireplace. I’m not sure we’re ready to take the plunge and paint the whole thing, but thinking it would look a million times better if the grout actually looked clean! Thank you!
YoungHouseLove says
Yes, I think it would work there! Anyone tried it on brick mortar?
xo
s
Teresa says
It looks amazing! I have been trying to clean our grout for 4months. I would like to try this but 85% of our house is tile. It would take me months with moving furniture around. haha
Steph says
OH WOW you go girl! It’s insane what a difference that made. What a tedious project, but soo worth it. I have newer tile in our kitchen since we remodeled about four years ago, so the baking soda, lemon juice concoction did the trick recently for me. Our kitchen is a lot smaller than your area, so I can’t imagine the work that took. But I will keep this product name handy because our bathroom floor could use some love like this. I love how much you really care about your home. I know that probably sounds sappy, but it inspires me to love every nook and cranny, and in this case, crevice! haha ;)
YoungHouseLove says
Aw, thanks Steph! You’re so sweet!
xo
s
Anna says
I have been eyeing up this product from other bloggers and it’s on my to-do list for lightening up our dark grey grout on our stone kitchen tiles to a light grey. I’m sold now!
Sara says
This blew me away! I loved the post but I figured I was just one of the few but it looks like everyone loved this. Great work! The foyer is sooo dreamy now.