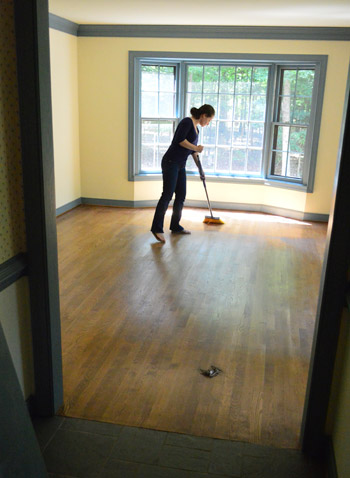
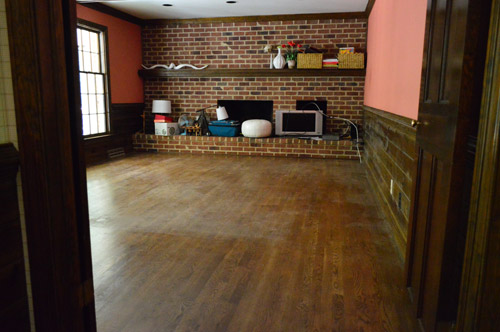
Whoops, I almost forgot to tell you about how I scrubbed and re-sealed the existing hardwoods right before we moved in (literally, like 26 hours before we moved in). The new hardwoods upstairs were looking so glossy, I didn’t want the ones in the office, living room, and dining room to feel so 2000 and late. So I gave them some love. Wax on, wax off, baby.
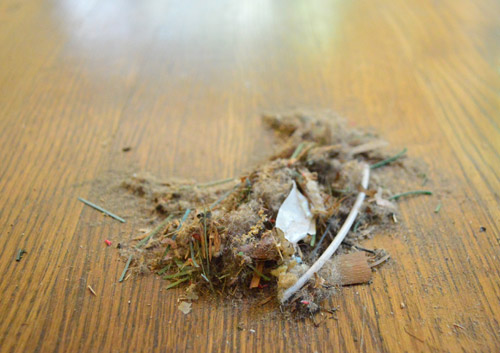
First I swept up the random dust and old faux Christmas tree leaves and all the other stuff that was left behind.
Not a bad pile for an empty looking room, eh?
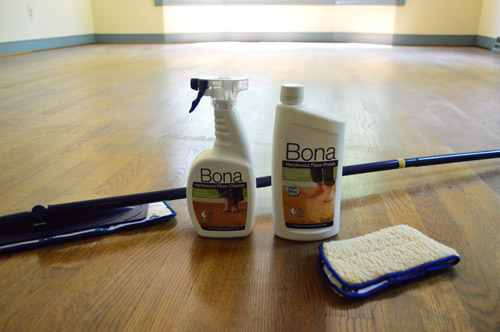
Then I bought this Bona stuff at Home Depot because I had heard good things about it when it comes to cleaning and glossing up floors that are old/dulled/mildly scratched (you know, floors that don’t need a full re-finishing but could use some moisture/polish to fill in small scrapes and seal them again).
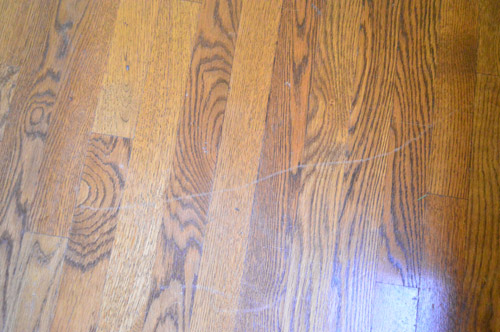
You know, little stuff like this.
After sweeping, the next step was to use their floor cleaning spray, by just working my way around the room spraying it on the floor and following that with the mop (with the cleaning pad on it). This made me mad sweaty, yo. So I give it a 7 on the exertion scale. You’re not just swabbing over the floors like you’re swiffering, you’re scrubbing the heck outta them to get them nice and clean.

Then came the actual sealing/polishing step. This was a lot less rigorous (so you ARE doing the swiffer motion here). The idea is just to gently spread out the liquid that you’re pouring out of the bottle as you work your way out of the room. Oh and for this step you have to use a polishing pad on the mop (it’s more like a lamb’s wool pad while the cleaning one is a bit more scrubbing-sponge-like). Note: see the green painters tape on my mop? That thing came out of the box all wonky and broken, so I had to MacGuyver it together.
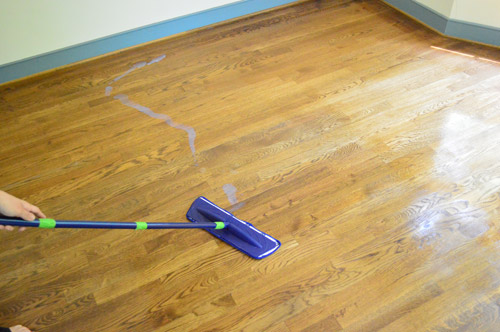
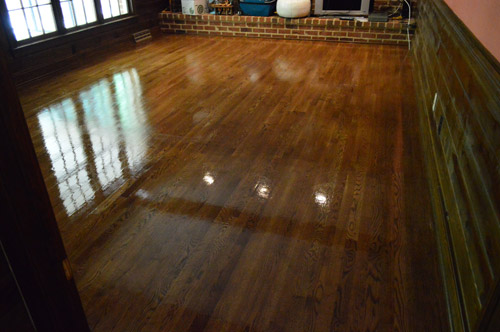
In this picture you can see how the floor that I had done was all moisturized and shiny (top left of the pic below) while the floor behind the polish pad is kind of dull and dry.
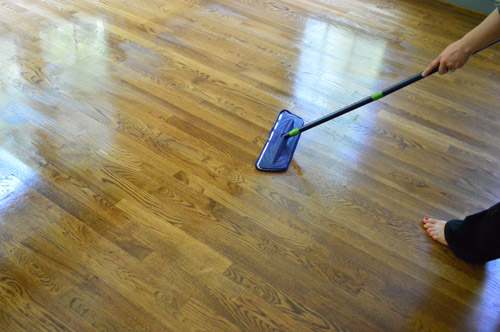
Sadly, by the time I worked my way out of the room I was only mildly impressed. Parts of it had dried and looked just like they did before (dull, grayed, slightly scratched, etc) while other areas that were still wet looked awesome.
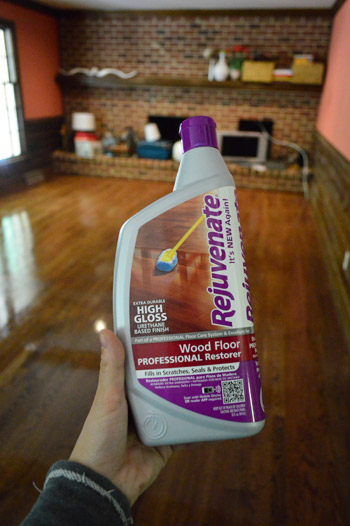
But once they dried… they were all chalky and dry again. I’m not sure if it was just something about our floors and the way they were refinished decades ago (some folks must love this stuff since we heard great things) but it wasn’t an awesome enough result for me to get going on the other two room’s floors. So it was back to Home Depot, where I bought another brand called Rejuvenate. It came in satin and high gloss but I chose high gloss since the floors upstairs are nice and shiny, which we like.
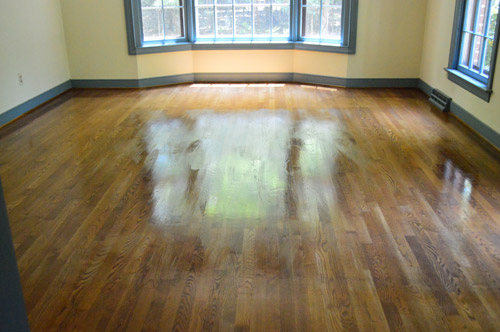
I still used the same Bona cleaning spray and the same Bona mop (with the cleaning head on it) since I already had those on hand and didn’t mind the job they did. It was just the Bona sealer that had left me high and dry (ok, just dry). So I switched ol’ Wonky Mop’s head to the polishing one, but this time instead of using it to spread the Bona stuff, I worked my way out of the room with the Rejuvenate wood floor restorer. The room looked like this before:
And this after:
Granted it still had to dry a bit in that shot above, but the comparison between the Bona stuff and the Rejuvenate stuff definitely left us liking Rejuvenate a lot better. It went on more evenly and left everything rich and sealed looking – even well after it dried. Nothing looked chalky a few hours later, and I was able to apply two coats in each room (you could apply them a few hours apart instead of waiting 24 hours like the Bona stuff required) which was awesome. I even went back and did the office again with the Rejuvenate stuff instead of doing a second coat of Bona in there. And I was so much happier with it.
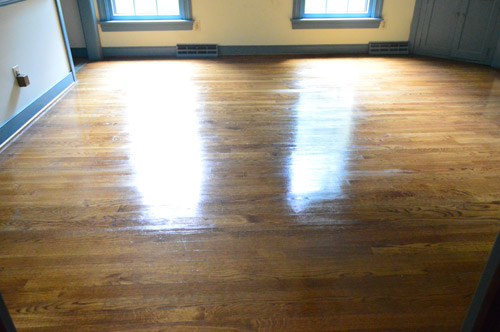
Here’s the dining room all dry. Flossy and glossy, eh? This is how the living room dried as well, and the office looks the same now that we went over it.
Have you used a floor cleaning and resealing system to bring life back to dull, mildly scratched, or chalky floors? Did you try Bona, Rejuvenate, or something else? Ever tried two different options for a smackdown to the death what’s-better comparison?
Psst – Here’s a post with an update on how the floors are holding up seven months later. Still going strong!
*This post contains affiliate links to projects we have purchased and loved*

Victor Kostenko says
Hope you still look at this. How did it do with the scratches in the floor? Did it help fill them in?
YoungHouseLove says
Deep scratches probably need to be refinished out, but the smaller scratches worked with it.
xo
s
Nikki says
Hi there!
We are moving into our new house this weekend with very old hardwood floors, and I’m leaning towards your approach with the Bona cleaner + Rejuvenate polish. Now that you’ve been there for a year, do you still think they hold up well. I just read through allllll the comments, and noticed a couple of people mentioned that it flaked. Have you experienced that at all? Thanks!
YoungHouseLove says
Yes, they still seem to be holding up well. No flaking or anything like that, and there’s still a nice shine to them.
xo
s
joanne says
Do you know if rejuvinate is a polish like the bona polish is? After spending hours already getting the previous owner’s polish and the bona polish off our floors using windex instead of bona’s remover, I will never touch a polish again. Just wondering. Going to try bona floor refresher once i get the rest of the polish off. It’s not a wax, so that’s ideal. Remember, you cannot put anything on the bona polish and you cannot re-coat the polish either.You can put stuff on the refresher and can recoat the refresher. Bona has some work to do making these things better.
YoungHouseLove says
I’m not sure how it compares to the Bona in formula, only that we liked Rejuvenate a lot and a year later are still happy with the results!
xo
s
Tiffany D says
I just went to canadian tire and bought some tonight but they didnt have the high glossone like your. I went to home depot and couldnt I couldnt find it. Where did you buy yours?
Kortni says
Unfortunately, we have not had the same good results with Rejuvenate. We had someone clean our home before we moved in a couple months ago. She thought she’d do us a favor and use the Rejuvenate. Within minutes of us and our dogs walking on the floors, they were a scratchy mess that got worse every day, followed by areas of cloudiness. I could tell the scratches were purely on the surface of the Rejuvenate, and did not penetrate into the floor. I am now in the process of removing the Rejuvenate, which involves being on my hands and knees, scrubbing with Windex and a scrubber sponge. The areas I have completed are now scratch-free and back to their original finish (a satin finish). While I’m happy with the results, the process is a pain in the neck and will take me forever. I actually found this blog while trying to find out if the Rejuvenate Floor Cleaner can be used to remove the Rejuvenate Floor Restorer. Does anyone know the answer to that question?