We started 2008 with a home improvement bang like no other.
We were up at 8:20 am and on the road to Ikea by 9. What would motivate two sleep-deprived twenty-somethings to get up that early on our last day off? How about the thought of gaining not one, but two more bedroom closets?! That’s right, we finally decided that one tiny closet in the master bedroom (which forced John to keep all his clothes in the guest bedroom) was not enough. So on New Years Day we (fittingly) resolved to do something about it.
Here’s the New Years Day play by play:
8:20 am- Up and at em’.
9:00 am- Hit the road for Ikea.
11:00 am- Arrive. Hightail it to the closet department.
12:30 pm- Leave $460 poorer with two giant wardrobes to flank the bed (plus tons of interior fittings).
2:00 pm- Arrive home. Rest.
2:05 pm- Enough sitting around. The wardrobes aren’t going to put themselves together.
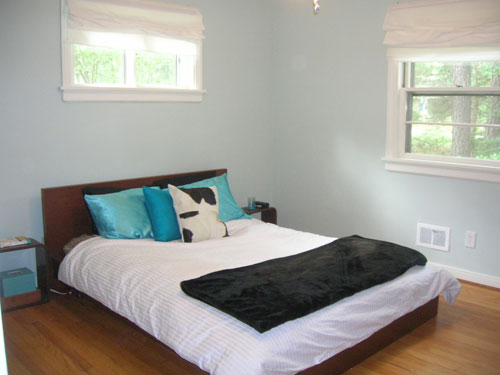
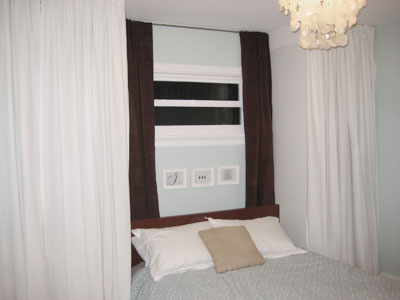
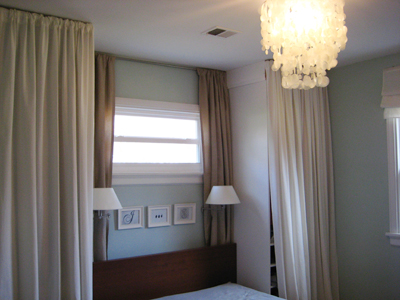
2:06 pm- Forget to shoot a “before” photo, but here’s an old pic for reference:
2:15 pm- Move out the side tables and get out the dreaded allen wrench.
3:50 pm- One wardrobe frame done, one to go.
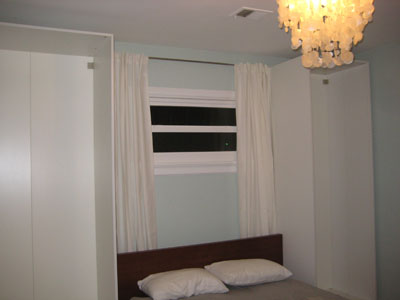
4:30 pm- Build second wardrobe frame. Re-hang curtains on back wall in an attempt to enlarge that tiny window
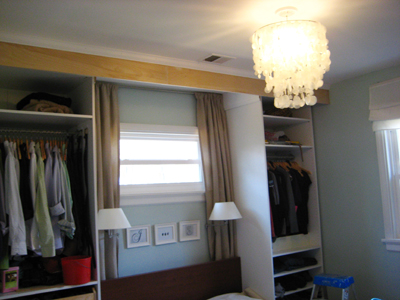
4:35 pm- Enjoy a victory bowl of cereal after shooting this “during” photo.
\
5:25 pm- Quick trip to Lowe’s to get long screws to anchor the behemoths to the wall, which annoyingly Ikea didn’t provide.
6:15 pm- Install six glorious shelves and a hanging bar in Sherry’s wardrobe.
7:30 pm- Install three drawers and a hanging bar in John’s wardrobe (two shelves were also meant to be added, but we realized we bought the wrong size- d’oh)
8:30 pm- Burger King run. We can’t survive on cereal and home improvement endorphins alone.
9:30 pm- Finally get all of our clothes, shoes, bags, and belts into our two fantastic wonderful beautiful new closets (the guest bedroom closet is now empty- amazing).
10:00 pm- Hang matching white curtains on both wardrobes. Step back and HATE them (we thought it would look soft and elegant- it wound up looking like a cheap Trading Spaces project).
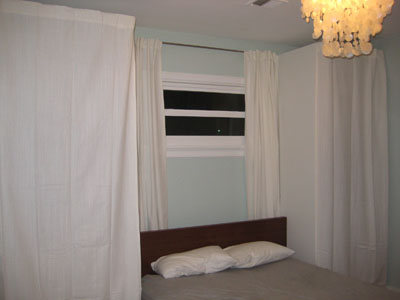
10:05 pm- Realize we both like it infinitely more with the curtains pushed to the side (they look more like fancy built ins, and not like a cheapo bookcase swathed in fabric).

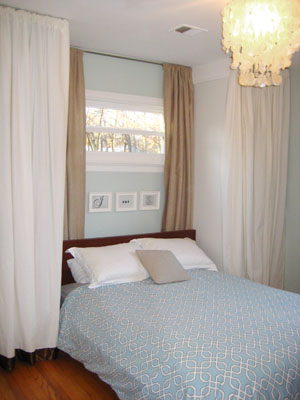
The next few days were full of progress. We ran to Home Depot and grabbed 7 inch molding to add to the tops of the wardrobes so that they appear more flush to the ceiling (bridging that 4″ gap that used to be painfully obvious on top of each wardrobe). Our next stop was Linens N’ Things where we picked up a few heavy curtain panels in rich chocolate brown. Back home we extended the wardrobes to the ceiling with the molding, hung the new brown panels around the window, and rehung the curtains in front of each wardrobe flush with the ceiling. Here’s what it all looks like now that we’ve bridged the gap. The wardrobes were definitely looking better with the gap bridged, but we weren’t so crazy about the dark chocolate curtains.
So we returned ’em and went on a curtain shopping spree. In fact you wouldn’t believe us if we told you how much money we spent. But we’re going to tell you anyway- close to $500. Yeesh. That’s a lotta loot. But we realized we needed lots of different curtain choices to make a final decision, so we got oodles of options (from Bed Bath & Beyond, Linens N’ Things, and Target) and then took them home for a little curtain fashion show (don’t worry, we returned every pair except for our favorites).
Here’s Burger sniffing out the competition:

Although we had many (many) curtain panels to choose from, there was immediately a clear winner. The gorgeous khaki chenille-esque curtains with the subtle crosshatched pattern for a little added texture from Bed Bath & Beyond. Bellisimo.
As our curtain crisis came to a close, then came the exciting hunt for plug-in swing-arm lamps for above the bed. Ok, maybe “exciting” isn’t the right word, but I tend to get a little thrill when I can check any project off my list.
After striking out at several places including Lowe’s (no swing-arms), Restoration Hardware (too pricey) we had just about given up on Richmond’s lighting stock. Luckily, we ended up visiting my parents in Northern Virginia and stumbled upon a Lamp Factory Outlet.
There, amongst endless rows of table lamps and chandeliers, we found the perfect option: two brushed nickel, plug-in, swing-arm lamps for only $40 a piece. About $200 dollars cheaper than most of the other options we saw. We snagged ‘em (the last two in stock!) and as of last night they’re officially swinging from our bedroom wall. We couldn’t be happier with the dramatic result:
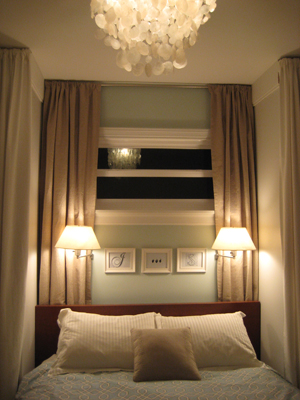
The room definitely looks more finished and hotel-ish, so we can’t wait to curl up with a good book and order some room service. Ok, wishful thinking.
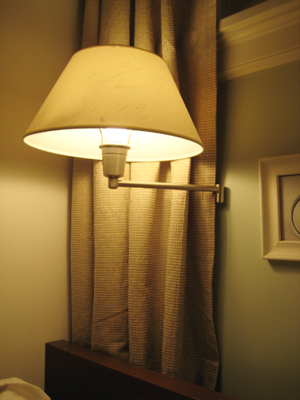
Here’s a close-up. You can see how we tucked the base behind the curtain and angled the lamp arm around the edge for a more polished look.
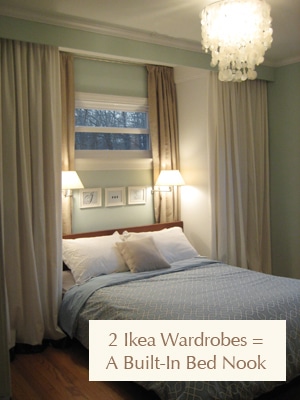
But alas, this project wasn’t quite finished. Instead of having two refrigerator sized boxes on either side of the bed, we wanted them to look more finished. So we decided to mount a wide piece of wood to the ceiling that would hang in front of both wardrobes and serve as a header (to make the bed feel like it’s tucked into a built-in nook). I know that sounds confusing, so I’ll just let a few pictures do the talking.
Here’s a photo of the wardrobes before the header:
And here’s a during shot:
Now I’ll ask for a drum roll. After painting the header and re-hanging the curtains, the eight inch plank of wood makes a major difference. And the crown molding is the icing on the cake. Here’s a detail shot so you can get up close and personal with our new master bedroom built-in:
And here’s a shot of the full monty:
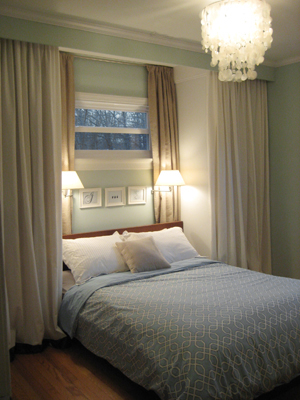
Now laying in bed truly feels like you’re tucked into a cozy little nook instead of squeezed between two large, unrelated pieces of furniture. The whole layout looks a lot more deliberate, which is exactly what we were going for.
So that’s the story of two people trying to turn a 12 by 13 foot room into something special. Fifty year old houses don’t have giant master suites with monster closets and attached bathrooms, so you gotta do what you can to make a tiny room (that looks just like the other bedrooms) appear special. So what do you think? Mission accomplished?
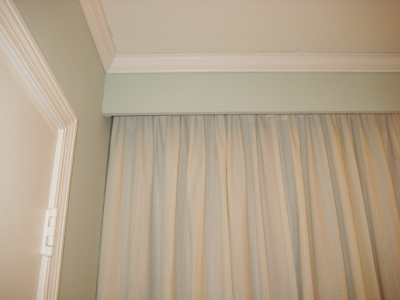
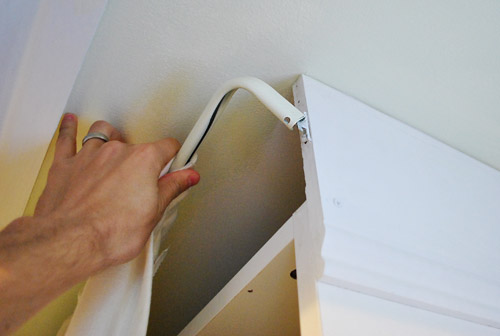
***UPDATE: Since a lot of people have requested them, we snapped some photos of how the curtain rod is attached behind the header on the ceiling. You can see below how it’s a cheap-o curtain rod that sits on a bracket we attached to the piece of molding bridging the gap between the wardrobe and ceiling. We had to hang it down a couple of inches from the ceiling so there was enough room to lift the rod off (you can see the two holes above the bracket proving we learned this the hard way!).

Leave a Reply