After 330 days of living in darkness, we can fiiiinally see daylight in our kitchen. And it’s nothing short of ahhhhhmazing.
This whole process took Licensed Contractor Steve and Right Hand Woman Tara almost seven hours of work (more on why we needed them, how we found them, and permit stuff here). Meanwhile John, Clara, and Burger hunkered down at his sister’s house to avoid the chaos and I stayed home to answer questions, offer up snacks/drinks, spy, drool, and live vicariously through them. They were amazing and we couldn’t be happier with the admittedly-still-very-raw but super-exciting-in-that-we-might-not-sleep-tonight result!
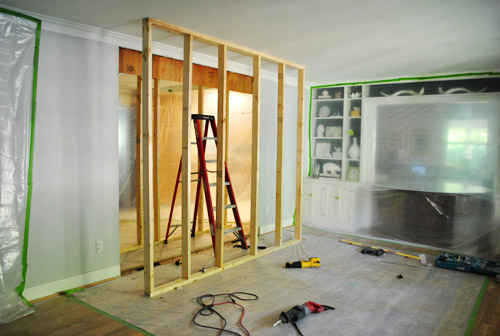
Here’s how it all went down. Literally. Of course this is completely over-simplified (and obviously isn’t a try-this-at-home tutorial since even we left it to the pros). First Steve and Supergirl Tara (can you tell I’m obsessed that our contractor’s right hand lady was a lady) used a power saw to precisely cut the full doorway opening into the paneling on the kitchen side of the room. First surprise: there’s not drywall or plaster behind the paneling- just studs. Good thing we decided to just paint it a while back (instead of tearing it down to hopefully find drywall/plaster behind it!).
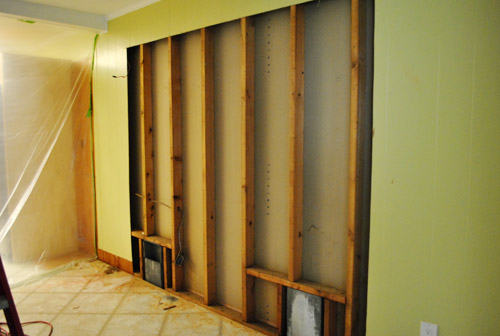
This is also when we got a better view of what the electrical wire in the wall was doing, so luckily we had our guy on call so he could head over to take care of it while the wall was open.
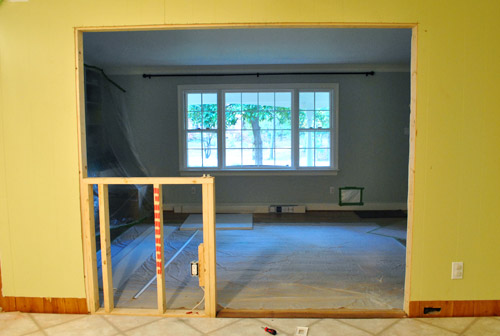
Next Steve and Tara cut the drywall on the other side (which was actually two layers of drywall, doubled up) and busted her open. Light came streaming in, and from behind the curtain I pretty much lost my mind. In a good (but probably awkward and borderline creepy) way.
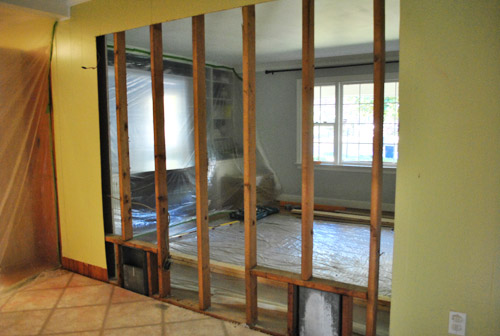
We already detailed what’s going on with those vents, but for anyone just tuning in: we had an hvac pro come out and ensure that losing those vents wouldn’t compromise our system. Then with his blessing John went under the crawl space and disconnected and capped ‘em (so the vents you see aren’t connected to anything anymore). We actually did that in our first house for our kitchen remodel as well.
Next Steve and Tara framed up two dummy walls for added support as they did their work on the header to reinforce the new opening (both from above and below in the crawl space).
It was kind of funny peering through all those planks of wood to see green grass, leaves, sunlight and all that other good stuff we never used to enjoy from the kitchen.
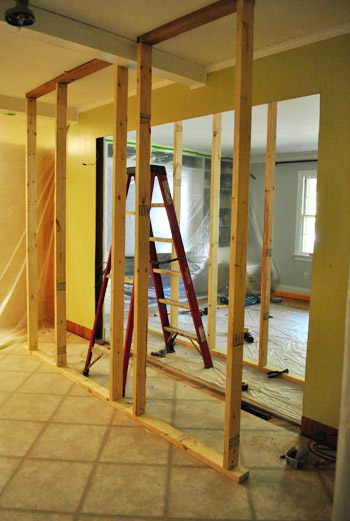
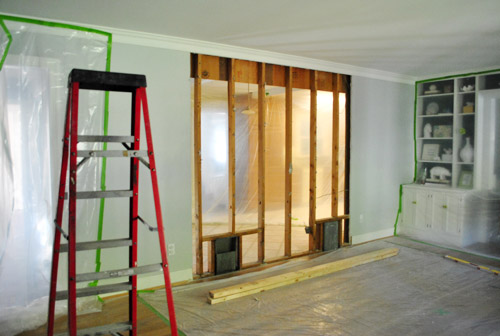
You can see the huge wooden header (and the drywall that we’ll need to patch above the doorway from this angle). The reason they worked on the header from this side? Drywall is much easier to patch for a seamless look than hacked up wood paneling. Yup, Steve and Tara = smartie pants peeps. Lastly they built in the half-wall for our peninsula to rest against and called it a day. Here’s what everything looks like as they’re pulling out of the driveway:
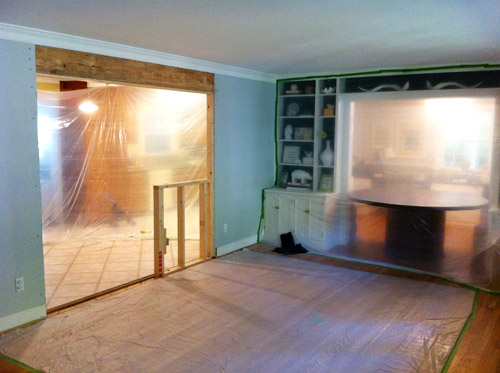
Behold: my favorite view ever. The magnolia out front is like a giant canopy with light streaming in all around it. Feels like some sort of tropical paradise complete with a tree-umbrella. Yes, I’m delirious with joy – but you have to understand why. There’s light in my formerly dark and cavernous kitchen!
Oh and see the electrical outlet reinstalled near the right side of the half-wall? We figure that will come in handy for anyone using laptops at the peninsula (most of the half-wall will be blocked by the peninsula once it’s installed, but since there will be a 12″ countertop overhang, a foot of wall space will show (which makes for a perfect outlet location).
When John got home we started laughing because we firmly believe it’s the first time that our fireplace has ever felt the delicious warmth of the sun streaming in on it. Might need to get him some sunscreen. Of course things still look a bit rough around the edges, but Steve and Tara’s work here is officially done (so I wrote out their $700 check as they went on their merry way). Now it’s up to us to:
- drywall, mud, and sand the half-wall and the area above the door on the dining side where the header work was done
- add a door jamb, a wooden ledge over the half-wall, and trim
- prime and paint the walls, jamb, baseboard, and trim
But we can see it. When we stare long enough and squint hard enough we can picture it all coming together. Can you see it? Two or three pendants hanging over the peninsula, a giant chandelier over the big dining room table, painted cabinets and shiny stainless appliances, rich mocha cork on the floor, a cozy armchair or chaise in front of the fire. It’s all there when we fire up the ol’ imagination. Let’s stare one more time, shall we?
Of course the half-wall looks odd without the peninsula behind it so we can’t wait for that to come together. We’ll keep you posted as we finish things off around the opening (we’re already working on drywall, so here’s hoping we have that update for ya tomorrow). And just to refresh your memory, here’s a before shot taken from a similar angle on move-in day last December:
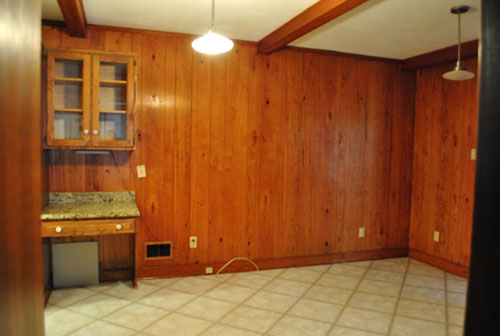
Is that crazy or what?
As a reminder, our goal is to complete this kitchen overhaul over the next few months. Maybe by sometime in January? It’s still going to take quite a while to remove (and craigslist) the old counters, get our new counters installed, find or make matching doors for the new cabinetry that we added to create the peninsula, prime and paint all of the cabinets, tile the full-wall backsplash, build-out/install a range hood, hang open shelving, lay the cork flooring ourselves, etc. Yup, there’s lots to keep us busy, but you know we love a challenge. And most of all we love liiiight, glorious liiight. Oh happy day.

Leave a Reply