Well, it took us 3+ weeks, but our 12 foot long DIYed living room console table is officially finished!
Before I get into any more pics of the final piece in place, let me back up a bit and recap some of the most recent constructions steps that got us there (since the last time you saw our console table it was stained but still topless). As you know, we had to turn to Plan B for the top since the pallets didn’t play nice (more on that here) so after lots of driving around town in search or something reclaimed that we could use (where sadly nothing was the right width or available in enough bulk) Plan B ended up being “buy new wood and make it look old.” Hence this pile in my basement:
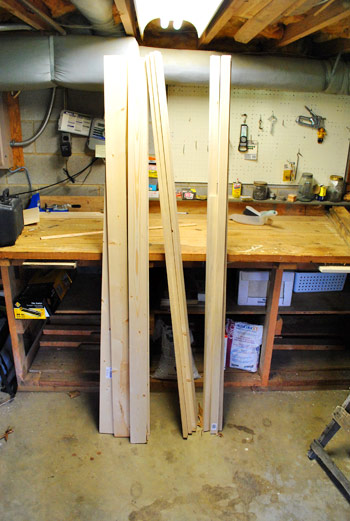
After trying out a few different combinations of boards on the floor of Home Depot, I discovered that I could achieve a near-perfect width by placing four 1 x 4″ boards (in plain whitewood) sandwiched between two 1 x 2″ boards (in poplar). This arrangement, by total accident, ended up looking great since the poplar 1 x 2″s around the perimeter inadvertently added a nice border that would match the 1 x 2″ poplar framing that I used on the front of the bookshelves. Score.
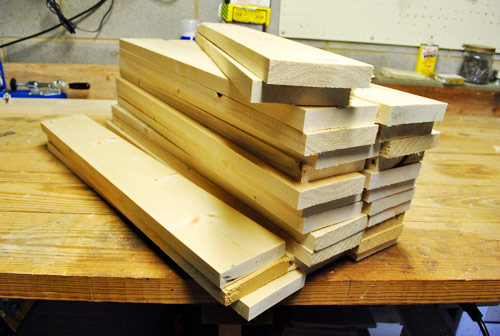
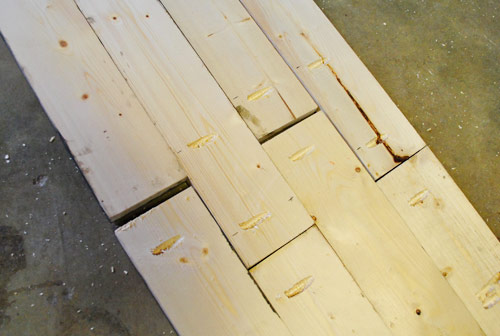
Since we wanted to lay the boards on top in a staggered almost brick-like pattern, I cut all of my 1 x 4″ boards into two-foot lengths to start.
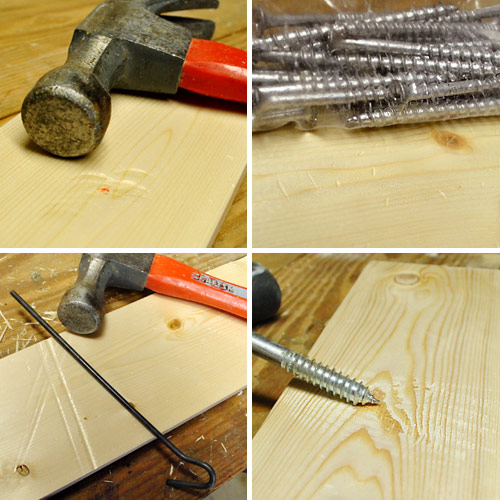
The next step was to distress each of the boards to make them look more aged and less straight-from-Home-Depot. This process, as well as staining them, is a whole story in itself so we’re going to do a follow-up post with an avalanche of details (it’ll have some video, which I have yet to edit – so that’s why you’re getting this reveal post first). But here’s a glimpse of the whole distressing process to tide you over (it involved a variety of things from hammering dents and dropping a bag of screws to making line imprints and roughing things up with pointy objects).
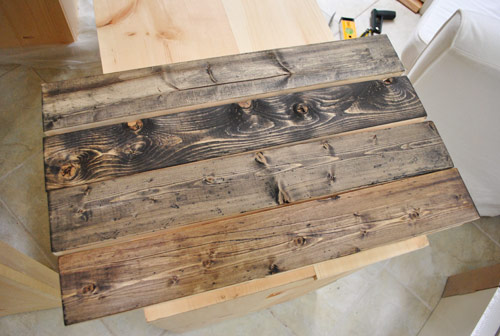
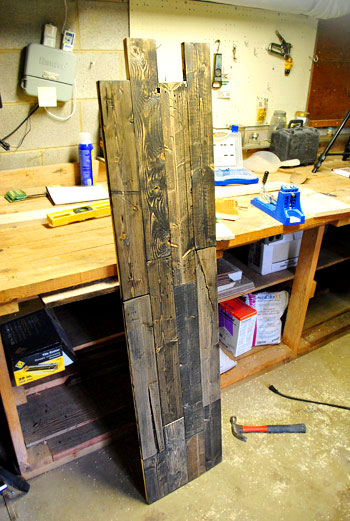
Once I had distressed all 27 pieces of wood (yep, over two dozen) Sherry worked her stain magic on them. Again, we’ll get into this more in a follow up post full of details (yup, there’s some staining video to edit too) but it basically involved doing a variation of applications using Minwax’s Dark Walnut and Ebony stains (some light, some dark, some mixed, etc). We ended up with a bunch of boards that looked aged and kinda beat up, like they were collected from a few different sources – instead of just purchased at the home improvement store a week ago looking all shiny and new.
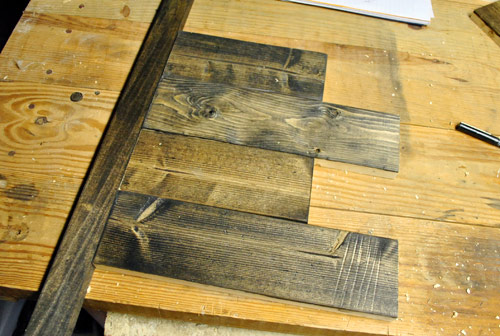
Then it was time to attach them together to create one big solid tabletop – well, actually three tabletop pieces (two long ends and one small “puzzle” piece that would cover our hidden storage compartment in the middle, which can be lifted out). After doing some math, we decided to stagger the boards by four inches so that when it came to the open part in the middle there would be a small lip on each edge for the puzzle piece to rest on when it’s closed so it all looks flush (I promise this will make more sense once you see the final pics at the bottom of the post). The point is, my first few cuts looked something like this.
To attach the boards, I again used my beloved Kreg Jig to screw holes that would tightly join each piece to the one beside it.
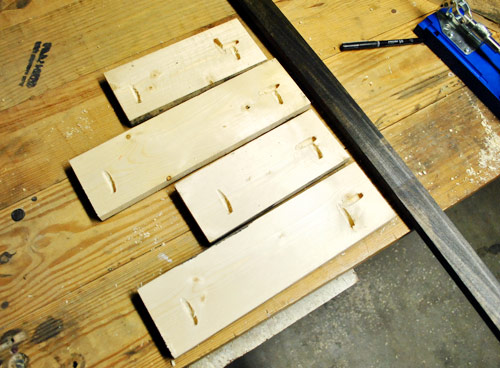
After joining the end boards, I drilled the rest of the holes and continued screwing them together, one-by-one. It probably took me about 40 minutes to create each of the two long sides of the wood countertop (and then about twenty to build the smaller “puzzle piece” cover for the storage space in the middle).
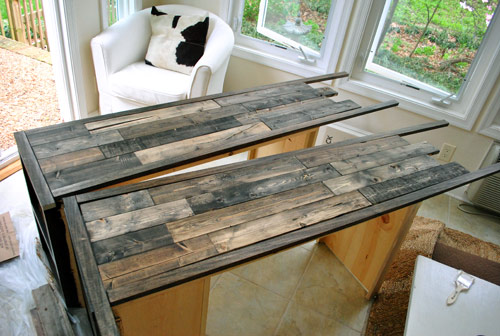
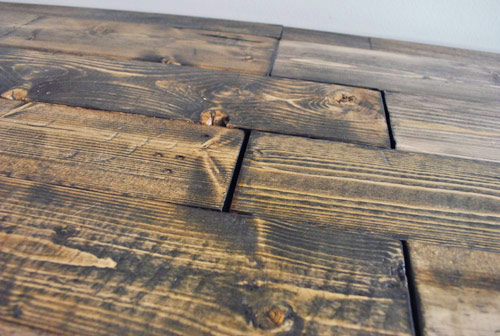
Here’s what one side looked like when it was mostly complete (it was still missing the 1 x 2″ poplar border around the edge). You can see how I tried to vary the color on adjacent boards so the change in tone looked intentional and added lots of nice texture and character.
Once the second side was done I double checked everything by placing the tabletops on the console bases – making sure that my measurements were still accurate and I didn’t need to make any adjustments before attaching the poplar 1 x 2″s around the perimeter. Luckily, all was good. Big phew.
Let’s fast forward (past attaching side borders and screwing four staggered boards together to create the middle puzzle piece) and show you our final step before putting the whole darn thing together: touch-up staining and poly-ing. We realized that it would help to stain some of the cut ends and part of the middle storage piece so that no raw wood would be seen. Once dried, Sherry applied a coat of Safecoat Acrlacq polyurethane over everything that was stained to seal it all in and protect our beloved console baby (and our beloved real baby since Safecoat is non-toxic and water-based so it doesn’t off gas like regular oil-based poly does (read more about staining and sealing the consoles here).
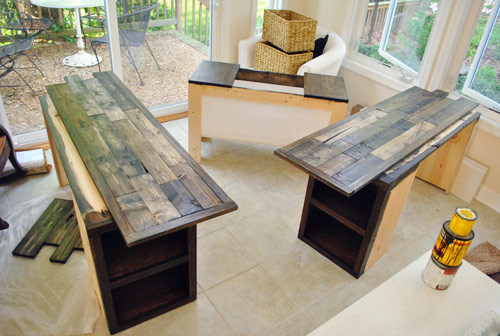
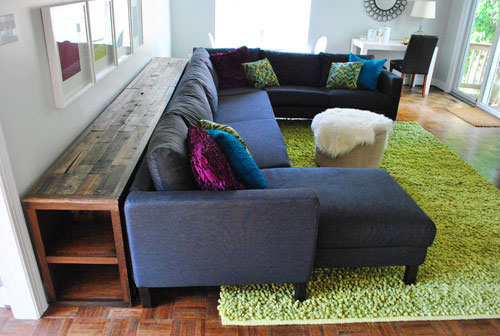
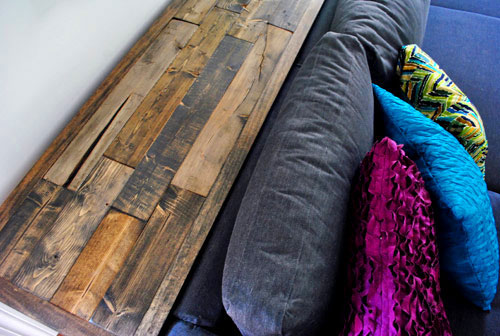
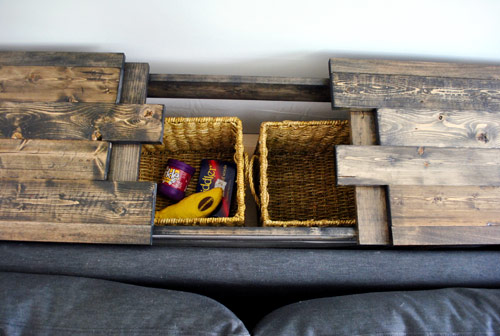
Oh and before I forget, do you see the white fabric around the middle console piece in the pic above? That was just an extra sheet that we had which Sherry stapled neatly around the entire wooden frame to create a nice little fabric compartment so nothing that we attempt to store can slyly slip behind the sofa. Then those two baskets that you see stacked on the chair (that we also already owned) can be contained inside the fabric “box” for storing everything from board games and books to remotes and other stuff that you might want to put on a coffee table (since we have an ottoman instead). More pics of that in a minute.
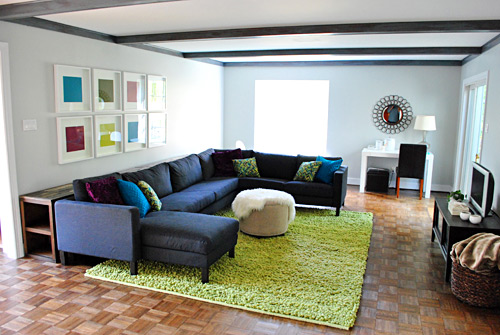
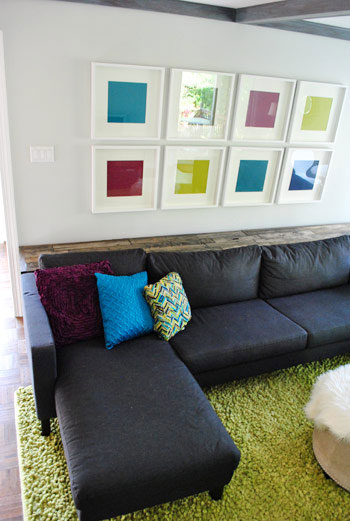
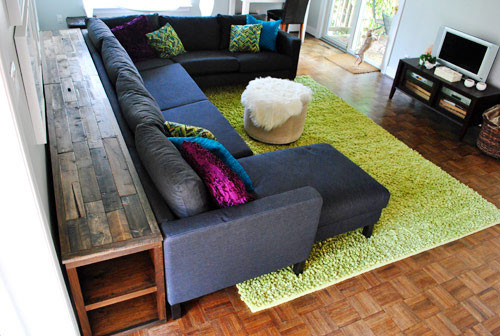
After that last bit of staining and sealing (and a few days of drying) everything was finally ready to come back into the living room. We brought things in one-by-one (bases first, then the tops) and after we had everything lined up the way we wanted it, I drilled a few screws up through the bottom of the two bases on the ends to secure the wood tops in place. And with that, our nearly 12 foot console (with a hidden middle storage compartment and some sweet bookcase-sides for even more stash space) was officially complete.
Maybe we’re biased because it’s our creation, but we’re both convinced that it came out even better than we had imagined. In fact, we think the DIY distressed wood top looks way better in the space than the grey-ish pallets would have (we’re the first to admit that the room has enough gray going on already). Hallelujah for happy accidents.
It also made us really happy that we opted for a rustic warm wood look with lots of imperfections and character (since the room was beginning to skew a little more modern than we had intended). It definitely brings some much needed balance to the overall vibe (especially once we add a heftier TV stand and some table lamps to finish things off).
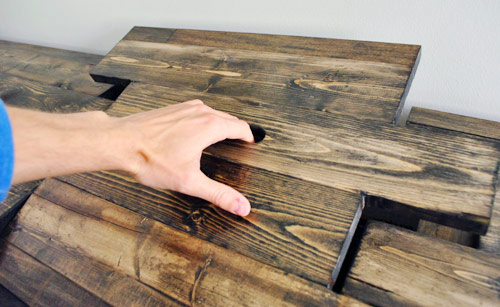
Oh, but I can’t forget to show you how the hidden storage compartment turned out in the middle. It’s my favorite feature, probably because it makes me feel like James Bond. Can you spot the removable puzzle piece there in the pic below?
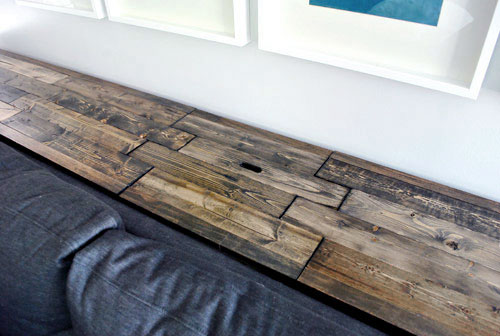
Clearly it’s not 100% disguised, but when you’re looking at the console as a whole it doesn’t scream at you (just scroll a few up a few photos to see what I mean) since it’s flush and the ends are still staggered instead of being cut into a big obvious removable rectangle. Once we’ve actually got some stuff on the table (lamps, a lacquer box or two, some books, etc) we think it’ll call even less attention to itself. We were just proud to get such a snug fit without making it difficult to remove (miraculously it slides right out and drops easily back in).
Speaking of which, I did end up drilling a small oblong hole (about 4 John fingers / 5 Sherry fingers wide) to make lifting it out as simple as possible. Three cheers for the sanding bits on my Dremel (Sherry got me a Dremel Trio for Father’s Day last year) which helped me make the hole even and smooth. I was nervous to puncture my took-three-weeks-to-make-it creation, but it all worked out in the end.
When lifted out completely, we gain access to those two storage baskets that I mentioned a while back (we’ll eventually fill them with more games, maybe some DVDs, not-often-used remotes, and who knows what else). Oh and you can see below what I meant by staggering the boards to leave a lip for the puzzle piece to rest on for a nice flush look:
We don’t expect to use that storage on a daily basis, so for the most part it’ll maintain its secret identity as one solid piece except once or twice a week when we dig in there for a movie or a game or something.
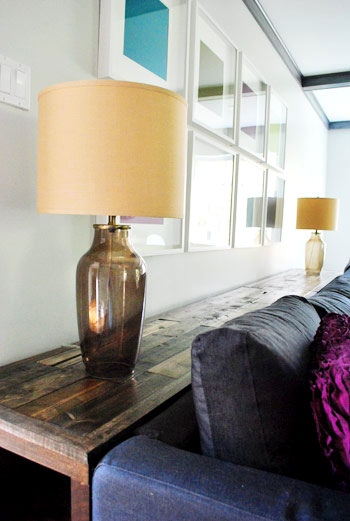
Of course we still have to put the darn thing to use – aka add some table lamps to the top, store some items on the shelves on each side, and generally load that baby up with function and a little form (maybe a ceramic animal for the wife). But to give you a sense of what it might look like, here are our two bedside lamps playing stand-in for a minute. It reminds us why the 16.5″ width is perfect for us – it’s wide enough to fit a chunky table lamp without having to worry about knocking our heads into them (since we’re both guilty of over-exaggerated laughing spells during particularly funny moments of Modern Family).
And no reveal post is complete without – say it with me – a budget breakdown. So here it is:
- Wood (white wood & poplar from Home Depot) – $98
- Screws & Tools – $0 (already owned everything)
- White sheet – $0 (already owned)
- 2 storage baskets for middle compartment – $0 (already owned)
- Minwax Ebony Stain – $4
- Minwax Dark Walnut Stain – $0 (already owned)
- Safecoat Acrylacq Sealant – $0 (already owned)
- Cheap paintbrushes for staining – $2
- TOTAL: $104
Clearly wood was our biggest budget hog, but for a nearly 12 foot piece of furniture made from solid wood, we can’t really complain about the just over $100 price tag. Especially since this extremely similar piece from West Elm goes for $379 – and we would’ve needed to buy THREE of them, to the tune of $1,137. Yowsa.
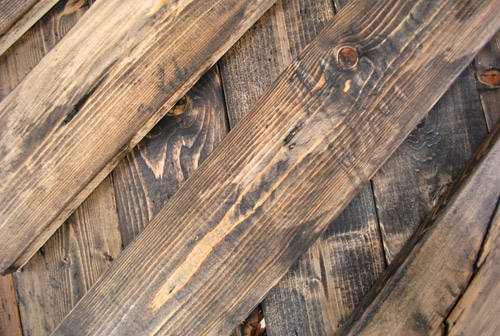
So another big thanks to Ana White for inspiring the design and giving me the confidence to tackle it myself (with the help of my stain slingin’ wifey). Did anyone else out there complete any builds this week? Who’s still in the basement/garage/shed/workroom finishing something up? Speaking of finishing up, I have some videos to edit and a big post to write about our wood distressing technique, so here’s hoping I can get that up in a day or two. In the meantime I’ll leave you with this shot of our new “old” boards before we screwed them all together to make the console top. Is it weird that it gets me all hot and bothered? Whatever, my wife likes leopard heels and I like distressed lumber.
Psst- Wanna see all the past steps that went into building this beast of a console table? Here’s the first post, the second one, and the third one.
UPDATE: CHECK OUT THE ACCESSORIZED CONSOLE TABLE HERE.

Leave a Reply