Q: I need help with space planning! Just your tip in the comment section of Ania’s design dilemma to “let the room breathe” made me realize that I’m so guilty of filling ever available inch of wall space. I need to edit some rooms! I’d love to get a post on space planning and room flow somewhere down the line! – Threadbndr
A: This is such a good question, and a topic that we’ve been meaning to tackle for ages. First we’ll include the comment that Threadbndr is referring to in her question above. Someone asked what we thought Ania should stick in the bottom right corner of the room (between the desk, #10, and the bookcase, #3, that we hunted down for her in this mood board).
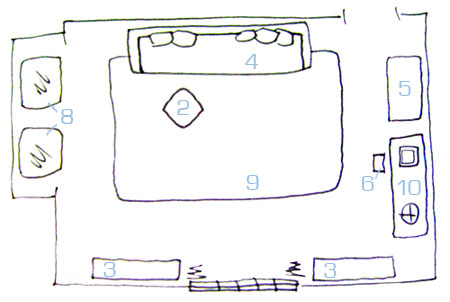
And here was our response: “Ania could always pop a potted plant into that corner (we love a crisp white Ikea planter with something green and leafy) but we tend to like keeping spaces that tight blissfully bare. Otherwise there’s something lining the entire perimeter of the room every 12 inches or so, which can look a lot less airy and open than leaving a few spaces like that for the room to breathe.”
So our first floor planning tip would be to resist the urge to stick something into every bare corner and fill the entire perimeter of a room with furnishings and accessories. Sometimes you want to keep certain areas open for flow and to keep things from looking too cluttered and chaotic. But when it comes to creating a true floor plan, like the sketch above, we actually have five specific approaches, all of which can help pin down the best furniture and accessory arrangement in any space. Let the fun begin…
Floor planning method #1 is graph paper. It’s a super easy way to experiment with endless room layouts without any commitment at all (all without breaking a sweat). We’re definitely no stranger to this method- in fact here’s a detailed how-to video (see more basement planning details here) so you can whip up your own graph paper models of each room in your house and play around with the layout until you hit on something you love. Watch the video below or check it out here on YouTube.
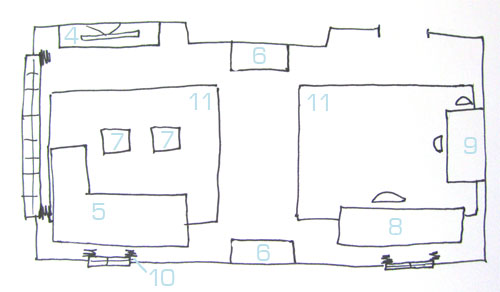
Floor planning method #2 is sketching. The upside is that it’s not as numerically demanding (no counting graph paper squares) but the downside is that it’s not as exact as the graph paper method outlined above. But it can still really help you uncover a number of floor plan ideas that you might not see while standing in the space and staring at the furniture. There’s something about the aerial view and the act of drawing a number of options that lets your brain go a bit further than it usually can when you’re standing in the room looking around. And although this method isn’t super exact, it definitely saves you (and your back) from moving the sofa to every wall in the space (since you can sketch it on each wall and hopefully hone in on which layout will work better than the rest). See more info about this specific floor plan right here.
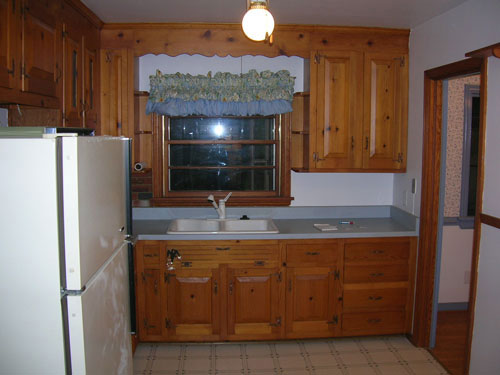
Floor planning method #3 is blue painter’s tape. This approach is so simple that nearly everyone we suggest it to is chomping at the bit to get started. We’re huge fans of using blue painter’s tape to outline where a piece of furniture could be placed on the floor (just to get a feel for the flow of the new arrangement without having to actually move anything. This method is especially helpful before ordering an item, so go ahead and tape off the floor where your new buffet would sit before you buy it online- just to be sure the proportions and the placement don’t crowd the dining table. In fact we even used this method when we were changing our kitchen’s floor plan from this L-shaped arrangement…
… to this U-shaped one…
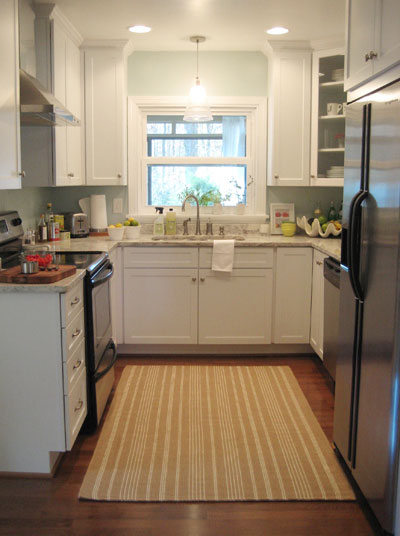
Because as nice as it was to refer to the computer renderings of the new layout, we really liked the idea of standing in the space and seeing exactly where we would be able to walk and where the new cabinets and appliances would be placed. It really eased our nerves that everything would be too cramped, because once we taped things off on the floor we could actually “stand” in the new floor plan. It was so worth the ten minutes it took to stick down that blue tape.
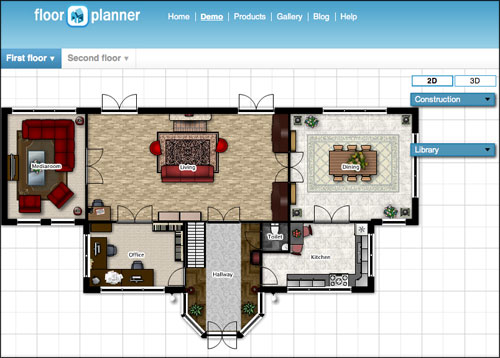
Floor planning method #4 is floorplanner.com. We’ve definitely relied on this free (and pretty simple to use) site to lay rooms out and to help wrap our minds around what something might look like before we pull the trigger. Again, it’s just another tool to help you see things from a new vantage point and experiment with a bunch of options… all without lifting a finger (or a sofa).
Floor planning method #5 is furniture sliders. We definitely like to avoid the dreaded furniture shuffle when we can, but sometimes there’s nothing like shifting a few pieces around to see exactly how everything will look in a few new configurations. And the good news is that you can save yourself some major aches and pains by investing a few bucks in some easy furniture movers which you can use over and over again in every room of your house. They slide seamlessly on hardwood flooring or carpet and they make one-person-furniture-arranging possible (no more waiting for the hubs to come home with these babies). Which makes them great for surprises. In fact John has come home to many a new layouts here at Casa Petersik thanks to sliders like these.
So there you have five ways to approach floor planning along with the obligatory warning that the perimeter of a room likes to breathe (so resist the urge to fill every corner and expanse of wall with tiny tables, plant stands, and other items that can take away from that airy effect). We also love using large area rugs to define floating furniture arrangements, so that’s another way to anchor furniture that may feel unfinished or restless when you pull it away from the wall without anything defining that new room within a room. And if you’re still stuck in the space planning department, feel free to scroll back through some of our more recent Design Dilemmas for a number of sketched floor plan ideas that you might be able to implement in your house. So many possibilities, so little time.
But what about you guys? Do you have any other floor planning tips to pass along? Any specific room layouts that you love? Share and share alike.

Leave a Reply