Ok, so you might think we’re crazy, but we always thought the sheepskin rugs that Ikea sold (especially the super cheap small sized ones that we always grab) were faux. Well, we recently had one of those duh moments when we noticed that the materials weren’t listed as acrylic or some other fabric and instead read: 100% sheepskin. Oops. We should have known- after all, they’re a Swedish company- but for some reason we always saw $99 sheepskin rugs and assumed those were the real ones and that the cheap $25 Ikea ones just had to be man made.
Now we know the faux or real sheepskin decision is an extremely personal choice (just like wearing fur, eating meat, wearing leather, etc) so this post isn’t about judging or debating that issue (to each his own!) it’s just about a faux sheepskin DIY project that we took on so we could happily pass our Ikea sheepskins on to a relative who promised to give them a happy home. It suddenly just felt weird to see Burger laying on the one that we had draped over the sofa but we didn’t want them to end up in a landfill (so handing them off to someone who would appreciate them seemed like the best thing to do). We actually took on two different faux sheepskin projects, so this post will detail one of them while the one this afternoon will detail our second adventure in faux sheepskin making (hence the “part 1” mention in this post’s title). Let the fun begin…
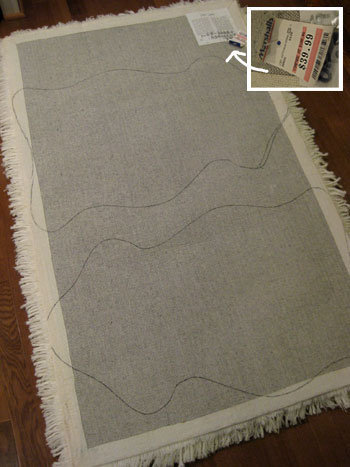
First, we hit up a few stores in search of a super wooly shag rug on the cheap. We hit the jackpot at Marshall’s where we found a large 4 x 6-ish version for $39. We knew we could get at least two faux sheepskins out of it (which made them under $20 each- which was actually cheaper than the affordable Ikea ones) so we snatched it right up. The tawny eggshell color was perfect and the fact that it was convincingly textured and wooly looking made it more of a “perfect fit” along with the fact that the backing wasn’t that baby-doll-head-smelling grippy rubber, it was one of those woven fabric-backed rugs that we prefer.

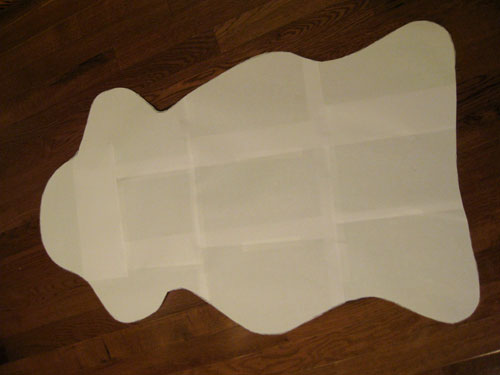
Then we got to work making a life-sized template to dictate our new sheepskin’s shape, so we taped a bunch of pieces of paper together to get a nicely sized “background” and pulled up the link to the real Ikea ones which we used as a guide. It was as simple as sketching out a sheepskin-ish blob on our taped-together printer paper and cutting it out with a scissors.

Oh and here’s a tip: you can fold the paper in half vertically before cutting it out and just follow the pencil line on the exposed half of your sketch while it’s folded for a perfectly symmetrical result if perfection is you middle name. I actually didn’t go that route because I figured a little asymmetry never hurt and most sheepskins aren’t perfectly even on all sides anyway.
Next we just placed our new “sheepskin” template on the back of the rug and used a thin sharpie to trace around the paper cutout which left two sheepskin sized outlines on the back of the rug:
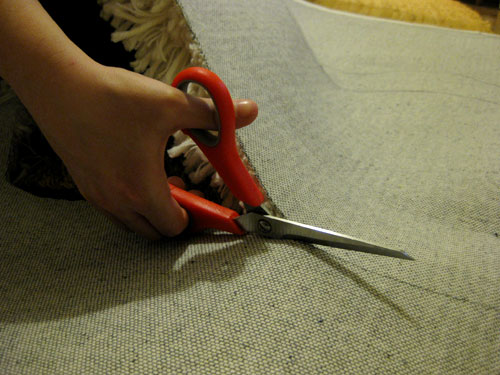
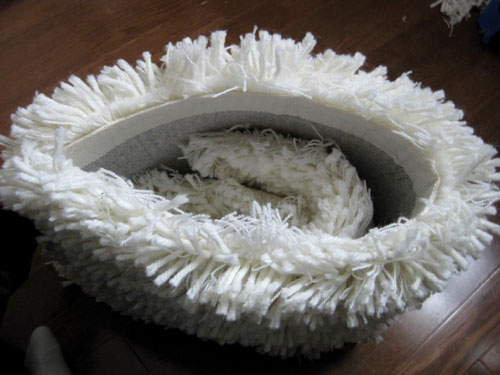
Then we did a test cut to see what would happen to the rug when we sliced through it. Our big fear was that everything would come loose and fall out (which we thought we might be able to remedy by using white duct tape to tape around the cut-out lines on the back of the rug before snipping to hold things together at the edges). But we were pleasantly surprised that no tape or other precautions were necessary and every slice was clean and no threads came loose even when you tugged on them after cutting. So then it was as simple as cutting out both of our sheepskin outlines…
… which left us with two pretty darn amazing little faux sheepskin rugs. We love all the soft creamy texture that the shag pattern adds, and of course we love that we made them ourselves. There’s always a bit of pride when you get to mention that you DIYed something, right?
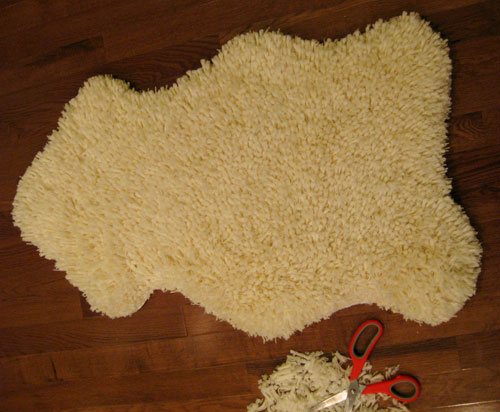
Oh and do you see that little pile of fluff under the scissors? We gave the outline of each rug a little haircut to refine the shape and make them look more polished and clean (initially the shag had flopped a few directions while we were cutting so the outline wasn’t very crisp- but a few snips around the perimeter of each of our new wooly additions really cleaned things up and emphasized our intended shape.
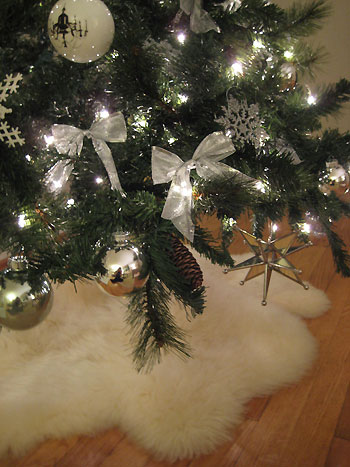
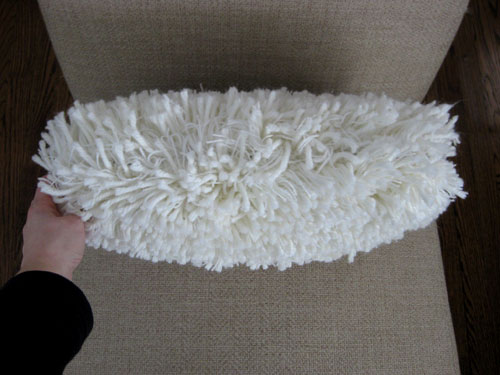
Now this version of our DIY sheepskin is thicker and less flimsy than our second one (which we’ll be sharing this afternoon). So it’s not as easy to “drape” over the back of a chair for example (it’s a bit more structured, like a rug would be). In short: it’s much better served as an actual sheepskin rug (ie: use it on the floor as opposed to tossing it over the back of your sofa). Oh and you can make a much larger one for a bigger area with a larger rug (or just by not making two of them from one rug) so that’s another idea. When it came to our two little ones, we did notice that one of them looked great on our square ottoman in the nursery (which required it to be a lot less flexible than thinner surfaces like the top of a soft upholstered chair or sofa) so that’s where we decided it should live:
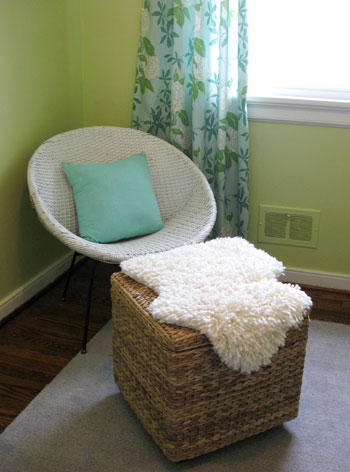
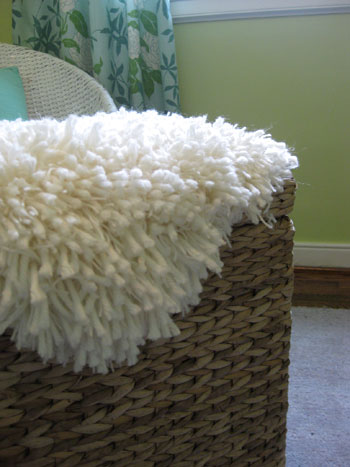
Isn’t the shaggy texture charming? We just love how chunky and tactile it is- you really can’t walk into the room without petting it.
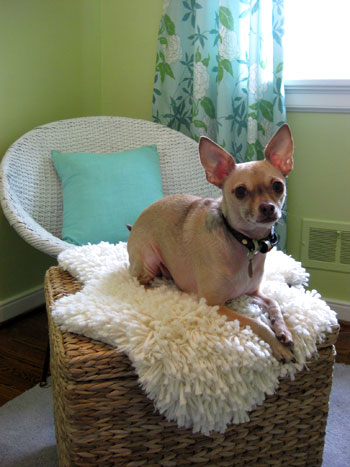
And Burger LOVES IT! In fact sometimes we can’t find him and he’s in there sleeping on it in the sun. Maybe he can sense that no animals were harmed in the making of it? Either way, so cute.
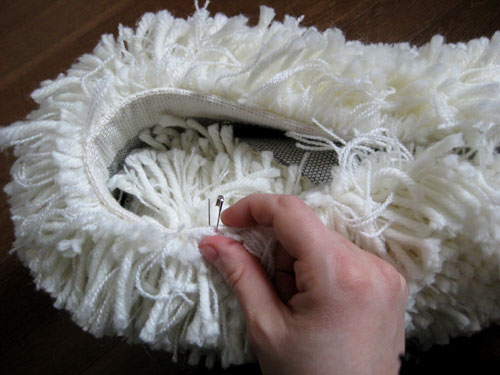
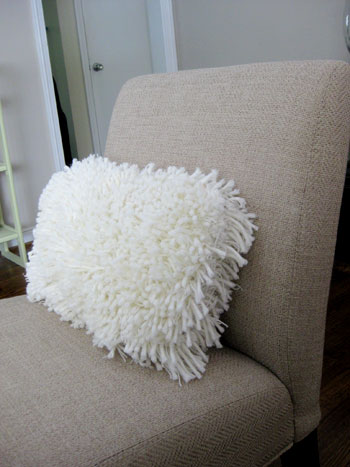
Our second wooly rug will probably also live in the nursery (on the ground as an actual rug) so stay tuned for those details as we continue to cobble things together in there. Oh and remember how there was an extra strip of leftover rug on one end after we cut out both of our sheepskin templates? Well it was perfect for creating a bonus little textured lumbar pillow. So not only did we get two faux sheepskins for $20 a pop, we actually got two sheepskins plus an accent pillow for $39 total. Not bad right?
All we did was take that long piece of leftover shag and trim the interior edge so it was one long rectangle. Then we “folded” it in half to create a nice loop of shaggy texture. When it came to filling our fluffy DIY pillow, we actually looked no further than a few other rug scraps- so it really is made completely from leftover rug snippings. We love that we didn’t have to buy any batting or anything- and there was practically zero waste created by our entire project since we used it all.
Now we’re sure this next step will leave a few of you shaking your heads, but we’re work-with-what-you-have people, so we actually reached for safety pins to secure the left side of our makeshift pillow (which you see me holding together in the photo above). The great thing about the rug’s incredibly dense shaggy texture is that every single pin was completely obscured but it held things nice and securely- plus it’s super poke-free and safe since they’re buried so deeply in the shaggy texture that you’d literally have to go hunting around for them to find one and then would have to apply a ton of pressure to pop one open (which can’t be done by leaning on the pillow or even whapping someone in the face with it during a pillow fight). Anyway, so we used a few safety pins to connect our loop of fabric on the side and a few more along the top and bottom seams.
As you can see from this close up, they’re placed extremely close to the base of the rug so they don’t stick up and can’t be seen, felt or accidentally opened (they’re literally buried two or three inches “beneath” the dense shaggy fabric).
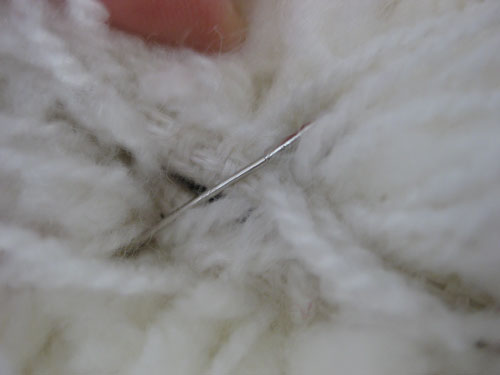
So unless you’re digging through the long fibers of the rug in search of one they’re completely undetectable. Gotta love a cheap on-hand solution like that.
We’ve been using the pillow for about two weeks now in our living room and we have yet to feel any “small metal nubs” when we lean back on it. And we especially love that it was a free little bonus so if at any point we want to revise how we connected it (and remove the pins) we can- but seriously, so far so good. And we love that we used every last scrap of our rug and got a little bonus decor item out of the deal.
So that’s one take on our faux sheepskin solution. Stay tuned for this afternoon’s post where we actually hunted down fabric and made a more flexible and drapey “throw-like” version. And those were even cheaper and easier so they’re definitely an anyone-can-do-it DIY project. Well maybe not anyone; Burger refuses to help but ironically can always be found enjoying all the fruits of our labor…
Sidenote: Is it wrong that we think he’s the best looking dog in the world? Seriously, he’s a knockout isn’t he? But enough about our heartstoppingly handsome chihuahua. Have you guys ever DIYed anything from a rug or altered one in some fun hands-on way (dyed it? spray painted it? used it to “upholster” something like a cube ottoman?). We’d love to hear all about your thrilling adventures in rug-customization.

Leave a Reply