If Teddy ever forgets what letter his name starts with, he now has a whole wall to remind him. That’s right, it’s always “T” time in there. Har-har.

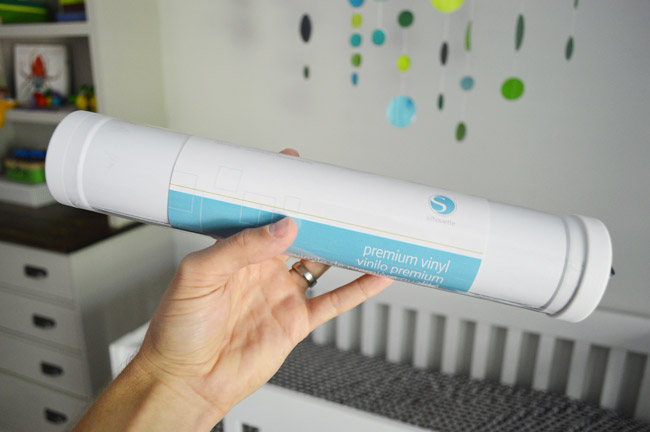
As we mentioned a few weeks ago, Sherry and I settled on a plan for a subtle accent pattern on the wall between the built-ins. Our original plan was to paint the Ts, like Sherry did for Clara’s raindrops. But after some of you suggested things like vinyl decals in the comments, we decided to give that a whirl instead. Vinyl has become a pretty mainstream option these days, especially for kids’ rooms. It’s removable and affordable, so we see the appeal. This tube – which is meant for Silhouette craft cutters – was $5 from JoAnn with a coupon. We don’t own a craft cutter, but that didn’t stop us from cutting simple line shapes by hand.
First we had to determine the size of our Ts. The wall space was around 88″ wide, so I figured some multiple of 4″ would make life easiest. But I mocked up two sizes with printer paper cut into 1/2″ strips – just to be sure that we both liked the 8 x 4″ version because it looked right (and not just because the math worked out). Thankfully we did.

With the size selected, next we had to lock down the arrangement. I cut out a few paper templates, taped them up, and we moved them around until we liked the layout. Happily, the pattern that we liked could easily fit into 4″ increments.
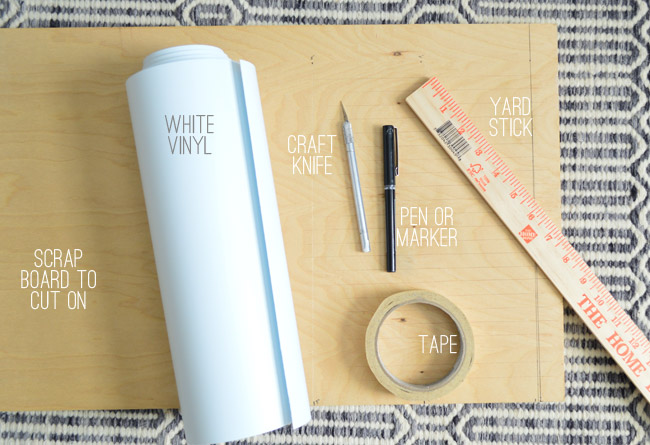
The next step was cutting a bunch of 1/2″ vinyl strips: some 8″ long, some 4″ long. I’m sure this would’ve been faster if we owned a craft cutting machine, but it wasn’t too hard to execute by hand. Here were our materials:
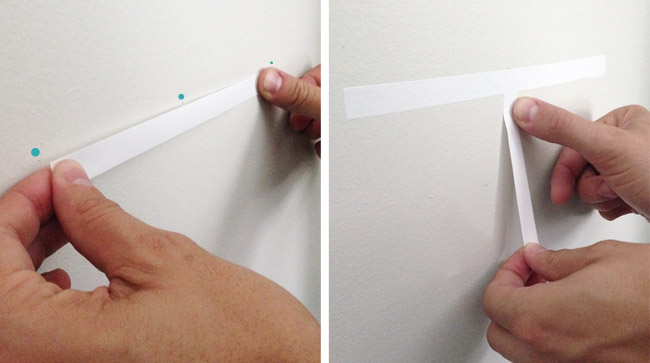
I started by making a simple guide on my board (three small pen dots on the wood at the zero inch, four inch, and eight inch spots). That way once the vinyl was rolled out, I could easily slice off an 8″ section.
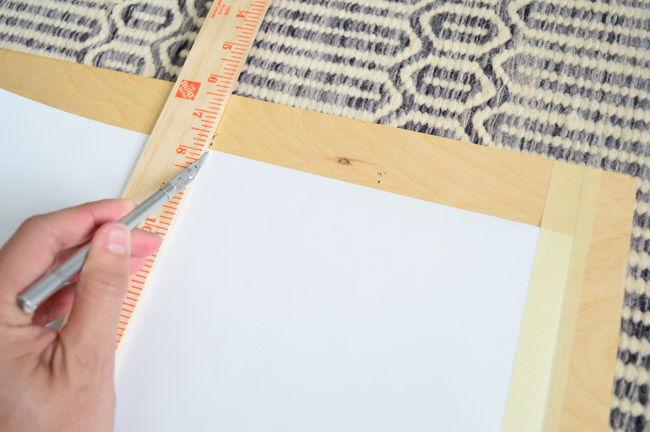
With a 8″ section of vinyl cut and taped down on both sides, I used the ruler to tick off 1/2″ marks on both sides of the sheet.
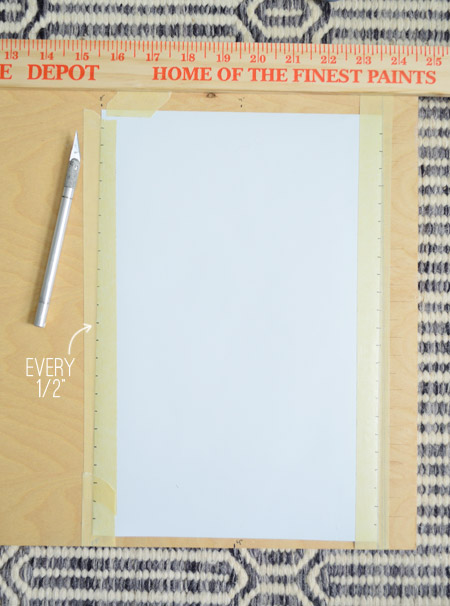
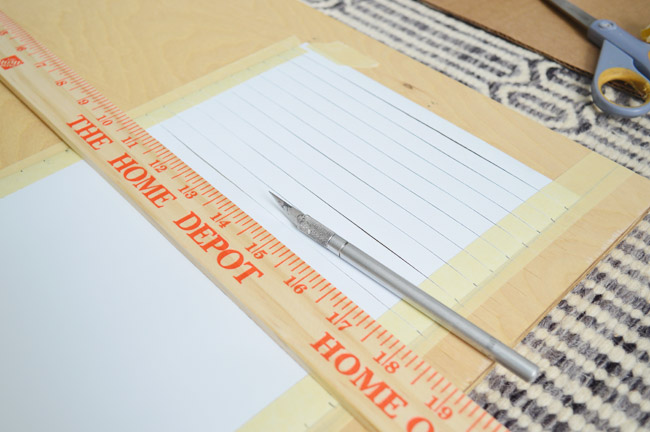
Then I lined up the ruler to each set of marks and sliced through the vinyl (it took 2 passes – one to get through the vinyl, and one to get through the backing). Then I just moved down the sheet until the entire thing had been carefully shredded into 1/2″ strips. Making 4″ long strips meant following the same steps, and ending with one last cut down the center. I needed about 70 in total. It wasn’t particularly difficult work (sort of that auto-pilot, get-in-the-zone stuff).
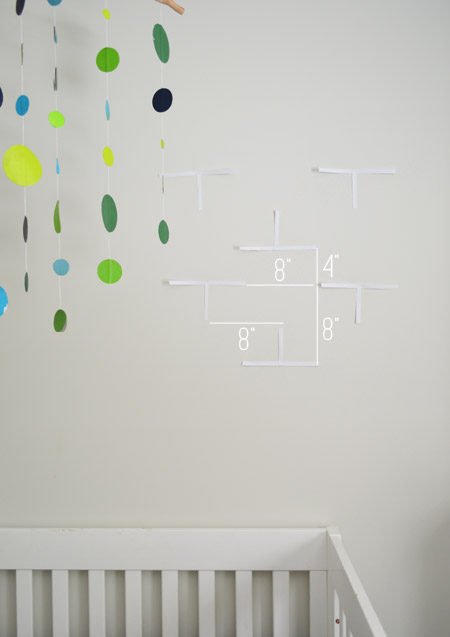
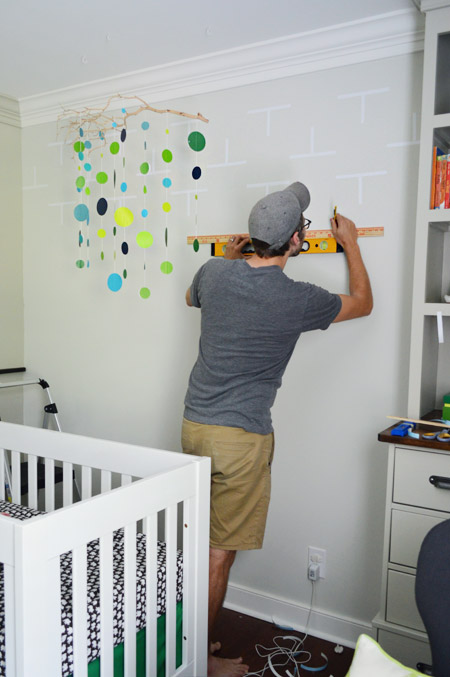
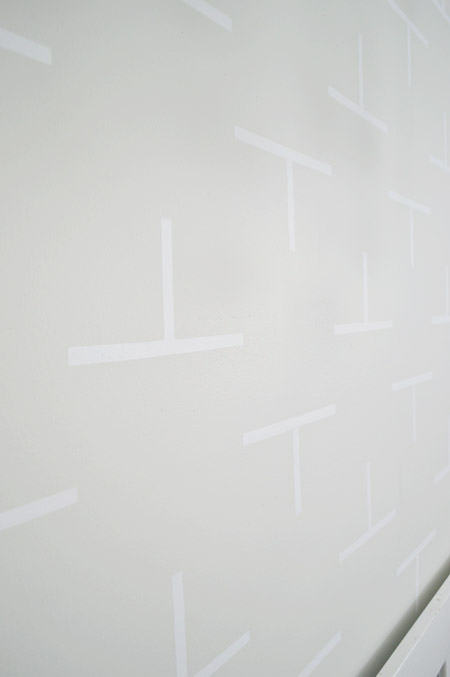
Applying the decals to the wall was also pretty simple and repetitive. Since we were basically creating a giant grid on the wall, I knew that keeping things level and equally spaced was key. So I started at the top middle of the wall and worked in small sections, making pencil marks with a level and yard stick.
How I measured & marked the wall may be TMI for most people since it’s really specific to the shape/size of the decal you’re applying, but if anyone’s looking to recreate this look exactly, here’s the rundown. With my yard stick held vertically (and checked with a level) I marked the vertical spacing of each row – as seen below in the RED dots. Next I held the yard stick horizontally on each mark (again, checked by a level) and marked the middle and both ends of each T – as seen below in the BLUE dots. It sounds a lot more complicated than it was.
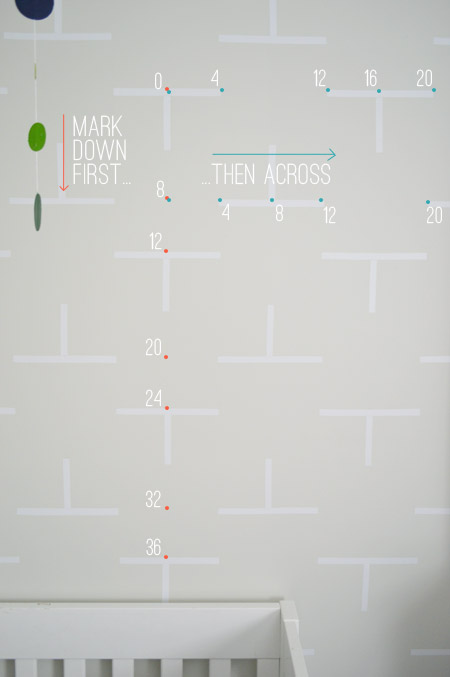
Then I used those marks to place the vinyl strips. You can sort of see my light pencil marks below, but I’ve added blue dots to help you see how they guided my placement of the 8″ strips. Once the long strip was placed, I used my center mark to add the 4″ vertical strip. I just eyeballed these since it was pretty easy to make such a short strip look vertical.
The vinyl was really easy to work with, so I’m glad we made that choice. It held tight to the wall with just a quick smooth of the finger and so far nothing has peeled up on its own (I started the project before Memorial Day and worked through last week, so some of the first strips have been up for almost two weeks). And just for kicks, I tried removing one to see what happened. It took a decent amount of work to get my nail under the edge enough to peel it off, and a decent amount of pressure to yank it off, but once I did it came off without damaging the wall. Initially when we considered vinyl vs. painting for the Ts, we worried Teddy might be able to peel them off when he’s older/more mobile, but I doubt Clara could remove one.
It was our first time working with self adhesive vinyl and I’m impressed with how crisp and grid-like the design turned out (something I’m not sure we could’ve achieved with paint alone). It’s nice to have some subtle pattern and interest between the built-ins. And the $5 price tag is pretty nice too.
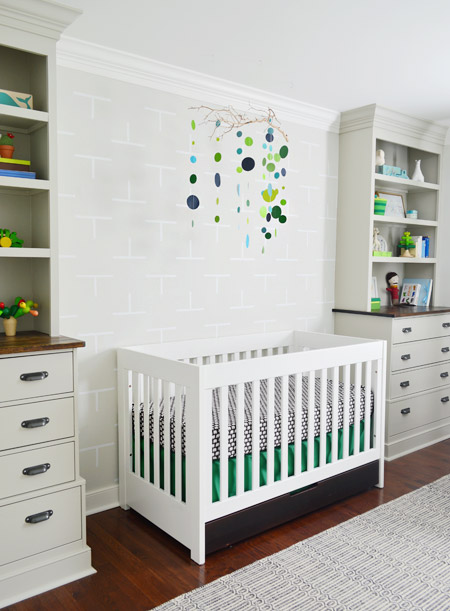
We didn’t extend the T’s behind his crib, just because we thought the lines would look busy with all of the crib slats. But I did save some extra strips to add once he moves to a twin bed (we also have about a quarter of the vinyl roll left for backup). But let’s not jump that far to the future yet, okay? This kid is already 12 pounds. They really do grow up too fast.
I like that if we ever tire of it (or if Teddy requests something else down the line), we can just remove it and move on. Although it does make my geeky heart swell a bit to imagine what Teddy will see in the pattern besides his first initial. A bunch of squares for hanging his drawings? A bunch of cliffs for careening toy cars? A giant Plinko board?
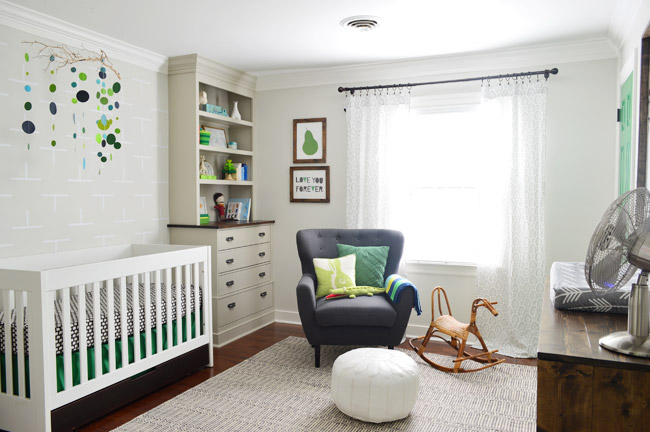
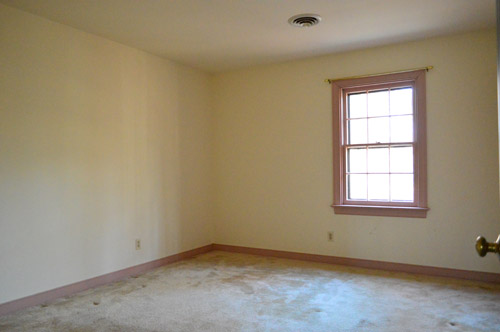
Other than needing a light fixture overhead, I think we’re done in here for now. And you know we love a good before and after, so here’s a reminder of the carpeted pink-trimmed room we started with:
Did you guys finish up any projects this weekend? Or do anything outdoorsy? We squeezed in a few long walks and even slipped through a street festival on Sunday. Teddy loved the candied bacon on a stick.
Note: I spared you all from like two dozen T-puns that I was thisclose to unleashing throughout this post. Like how I think the wall fits Teddy to a T. And how I hope he thinks it’s T-rrific. And how I didn’t need a TI-82 to calculate the placement of my decals. Remember those?
Psst- Wanna know where we got something in our house or what paint color we used? Just click on this button:


Leave a Reply