When your kid reaches the stage where they beg you to hang up nearly every painting, drawing, and stickered creation that comes out of her school bag, you may find yourself needing some more display space. Here’s how we hooked up our daughter with a giant cork board wall with a nice framed-in look and lots of room for art galore.
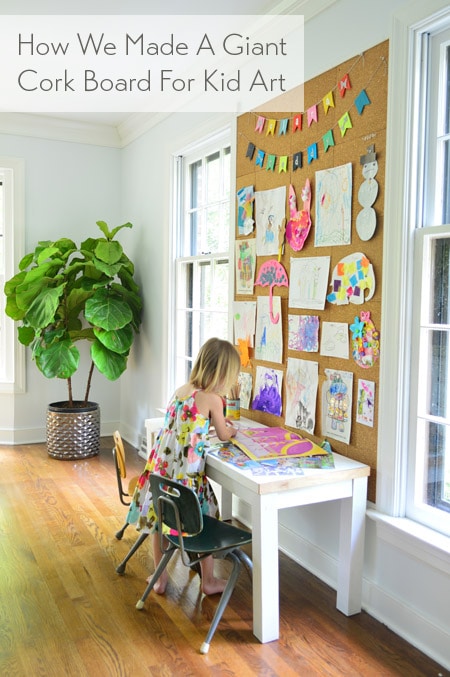
The “bell-etin board” that she used to be referring to was this smaller fabric-covered cork board that hung in our office for the last eight months or so (it was originally made by Sherry for our old closet) – but it had been getting pretty crowded. Sherry had the idea to turn things up a notch and take that cork board wall from window-to-window so that we’d have more room to display stuff – and so that it would more clearly define that little section of the room as Clara’s (and eventually Teddy’s) workspace.
Creating A Base For The Cork Tiles
We started by hanging a thin wood base for the cork tile squares to be adhered to. Not only would this make the squares hang more securely than individually tacking them up, it would solve a slight problem of the existing board: some of the pushpins poke all the way through the cork and into the wall, which would mean a plethora of wall holes over time from window to window if we skipped the backing.
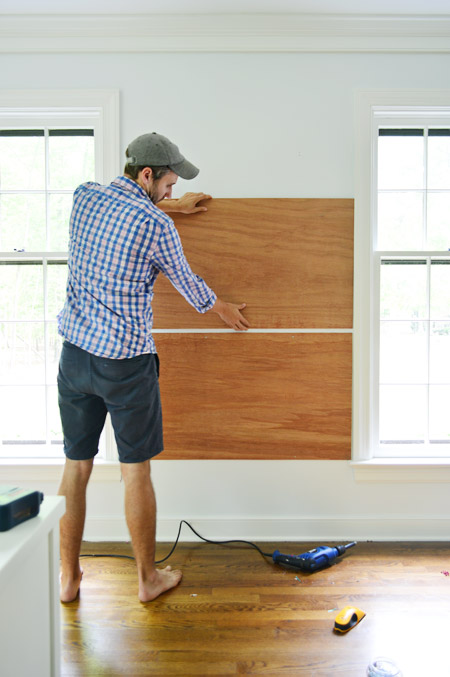
Now we’ll only have a few screws to remove if we ever want to take this down, and a few small holes to fill – as opposed to a swiss-cheese-like wall full of divots.
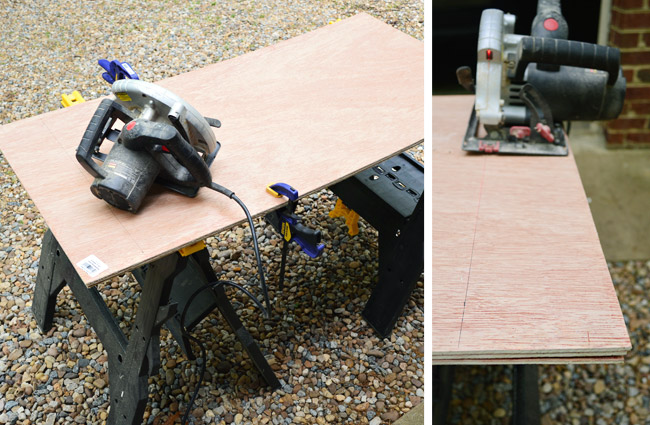
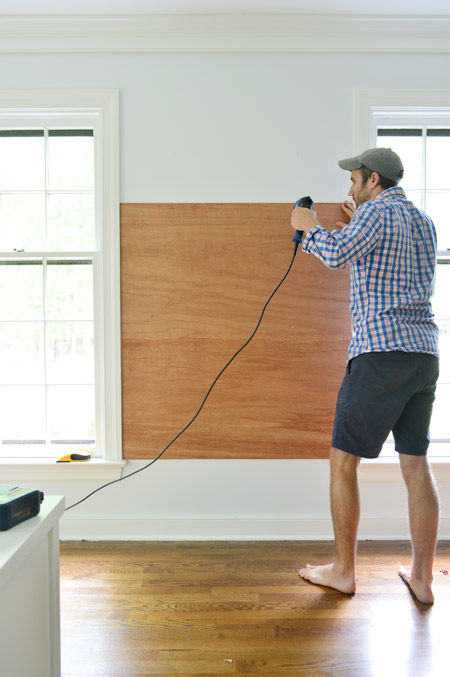
The wood backing was made of three 2 x 4′ sheets of 5mm underlayment from Home Depot. All of them needed a little trim to fit the 43″ wide gap between the windows. I clamped them together tightly and cut them all with one slice of my circular saw.
Starting from the windowsill, I attached each board with a few 2″ wood screws each, using my stud finder to be sure they were going securely into studs.
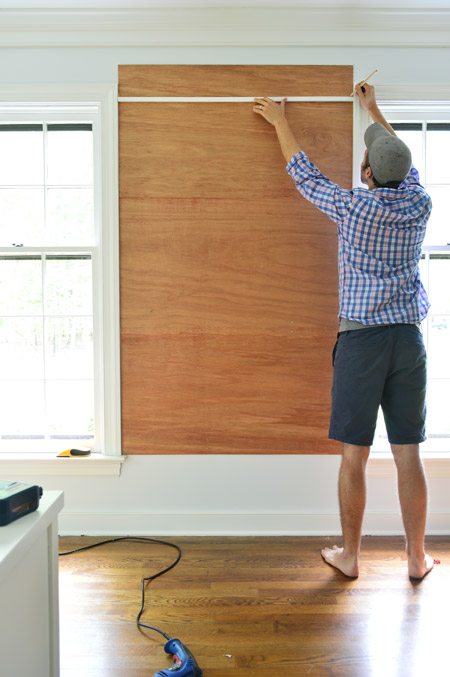
We wanted the third board to stop just slightly below the window for a stepped-down inset effect, so Sherry stepped back and eyed things so I could mark where it needed to be cut with a pencil. I also sliced two thin strips of wood to act as a basic molding for the top and the bottom, just to give it a more polished look so the cork didn’t just end.
Gluing The Cork Tiles To The Wall
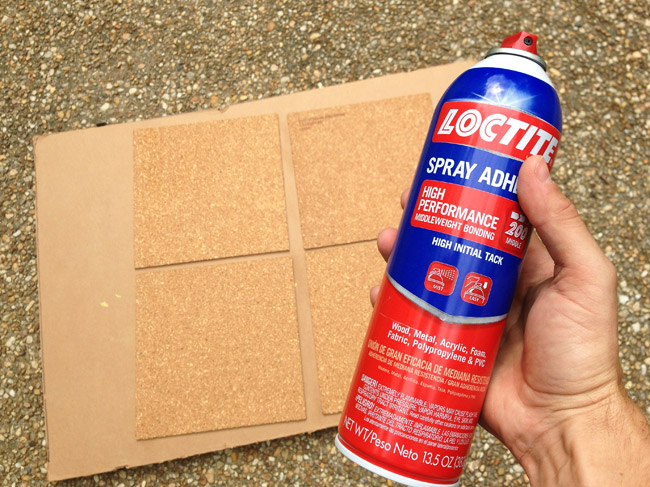
With the boards all cut and attached to the wall, we could start attaching the cork squares. We used this Loctite Spray Adhesive, since the back specifically said it worked for bonding cork to wood. It suggested spraying both surfaces, but since I didn’t want to spray indoors – I just spayed the back of the cork outside and Sherry carried each square in and stuck it up. Seems to have worked just fine so far.
Tiling the wall was pretty straightforward (read: it went really fast), especially since we could use full squares for most of it and we were tag teaming things. We did all of those first before doing any partial pieces.
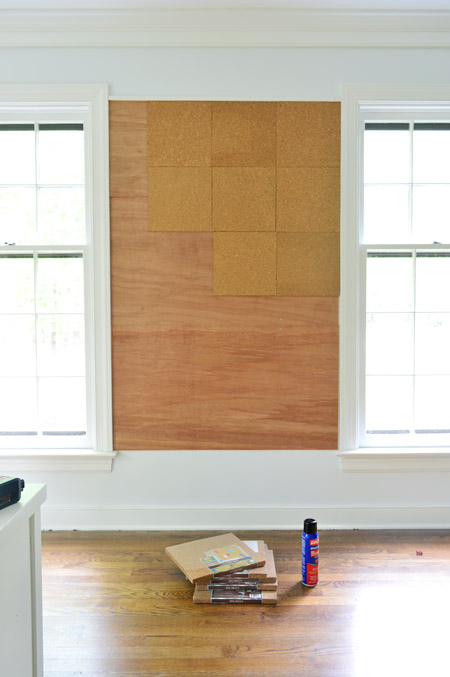
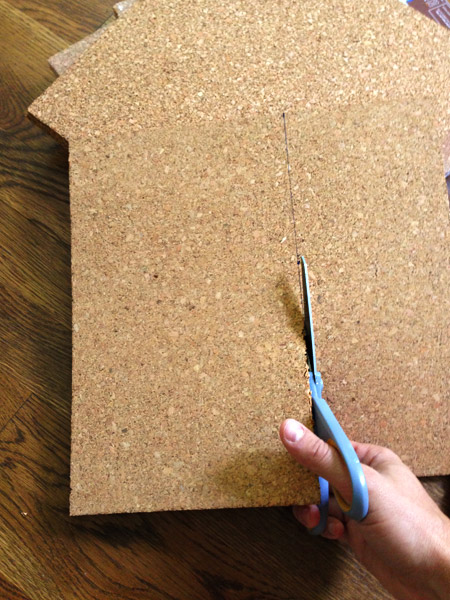
Sherry marked the partial squares with a pen and a ruler and then we just used regular old scissors to cut them. We discovered that making small cuts (rather than using the entire length of the scissor blade) helped keep the cork from cracking, which made for a cleaner edge.
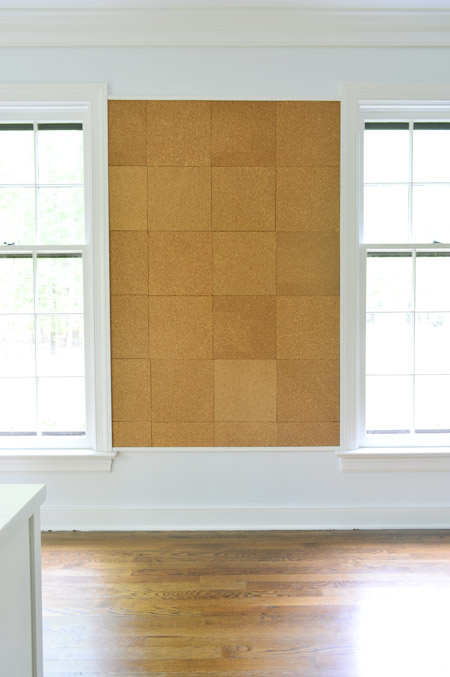
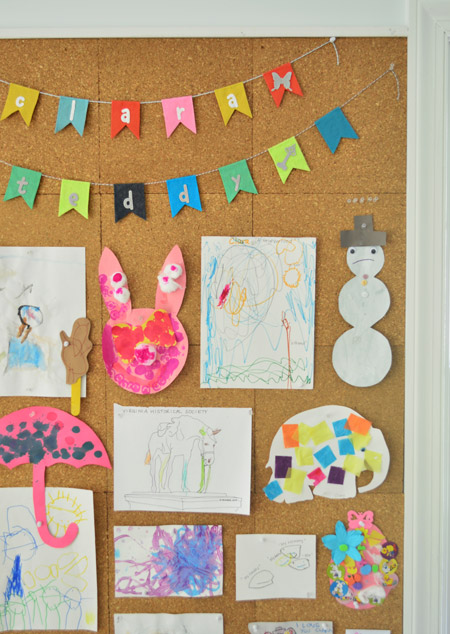
Here’s the finished cork board wall. Ideally, the seams would be less visible (we even considered covering it in fabric or painting it a pattern, or just the plain wall color) but ultimately decided that once art went up the lines would be a lot less noticeable. So since we both liked the natural color and texture it added to the room, we opted to leave it as is for now.
Arranging Art On The Cork Wall
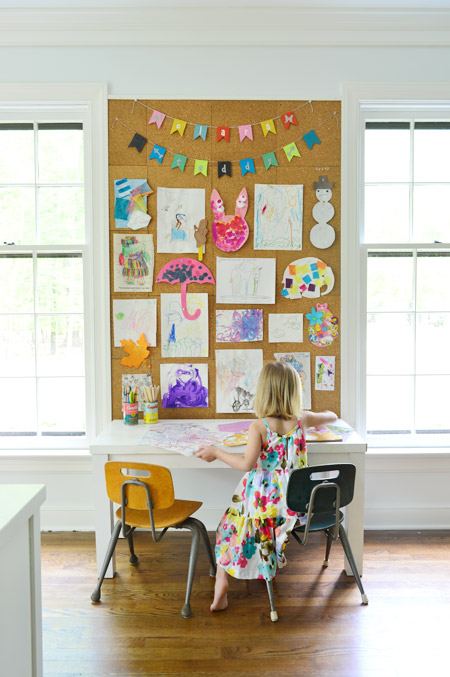
Sherry literally sprinted to arrange Clara’s current body of work on the board the second we finished hanging it (picture her rubbing her hands together and whispering “faaaavorite part starts… now!” Clara helped with choosing what to put where, and after a few minutes of shuffling things around, we ended up here. The artist herself was also quick to assume the role of producing more stuff to hang, although we’ve explained that even with a bigger board, we’ll still need to switch things out to make room for new stuff. So far she’s cool with it. She even seems to like the challenge of choosing what to remove to make room for her newest creation.
As for the rest of her art, we have a box full of other paintings/drawings/crafts that we save, and Sherry has a new app on her phone called Artkive, which she uses to take/store photos of it, with the intention of making a photo book full of her creations someday. We think it’ll be really fun to look back on (both for us, and for Clara).
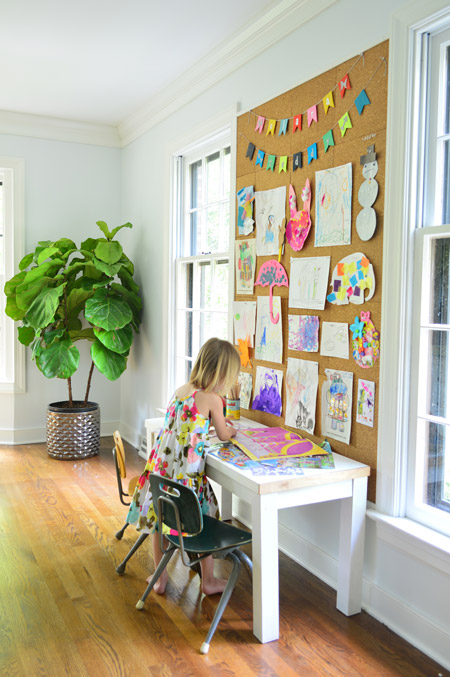
We’re really happy with how our new cork board wall is adding some personality and color to the office, and Clara couldn’t be more proud. We’ve realized it will get in the way of any curtains we might have hung, but we’ve been thinking about doing some inside-mount roman shades for the room anyway.
Oh, and those felt name banners are a little homemade surprise that a sweet reader sent us (thanks so much Jes!) as a welcome/big sister gift for Teddy and Clara. I like that it sets the stage for Clara that she’ll eventually be sharing her gallery space. Although I’m sure we’ll have a tough time bumping some of her stuff up there. We’re especially enamored with Grumpy Snowman.
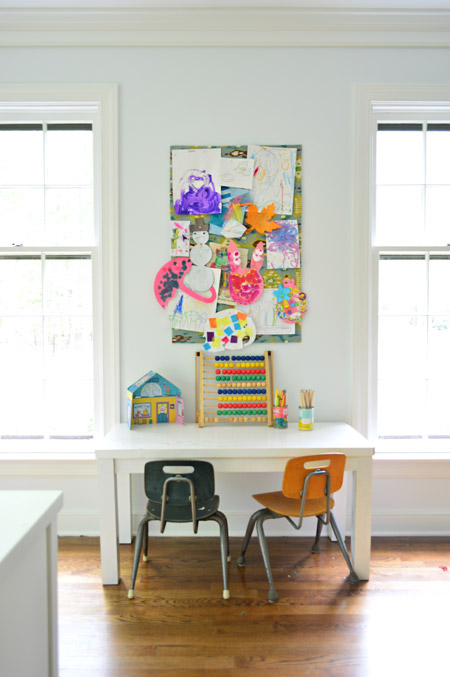
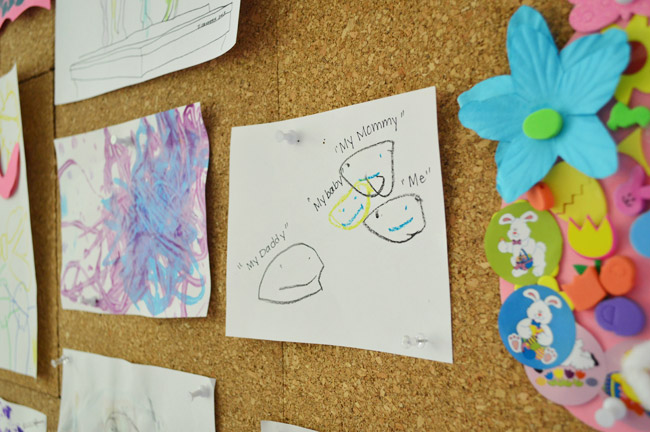
A clear family favorite is this drawing that came home from school last winter, where Clara had drawn a portrait of her soon-to-be-bigger family. She did it shortly after we told her that Sherry was having a boy, so it was a huge relief to see her embracing the idea of having a brother so quickly. Especially since she almost immediately started calling him “my baby.”
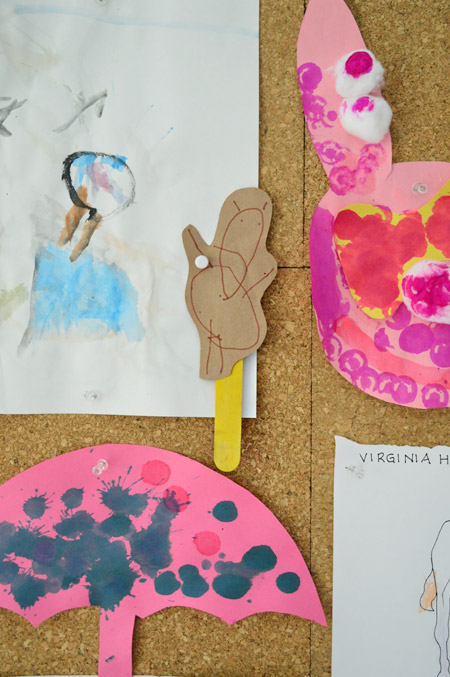
We’re also pretty big fans of this bear-on-a-stick that she made at school. It shows the evolution of her people drawing skills, since they went from just having heads to suddenly having bodies. Although some people still don’t get a torso, so this bear was pretty lucky.
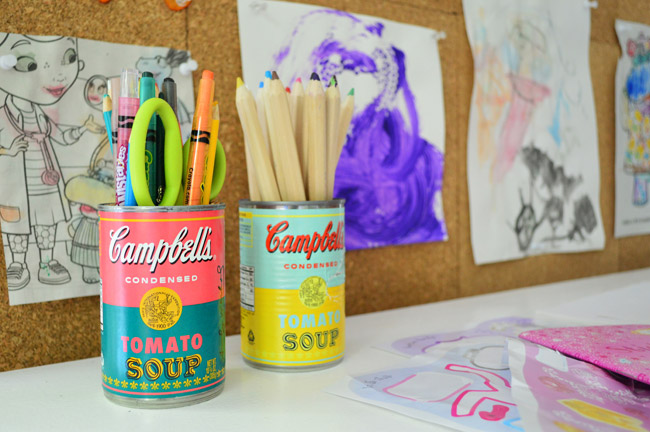
You may have also noticed that our repurposed Campbell’s soup cans (the limited edition Warhol ones from this old project from two years ago) are still going strong.
The rest of the office still hasn’t made much progress, but with Teddy keeping one of us occupied pretty much at all times, there isn’t really a rush on getting the double-desk thing going just yet. For now, Clara will just have to be our most productive office-mate.
Update: We love to share an update when something didn’t work out the way we thought it would – and explain how we fixed it! – so here’s how we dealt with the cork board curveball that this wall sent our way.
Note: This project was originally published in May 2014

Leave a Reply