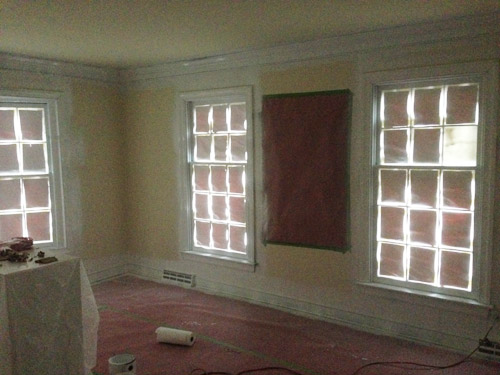
Whilst discussing office plans last week, a few of your comments about the blue trim situation in that room were the push that we needed. We were fooling ourselves to think we should paint all that trim by hand (we’re talking baseboards, crown molding, and five windows totaling 66 individual panes). So we decided to bite the bullet, break out the paint sprayer, tape everything off, cross our fingers and toes that we didn’t get any bleed-through on those wood floors, and say hasta la vista to some more blue trim this weekend.
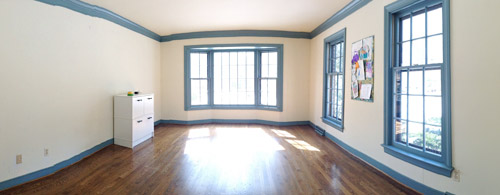
We had painted all of the upstairs trim with the sprayer before we moved in and before the new floors went down, which was an easy no-brainer decision (nothing to worry about ruining). But for the downstairs trim that we’ve tackled (just in the kitchen and foyer so far) we’ve worked by hand – mainly because those rooms needed to remain functional during painting, so we didn’t want to cover them with paper, plastic, and tape while a fog of paint-spray flew through the air. The office, however, didn’t have much furniture to move out, and could easily be sectioned off in a paint quarantine for a few days. So we went for it.

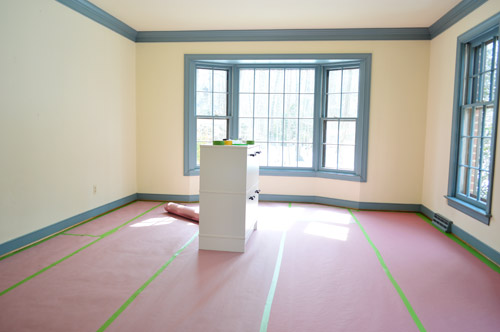
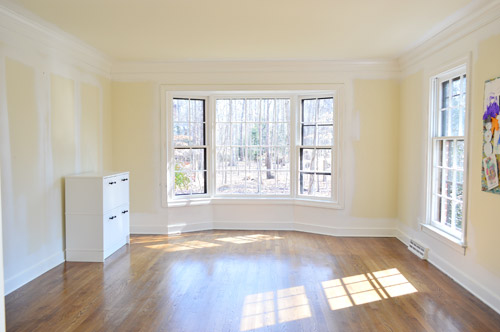
Last Thursday morning we emptied the room (except for the file cabinet, which was heavy enough that we decided just to cover it) and basically took over the dining room and foyer with all of the displaced items. Good thing we’re comfortable with chaos by now.
As excited as we were to attack this blue trim using a new method (we’ve never taped off a room to spray it before) we were both curious to determine if we felt like it was ultimately much of a time saver, since the prep is obviously a lot more intense. Although some things – like wiping down the to-be-painted surfaces and taping off the floor – would’ve happened anyways.
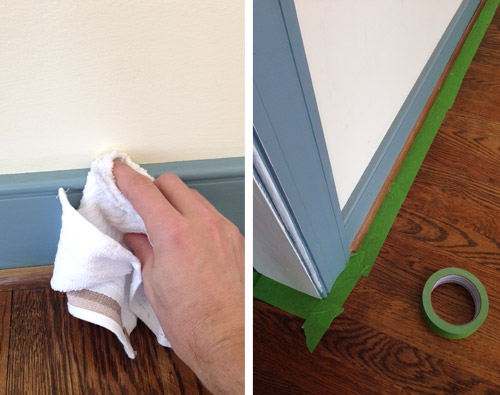
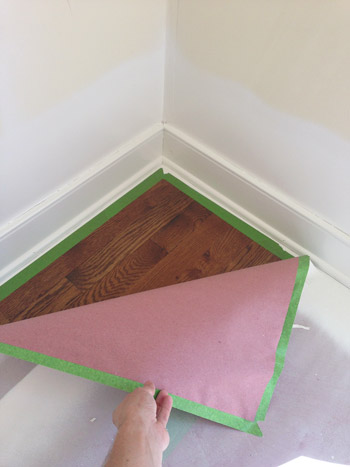
Next we rolled rosin paper out all over the floor since we’ve learned that paint mist gets EVERYWHERE from our particular brand of sprayer (which I’ll admit I’m growing less enamored with – we’ve since switched to this one). We did our tape edging and our rosin paper as separate steps, just so we could focus on getting the taped edges nice and secure (paint on the hardwoods = our nightmare) before shifting our focus to taping each row of paper down. It meant that we ended up using more painter’s tape than we probably needed to, but the extra precaution felt like good nervous-first-timer insurance.
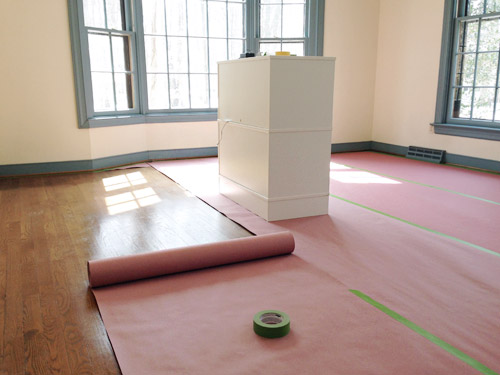
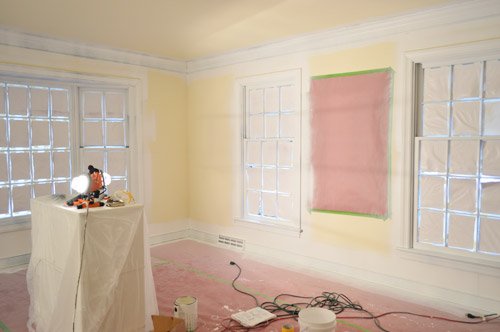
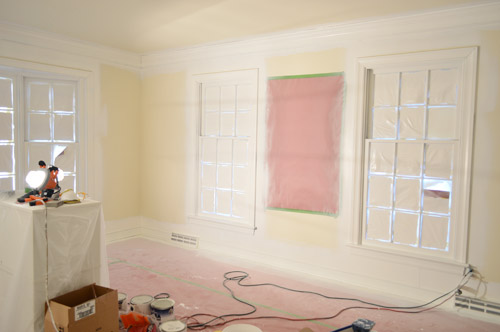
So here’s the room with the floors all taped over. Clara thought it was the coolest thing ever, especially when we let her come draw on the floors while we worked on the next prep step: windows.
I’ll admit I was a bit perplexed about what to do with the windows. I’ve heard lots of talk about “liquid masking film” that you can paint on your windows before spraying, which helps the dried paint just peel off seamlessly afterwards. It sounded awesome, but after reading some message boards it started to feel too good to be true. Lots of pro painters complained that it took 2 or 3 coats of it to work, so most recommended just doing the old fashion scrape technique anyways.
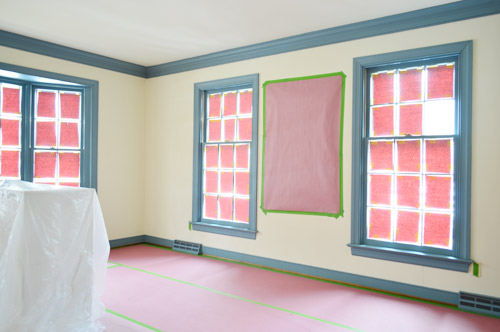
Wanting to save ourselves a bit of trouble, Sherry came up with the idea to roughly cut some rosin paper squares and tape them to the center of each pane. We didn’t meticulously cover every edge, but figured this would at least save us time on the back-end from scraping the entirety of each of those 66 panes. I left one empty just to test if the paper was a waste of time (spoiler: it wasn’t – that uncovered pane was a giant pain!). Oh and that big paper-covered thing between the windows is Sherry’s overflowing bulletin board full of Clara-art that we decided to just cover instead of removing (it was nailed right into the wall at the four corners as opposed to hanging on a hook).
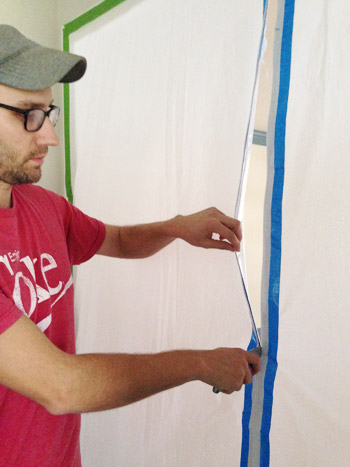
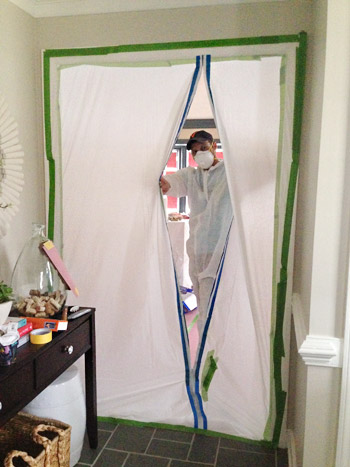
With furniture out (or covered), floors protected, and windows “dressed” our last prep step was to seal off the office from the rest of the house. We carefully taped up a tarp across the doorway (on both the inside and outside of the door frame) and then used this handy instant zipper thing we found at Home Depot (it basically sticks to any tarp and then you slice an opening as you unzip it, giving you a resealable doorway in your tarp. Best $10 we spent on this whole project. That thing was airtight, which meant it single-handedly kept all of that swirling primer and paint dust from sneaking out into the foyer (while still allowing me to enter and exit the room between coats for a lot less hassle than a taped off tarp would provide).
Next, Sherry saluted me and wished me luck as I loaded in all of my supplies: paint sprayer (lately we’ve been using this Wagner sprayer), extension cord, and a can of primer (we used Kilz Premium). I also got dressed in the painters suit and booties that I bought and told Sherry to send reinforcements if I didn’t emerge in a few hours. I don’t know why, but I was actually kinda nervous about how this would go.
Well, it didn’t go great. At least it got off to a rocky start. For starters, my paint sprayer immediately got clogged, so before I could aim it at any blue trim, my hands were covered in primer and my sprayer was sputtering and leaking. About 30 minutes later, I was finally spraying. By this time it was about 4pm, and between clouds rolling in and all the paper on the windows, the room was suddenly pretty dark. And it only got darker as I sprayed the windows with primer. I’m so used to this room being crazy bright that I hadn’t even thought about needing a work light. Oops.
I actually didn’t own any work lights that we didn’t mind getting misted with paint spray (between this and just recently buying a dolly, you guys are probably questioning our preparedness) so I ran out to Home Depot after I was done with the primer coat and bought a couple, along with the trim paint that I’d need the next morning (Simply White in semi-gloss by Ben Moore – but here are some other top white paints you could use instead). The lights revealed that my priming wasn’t perfect, but it’d do the trick.
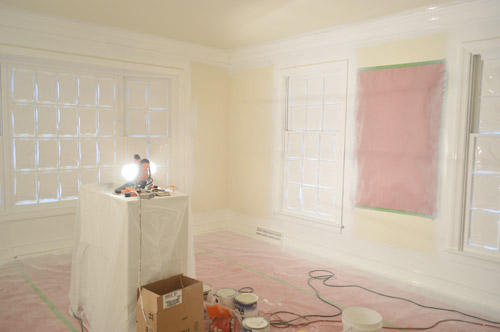
After letting the primer dry overnight (and thoroughly cleaning and de-clogging the sprayer) I woke up early the next morning (Friday) ready for my first coat of paint. This is the room right after I finished that coat. Note the paint fog.
After cleaning the sprayer once again, I let that coat dry the entire day since we had showhouse stuff to do that afternoon in Northern Virginia. I was hoping the next morning (Saturday) would just be a clean up day, but we weren’t entirely satisfied with that single coat of paint. It did a great job covering, but it didn’t get all of the various nooks and crannies of the trim.
This was one of my fears about spraying this room because it’s virtually impossible to get all of the angles and sides of the trim in one swoop, and you can’t just go back right away and spray from a new angle because you’ll apply too much paint and get drips. So instead of getting to dive into clean-up with Sherry on Saturday, I did a second coat of paint in an effort to get those spots that the first coat missed.
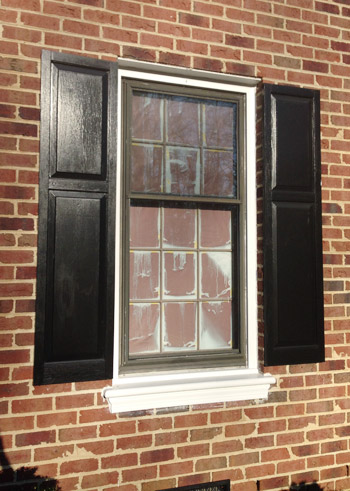
So now we were on Day 3 of paint quarantine in our office, which was also looking not so pretty from the outside. Luckily by now I think the neighbors are used to us always being the middle of a project, so it doesn’t really raise many eyebrows anymore.
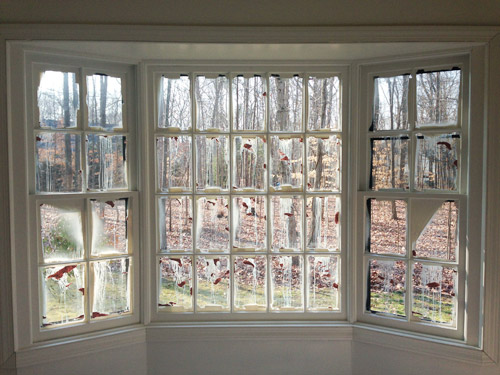
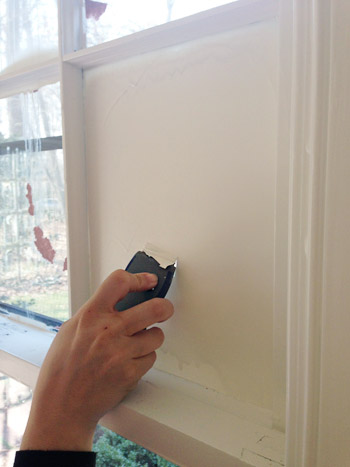
We let the second coat dry all day Saturday, and started the clean-up process yesterday morning. You can tell by the photo above that our homemade window coverings were far from perfect. We learned just how imperfect they were as we started to peel them off… leaving chunks of rosin paper stuck behind in various places. I was ready to curse our decision, and the time we had invested, in those quick little coverings.
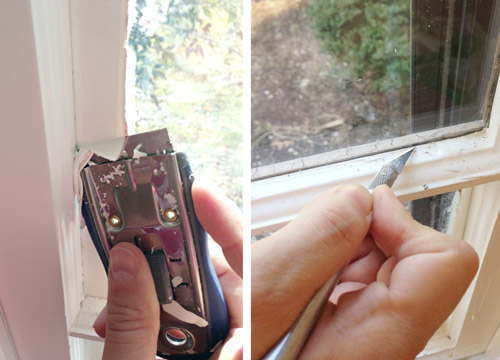
Sherry and I tag-teamed window scraping, since neither of us had the stamina (or the hand strength) to scrape 66 windows clean ourselves. The coverage was so thick (one coat of primer, two of paint) that it took lots of effort to peel it off, but some serious scraping did the trick. In the end, the best method we found was using straight razors to get most of the windows clean, and then going back to scrape the corners with an exacto (we also tried using a putty knife for those corners, which was a little bigger and harder to control, but also worked semi-well).
This basically ate up half of our Sunday (with breaks to feed Clara, hand her a few new activities, take bathroom breaks, etc). It sucked. I won’t lie. The whole time I was brainstorming what I’d do differently and it mostly boiled down to not owning windows, which I don’t think is a great solution.
But I said above that we don’t regret the rosin squares. That’s because the pane that we’d left completely uncovered was ten times worse. Maybe even a hundred times worse. My fantasies of this one magically peeling off in one giant sheet were far from reality. It was hard and grippy, so we could only chip it off slowly. It took Sherry a good 30 minutes to do just this one pane.
But by around one in the afternoon we had them all cleaned and enjoyed a nice celebratory lunch. It was glorious to have our bright office back (and even brighter).
We considered calling it quits from here (our hands were both aching) and we thought it might be nice to leave the paper down while we painted the rest of the room (walls & ceiling), but I was getting paranoid that our rosin paper on the floor had only performed as well as it had on the windows (I was picturing giant blobs of paint having leaked through) so we went ahead and peeled it up. And it was PERFECT. Phew!
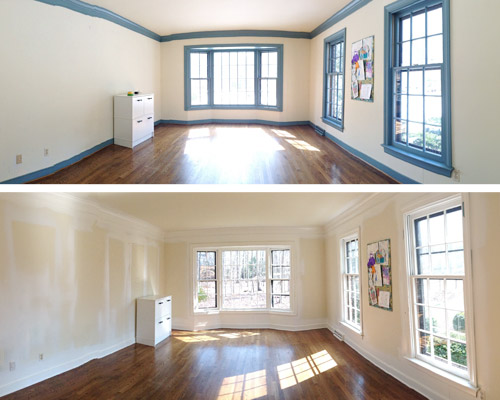
So here’s the room as of now (Sunday afternoon, when I’m writing this). It’s looking a bit gnarly with all of the over-spray beyond the trim on the walls and ceiling… but there’s no blue in sight!
We’re excited to go ahead and paint the ceiling and walls, since we figure it’ll be easier with all of the furniture still out. And we’re used to painting without the floors being completely covered, so there was no harm done by pulling up all that rosin paper.
But our trim-painting task isn’t quite over. For some reason my second coat of paint was especially drippy (once again, I’m less enamored with our sprayer than ever – we now use this Wagner sprayer), so we had to sand down a bunch of spots that are still in need of some paint touch ups by hand.
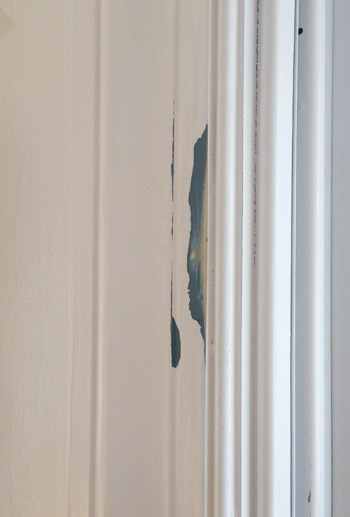
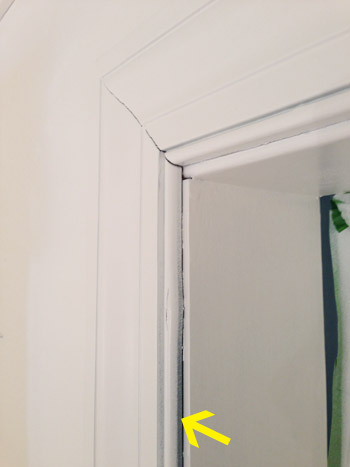
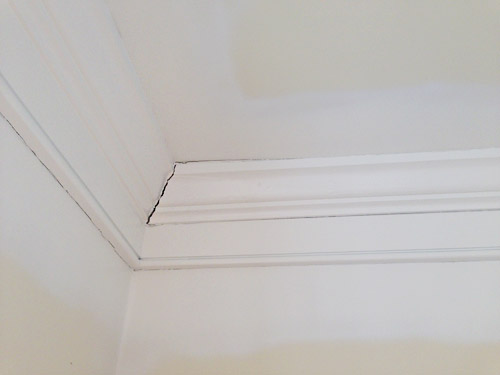
But before I break out the touch-up paint, we still need to do some caulking. I didn’t realize how rough some of our trim was looking until it was all painted white. So there are a bunch of spots where the moldings and walls meet that need some filling.
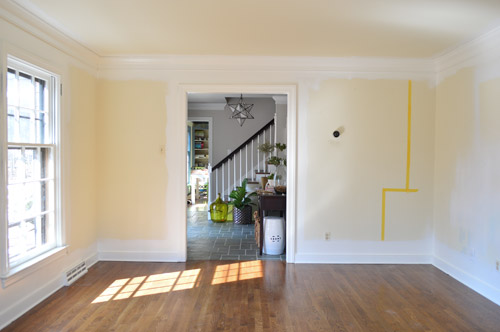
I also never noticed how yellow the paint was in there until now. Sherry and I are still debating colors. We’re both thinking of something nice and light, but not white – and maybe with a hint of color. Not sure yet. Though you can see below that we’re starting to tape off where things like the built-ins might go, just to try to picture everything and make a final call on layout/placement.
Oh, but the verdict on spraying vs. painting by hand? I’m not totally sure yet. Spraying was definitely WAAAAY faster when you just measure the time spent painting. It took me just about 30 minutes to do a single coat, so one primer coat and two paint coats were a total of just 1.5 hours spent spraying – versus a single coat probably taking around 4+ hours by hand. But we’ve still got some kinks to work out in our prep/clean-up system before I’m convinced it’s less trouble overall (for example, when we paint by hand, we don’t get nearly as much on the windows so it’s a lot easier to scrape, and we don’t have drips in the trim that we later have to sand and touch up).
I’d love any tips or suggestions from those of you who are more well-practiced in the art of paint spraying. We plan to spray the dining room when the time comes since, like the office, it has little furniture and can easily be sectioned off. So I’d love to work out some kinks before taking that room for a spin – and then share all the “this worked better” tips when we get ‘er done. Can you believe that room is our last room with blue trim?! It’ll be a big day when it’s done.

Leave a Reply