This kind of spoils the whole “wait for it… here it comes…” build-up, but I had to lead with an after picture for you guys.
It’s a super affordable, deceivingly simple thrift store table upgrade. Seriously, don’t tell me you can’t do this. You can.
And I’ll give you one of these if you say you can’t.
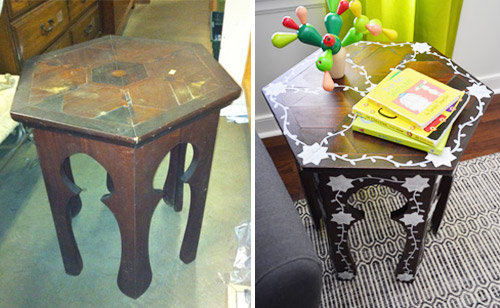
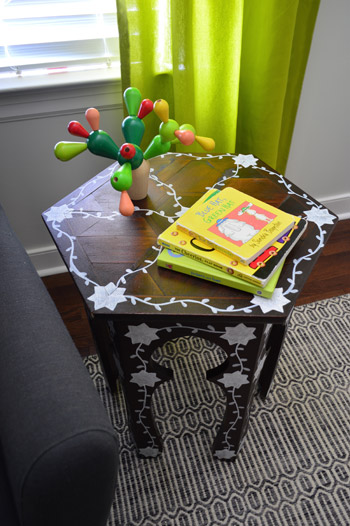
Do you remember the $25 thrift store Moroccan table that I brought home nearly two years ago?
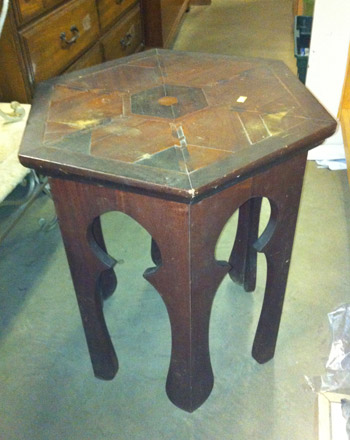
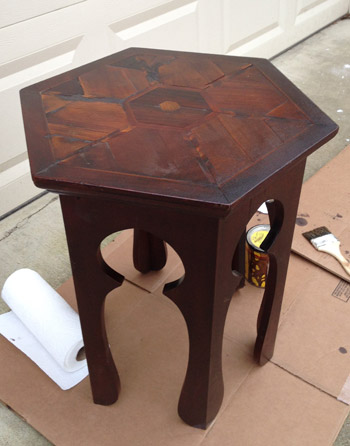
Even after cleaning it up, the top still had a few issues, but I didn’t want to rush into altering it right away (like attempting to putty, sand, prime, and stain/paint it) so I just tossed a few things on the top to hide those cracked and water-stained areas. John and I really liked the wood tone and the cool interlocking shapes on the top anyway, so we thought living with it as-is for a while was the way to go.
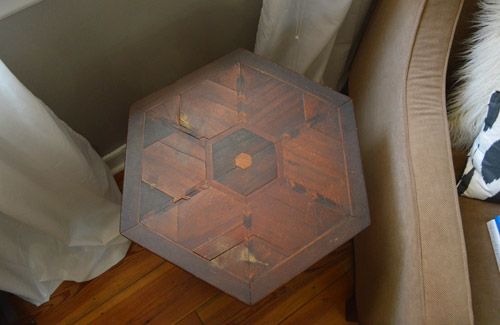
Fast forward nearly two years, and well, we’ve definitely lived with it for a while. No sir, there was no rushing into anything with this guy. But the years haven’t been very kind to the top of the table. And by “the years” I mostly mean Clara, who figured out that she could pull little wood shapes out of it like a puzzle.
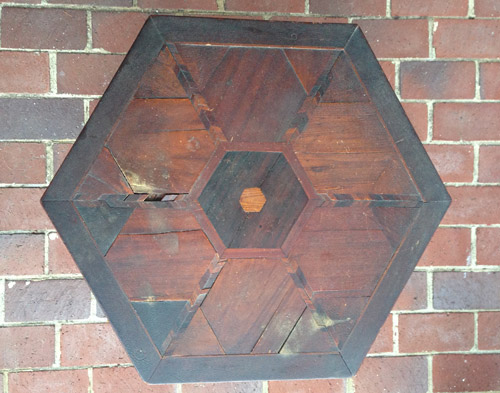
Some areas were a lot looser than we thought, and a few pieces even started to pop out and get lost in the shuffle.

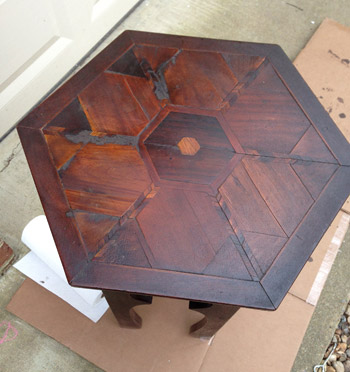
The temptation to paint our bedragged little table definitely came back full-force as it continued to fall deeper into despair. Especially when we started noticing sweet little versions like this and this popping up. Meanwhile, our old thrift store find was giving off that “uh, you don’t really have much to lose at this point” vibe. So we thought “let’s just try refinishing it, and if that backfires we can always paint it as a backup.” The first step was sanding it and adding some wood filler to those cracked, broken, or uneven areas.
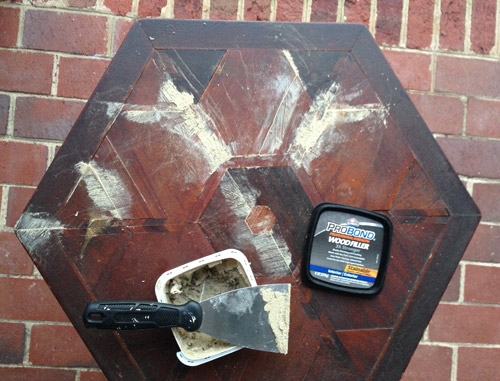
We had luck using this same type (and tone) of wood putty with our dark-stained kitchen cabinets (more on that here), so although we debated running out to buy some darker wood putty for this project, we figured we’d have the same luck with being able to even things out with a little more stain on those puttied areas. That last sentence is foreshadowing. Feel free to read into it.
After everything was dry, we sanded those areas, and then it was stain time.
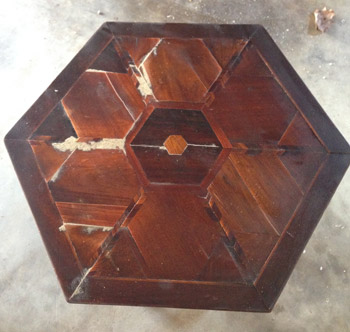
We wanted the same rich reddish-brown tone that it had always had, so we went with Red Mahogany stain by Minwax (we’ve had the same can since using it on Clara’s two-tone dresser four years ago). After two coats – applied with a brush and wiped off, per the instructions – it was clear that those wood puttied areas were being a lot more stubborn than they had been when it came to our kitchen cabinets. Bummerz.
So I did what I usually do whenever a project goes wrong. I stepped away from it for a while and John and I started working on something else and ran to Home Depot for some other materials. In other words I just tried to forget about it for a little while – hoping some solution would come to me. Honestly I expected the solution to be “well, we said painting was a backup plan and it sounds like that’s the best option.”
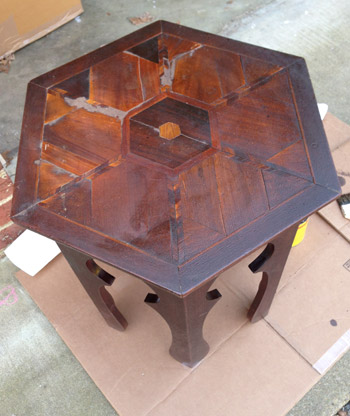
Then as we pulled into our garage after returning from Home Depot, stain markers popped into my head. I knew we had one in a dark color since I occasionally use it to touch up the dark wood furniture items that we have (like our foyer console table, Clara’s dresser, our sofa table, etc), so I figured I could just give that a go on the wood puttied areas to see if it might darken them up so they blended better.
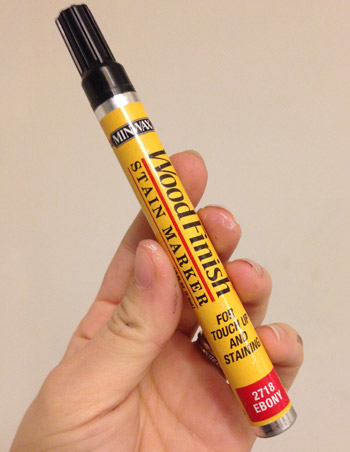
Miracle of all miracles, it worked. I just scribbled it on and gently wiped it with a paper towel to blend it all in.
It didn’t completely hide the putty (you still can see those spots when you stare at the top in this picture) but it definitely was a nice leap closer to the not-as-obvious effect that we were going for.
And that’s when I had another idea to completely obscure them. What if I didn’t paint 80% of the table, but I added some interest in a few areas with an inlay inspired detail? I figured that might draw the eye away from those patched spots while adding some fun detailing without completely robbing the table of the wood look like a full-on paint job would. I even found this example in an binder full of magazine tear sheets since I vaguely remembered thinking about that as a “down the line” idea a year or two ago. Turns out I had even written myself a little note so I wouldn’t forget.
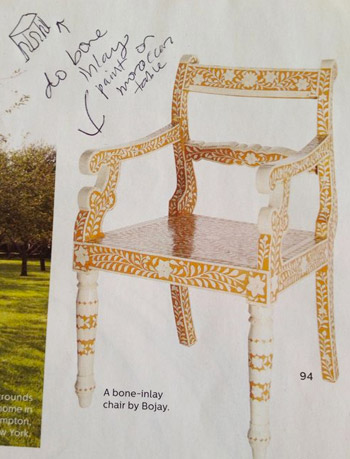
It’s definitely not a tame idea (ok, maybe it falls into the “kinda crazy” category) but I figured we didn’t have much to lose, and John was down with the idea too. So with his blessing it just came down to the “how” of the project. I considered everything from stencils and stamps to attempting to freehand the whole thing, and landed on a combo move: freehanding the leafy vines that connect everything but creating a cardboard template for the star-like shapes that seem to be on a lot of Moroccan designs.
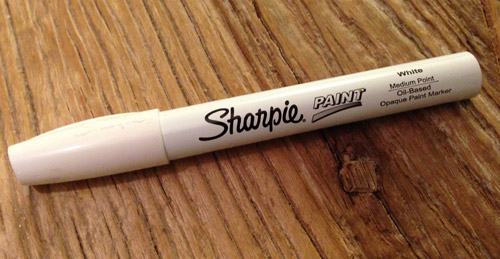
I thought a paint pen would give me more control than a paint brush, so I decided to try that first. Thankfully this Sharpie paint pen worked well, so I’d recommend it – but be sure to use their oil-based version (they also have a water-based one that I love) if you’re using it on a stained piece of furniture to avoid any bleed-through. To avoid fumes, I just opened a bunch of windows and Bane-d things up with my respirator so I wasn’t breathing anything in that I shouldn’t be.
To make my cardboard stencil I found a seven pointed star online, printed it out onto card stock in a bunch of different sizes, picked the size I liked best, and cut that one out. As for how I landed on seven sides for my shape, I noticed some Moroccan designs that had five, six, seven, or eight pointed stars – so because seven is our favorite number I went for that.
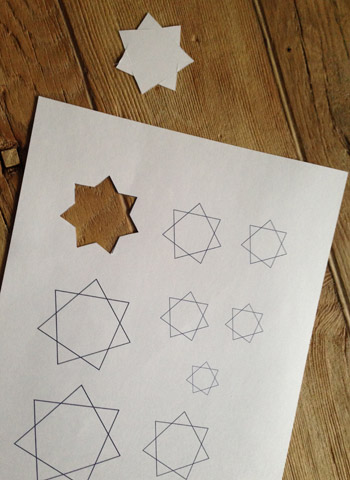
I traced that onto a piece of cardboard and cut it out. Then it was as simple as tracing around that like a template right onto the table, and filling it in (it took a few coats of “filling in” for things to look nice and solid, so pardon the sketchy look of these progress pics). Note: in hindsight I wish my stars were a smidge smaller, so choosing a star printout that’s a little smaller than the one you want will probably yield the perfect size since the traced outline makes it slightly bigger.

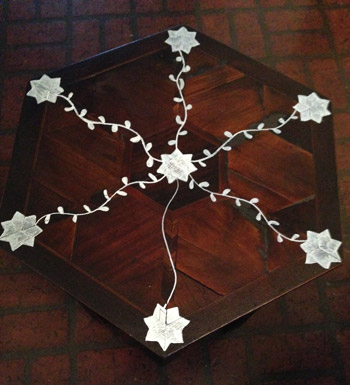
I drew one of them in the middle of the top and one on each of the corners, and then I just made random sort of wavy lines to connect them all.
Those were the simplest part, and adding little leaves on alternating sides turned those squiggles into vines. If you tell me you can’t do this I’ll challenge you to a duel with a paint pen, because you can. Anyone can. Just practice with a marker on a piece of paper, and make some wavy lines and add some leaves. It’s crazy easy, I promise.
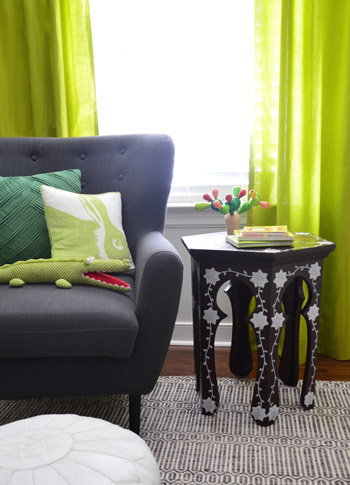
Then I just added more vines to connect the outside edges. This is before I did one more “coat” for the stars, so it’s still a bit sketchy looking in a few places. The cool thing about adding the faux inlay detailing was that it made the puttied parts virtually invisible, thanks to adding a lot more contrast with that white detailing. Can you even tell where the putty is anymore? It’s amazing what a little “look over here” diversion can do for a cute-but-flawed patch-job on an old secondhand table.

To do each of the six sides of the table, I laid it down on its side and worked on each one at a time – adding a star to the top, middle, and bottom of each leg, and connecting those with a hand-drawn leafy vine.
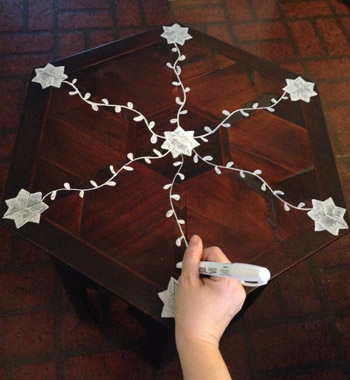
As I mentioned, the paint pen filled those stars in sort of sketchily, so I went back over all of them with another “coat” to make them look more solid. The vines were fine with one coat though, so it didn’t take too long. I actually might do one more star coloring session to make sure they’re solid looking before I use Safecoat Acrylacq to seal it all in (that’s our favorite non-toxic poly alternative).
Overall this entire refinishing process took a few hours and the inlay inspired stenciling/freehanding probably took two more, so it wasn’t as fast as painting it a solid color, but it was really fun to try something new – especially since this design is so common on Moroccan tables, and we still get to enjoy that pretty wood tone coming through.
Considering that some of the real-deal mother of pearl inlay tables sell for over $1000 (!!!) I’m cool with this $25 “look for less” result with some paint on our sweet little thrift store find. We had everything that we used in our arsenal already, but even if you had to buy wood putty, stain, a stain pen, and a paint pen, you’d only spend around $25 on materials.
It’s definitely one of those bolder furniture moves, so it’s probably not for everyone, but it was fun to try something different. And the nice thing is that it’s not too much of a commitment, so if we tire of it down the line we can always sand it down and re-stain it, or even paint it a solid color someday.
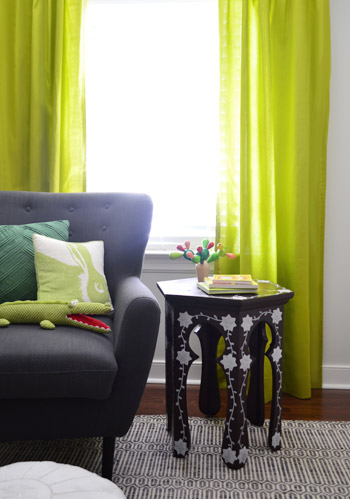
Right now it looks pretty sweet in the nursery since there are other wood elements in there (the built-in dresser tops, the crib drawer, the wood wrapped toy cabinet, the wooden bike frames) but we’re not sure if it’ll stay there for the long haul. You know we’ll keep you posted!
Were any of you making over any furniture this week? Have you ever tried one of those stain pens on wood putty? Or a Sharpie paint pen? I was so relieved that the stain pen helped and the paint pen actually worked (I think my lines would have been a little harder to control with a craft brush). When a project stalls out, how do you deal with it. Do you walk away and work on something else? Google around for ideas? Consult your all-knowing chihuahua?

Leave a Reply