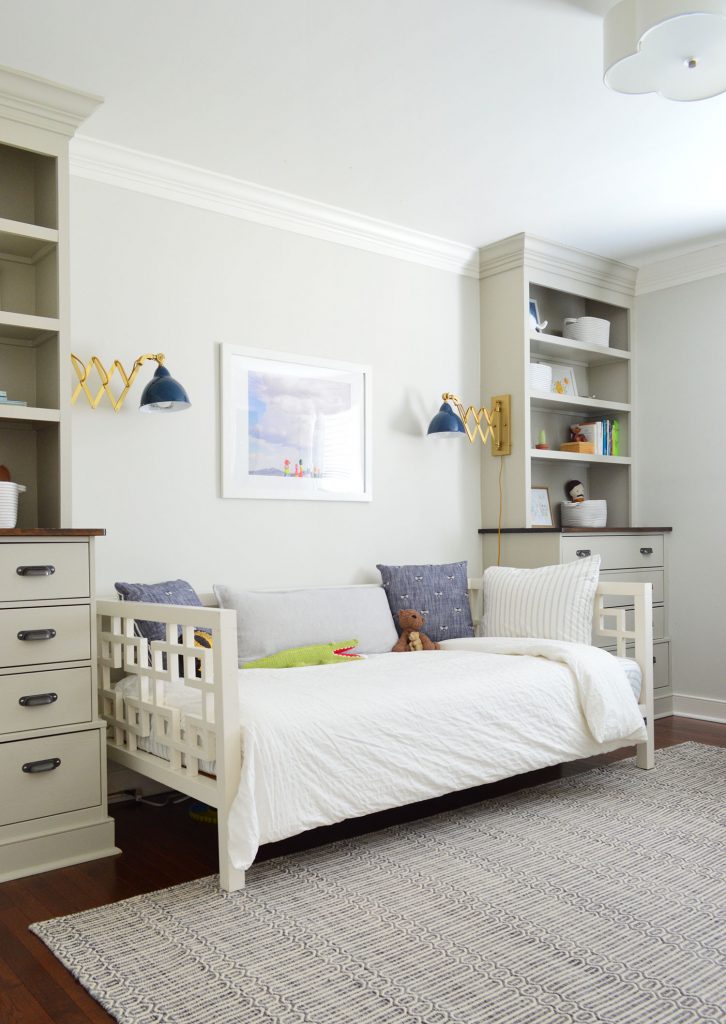
Today we’re going to show you how we built the bookshelves in our son’s room. It’s an easy project that we’ve since used to create custom shelving everywhere from our living room to our beach house pantry. But these bedroom shelves were our very first attempt at them and we absolutely loved how they turned out.
This tutorial specifically focuses on building the actual shelves, aka the top portion of these built-ins. You can separately read about how we first built-in the cabinet bases (it’s an Ikea hack!) and later finished them off with crown molding. But since not every bookshelf needs those features, we’re talking just about the shelving today.

You also can take a tour of the finished room both in it’s initial version as our son’s nursery and then later when we updated it with a big boy bed.
Tools & Materials To Build A Bookshelf
Here are the supplies and tools you’ll need to build your bookshelf. If you don’t have a table saw or circular saw, try renting one from your local home improvement store. Some stores will also cut your wood for you, but this is a project where you’ll really like having one around.
- 1/2″ MDF or plywood for the shelves
- 1×3″ pine (ripped in half) for support pieces
- 1×2″ pine for face pieces
- 1×4″ or 1×6″ pine for top brace
- Measuring tape
- Stud finder
- 24″ level
- Clamps
- Nail gun with finish nails
- Miter saw
- Table saw
- Circular saw
- Power drill/driver
- Wood glue
- Paintable caulk
- Primer & paint
- Painting supplies
The exact amount of wood you’ll need depends on the specs of your bookshelf build. That’s why the first step is so important!
Step 1: Plan Your Build
Start by measuring your space and sketching out your bookshelf on paper. This will help you figure out how material you may need. You can still adjust as you build (like you might change your shelf spacing as you go) but always take time upfront to make a plan. For us, this made sure we bought enough – but not too much! – plywood for our shelving. You can see below how figuring out exactly how to maximize a 4×8′ sheet of plywood was almost like a puzzle.
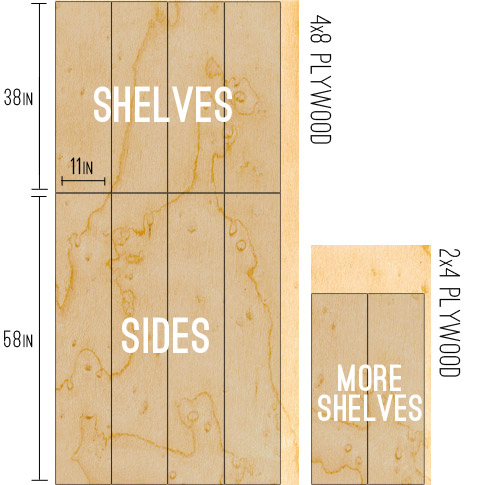
NOTE: We used plywood for this build to better match the subtle wood grain in the base cabinets. However, for a smooth, painted finish we recommend using MDF instead.
Step 2: Cut Your Shelf Pieces
The first building step is to cut your plywood or MDF into the big shelves and side pieces. You can do this with a table saw or circular saw, like you see below. That photo is actually from our pantry shelf project because we got our plywood cut in-store for these bedroom bookshelves. The Home Depot guy ripped my plywood into 11″ strips after seeing my sketch, which was a huge help. He was able to lock his big saw into place to ensure I got equal and even cuts on all of my shelves.

If you are cutting at home, I recommend careful measuring and taking your time. You can also see above that I had clamped two pieces of MDF together so that I could make two cuts at once to ensure the shelves matched.
Step 3: Prime & Paint Your Shelves
We find it easier to paint all of our big pieces BEFORE installing them. It’s typically easier to paint flat surfaces with a roller when you don’t have to worry about edging against walls or cutting in to corners. You will still need to do some touch-ups after building, but this saved us a lot of time.
Just be sure to prime the pieces first, especially if you’re starting with raw plywood or MDF. The color we used was Benjamin Moore Senora Gray.
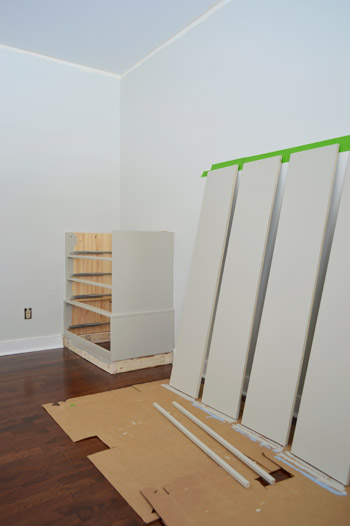
Step 4: Build Your Bookshelf Frame
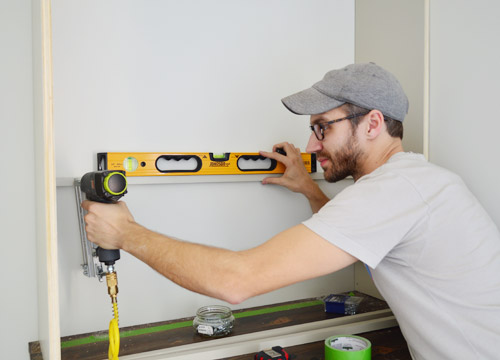
One our paint was fully dry, we began construction by securing one of the tall side pieces directly into the wall. We used a stud finder to locate studs and attached the piece with countersinking screws that we could putty over later.
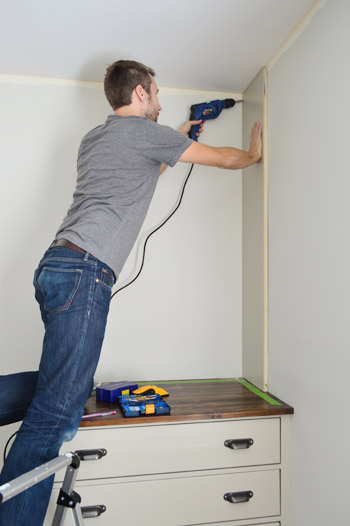
Attaching the next side piece was a bit more involved since I wasn’t screwing directly into a wall. I knew it would become sturdy once I added my shelving, so the challenge was to keep it in place in the meantime.
To do that, I attached a 1×3″ brace piece along the top of the back wall into a couple of studs. This piece wouldn’t be visible in the final bookshelf, but it gave me a place to screw the vertical side piece into. An alternative plan would’ve been to purchase a large piece of MDF or plywood to act as a solid back behind the bookshelf. We opted to just use the wall itself instead, mostly to cut down on cost.
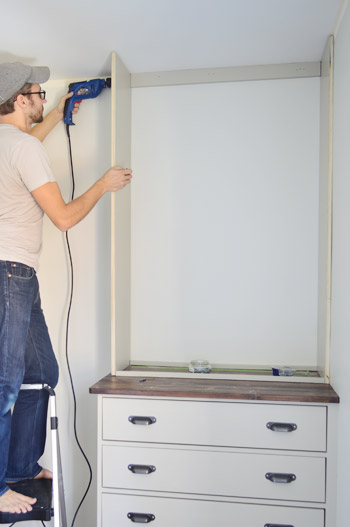
I also add a 1×6″ brace piece across the front of the bookshelves to help keep things square. I hadn’t planned on this piece originally, which is why it’s not painted.
You can also see some pieces at the bottom helping to keep things square down by the base of the bookcase. These were cut to the same length as the eventual shelves just laid there temporarily.
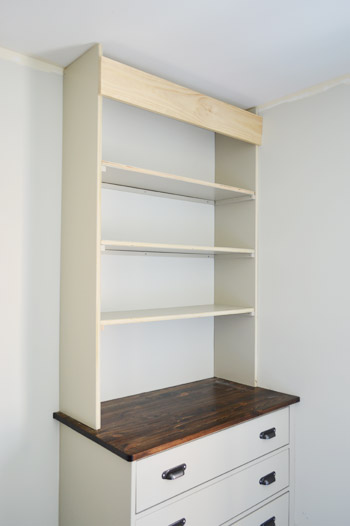
Step 5: Add Your Shelves
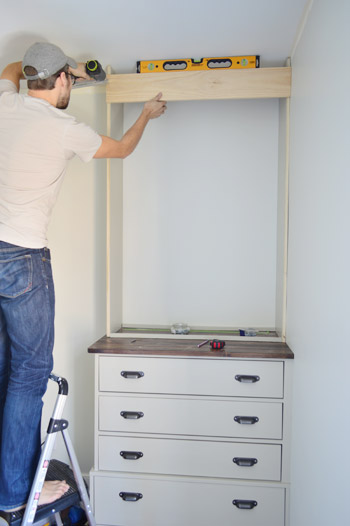
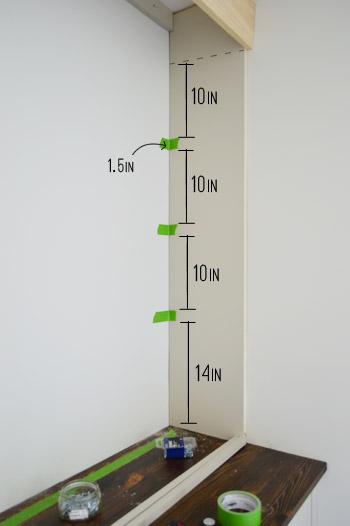
With the sides in place, we turned our attention to the shelves. First we needed to finalize our shelf spacing, so we broke out a ruler and some painter’s tape to help visualize spacing options. Ultimately we ended up with evenly spaced 10″ shelves with a little bit of extra room at the bottom. Just be sure to account for the 1.5″ width of the shelves themselves, as represented by our painter’s tape.
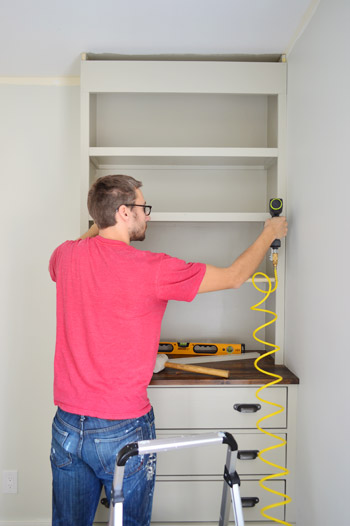
Next it was time to attach the shelf supports. These are thin strips of wood under each shelf on 3 sides. I cut these pieces by ripping a 1 x 3″ along my table saw into .75″ wide pieces. This will make more sense in a moment, but any thicker than that and the supports would be visible below the face pieces added later to the front of each shelf.
I first nailed the braces into the wall and the sides being sure to keep things level as I went. This was just a speedy way to get everything in the right place. Then I went back and screwed each piece more securely into a stud (along the back) and into the wood (along the sides). This enables the shelves to bear more weight over time.
Once all of the support pieces were screwed in, it was easy to pop the plywood shelf pieces into place. After all, we’d already cut, primed, and painted them!
I also nailed each shelf down into the brace piece so they won’t pop out or jiggle or anything.
Step 6: Finish With Face Pieces
The next step is my favorite because it makes the bookshelf look way more finished. We cut and nailed in 1×2″ pine pieces (already primed and painted) to cover all the exposed edges along the front of the shelves. This not only hides the raw edges, but also makes your shelves look thicker than they actually are! This is also why you want those support pieces cut thinner in the previous step.
You can also see before this step I had done some painting – both the back wall and the brace piece at the top. I also had done some caulking, but you can do this as a final step as well.
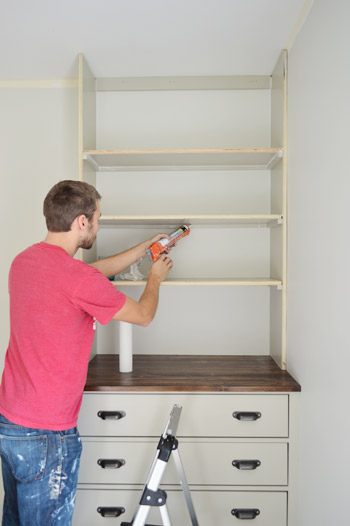
Step 7: Caulk & Touch-Up Paint
Once everything is constructed, you’ll want to caulk your seams, fill any nail holes, and do any necessary touch-up paint. The caulking will take some time, since you’ll want to caulk any place two surfaces meet: shelf meets wall, wall meets support piece, support piece meets shelf, etc. We did a little bit of this as we went, especially to fill gaps where our wall wasn’t very flat.
Once your caulk is dry, you’ll need to do touch-up paint over it. This may feel tedious because you already painted, but I promise you this is much faster to do quick touch-ups than be painting from scratch at this point.
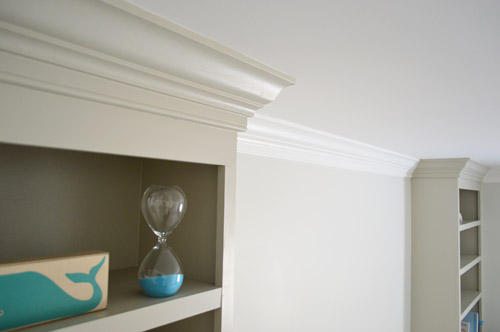
Step 8: Add Crown Molding (Optional)
For our bookshelves, we decided to finish off the top with crown molding that integrated with the crown we’d put installing around the whole room. We would be using a “beefy crown” method we’d tried first in our daughter’s room. It’s involved putting a piece of baseboard around the top of the room first, to make the crown look thicker.
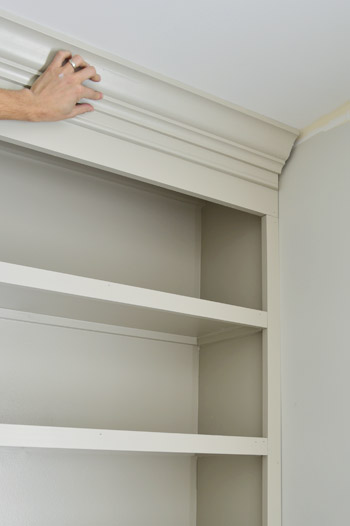
You can read more about the process of installing crown molding in this room.
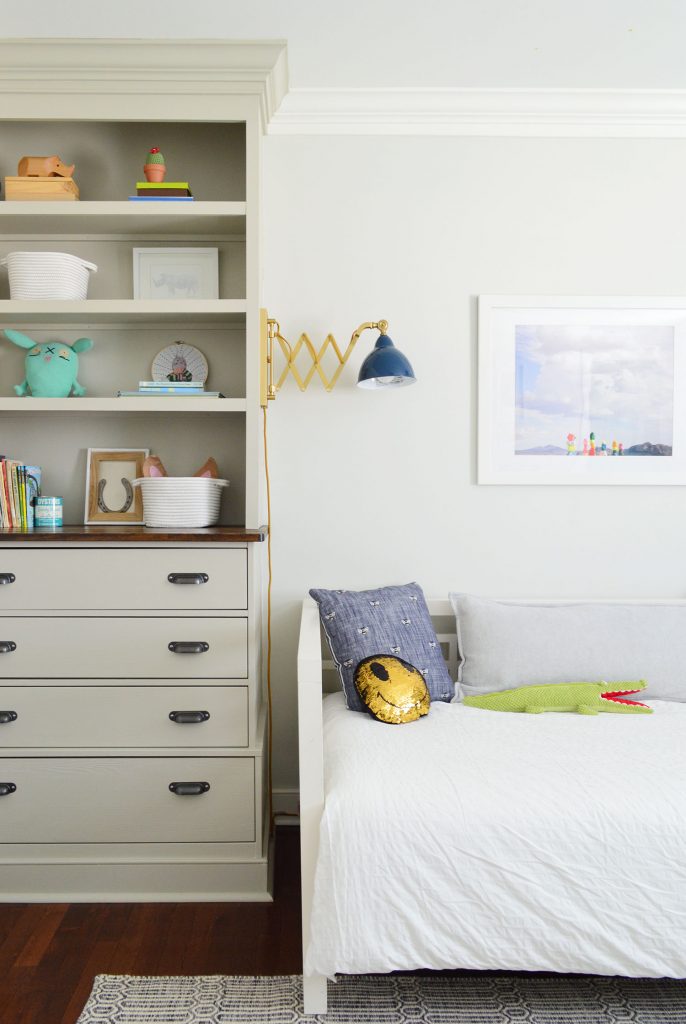
We love how these bookshelves turned out, especially how easy and affordable they were to create – they were about $60 each. And that includes all of the material for the bottoms too! They’ve also been great for both functional storage and cute display items.
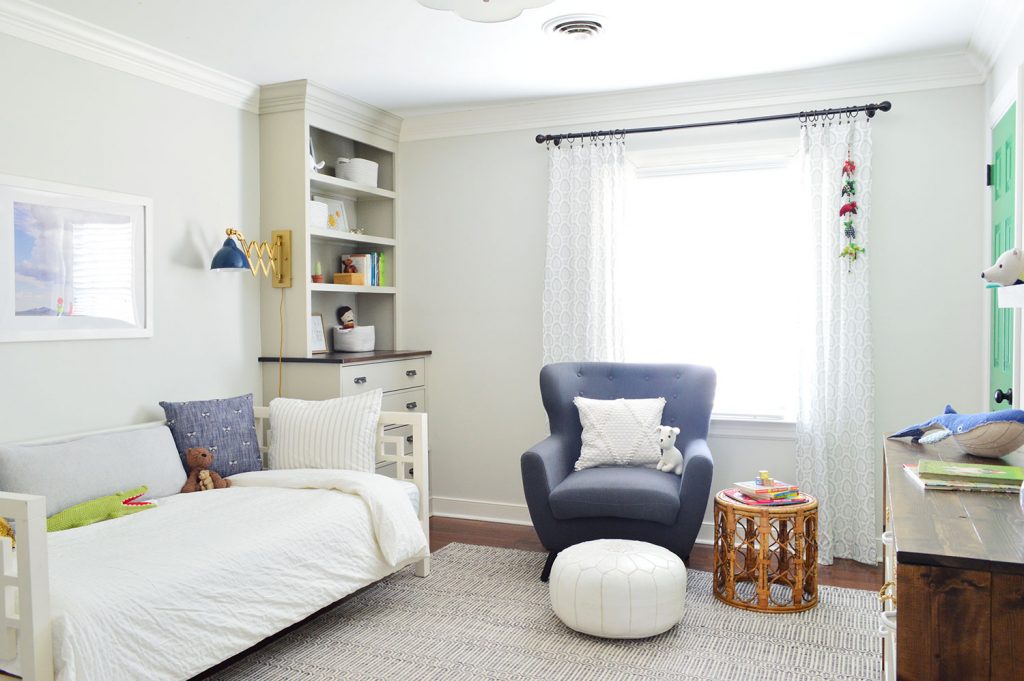
Again, you can read more about how we finished this room in its first iteration as his nursery, and then a few years later as a big boy room.
More DIY Shelving Projects
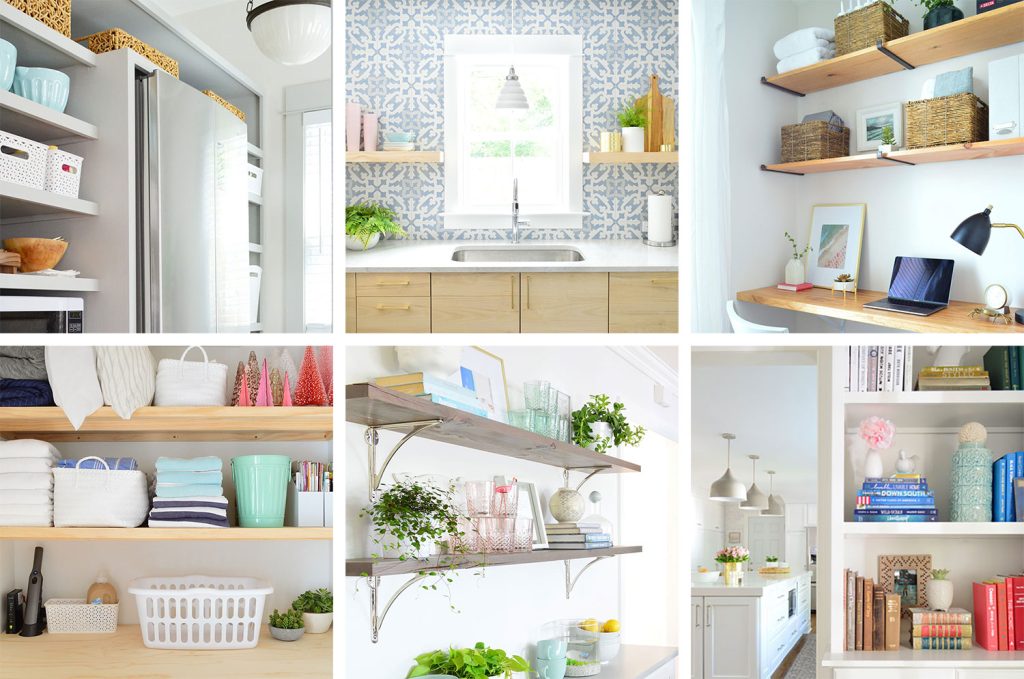
If you’d like more DIY shelving ideas, we wrote a roundup of 15+ shelf projects you can build yourself. You can even see how we used a similar technique shown here to create kitchen pantry shelving!
P.S. And when it comes to the items in our house, we hear “where’d you get that?!” a lot – so here’s a page full of our home’s paint colors & stuff we’ve bought/loved.
*This post contains affiliate links*

Leave a Reply