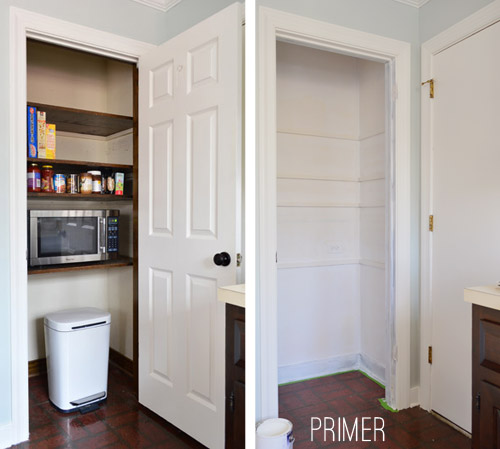
Thanks for all of your thoughts and suggestions on the beginnings of our pantry project on Tuesday. We’re kind of swimming in ideas for what to do, but for starters we knew we wanted to take everything out (even the door off its hinges) to begin the process of priming and painting.
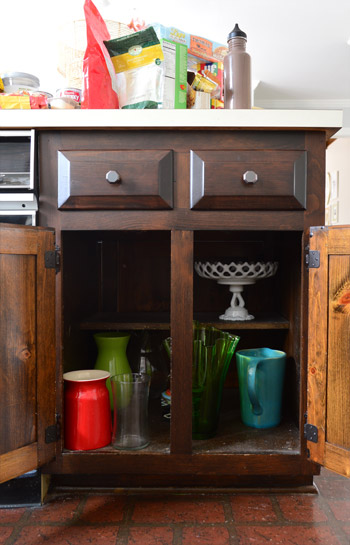
And, thanks to the conversation between Sherry and I that Tuesday’s post sparked, one thing that won’t be going back into the pantry is our trash can. Instead, it’s gonna go into this cabinet right here. This the cabinet on the end of our peninsula, facing in towards the prep area (as opposed to the eating area). Just ignore all of the pantry cast-offs on the counter.
Although we didn’t have any odor issues with our trash can in the pantry after a month or so of use that way (we initially worried about that and mentioned it here), our decision to move the garbage out of the pantry was three-fold.
- We knew that bottom space could be more functional for storing stuff if so much of it weren’t taken up by the trash can (and trash can lid-clearance).
- When we really thought about it, having a kick-step trash can wasn’t nearly as hands-free now that we had to open the pantry door and then get our foot in there to open it – so one of those moves (either pulling something open with our hand, or stepping on the can when it’s out in the open) would be more efficient than both.
- This cabinet wasn’t doing a whole lot except for housing a few vases. Hello missed opportunity. Nice to meet you.
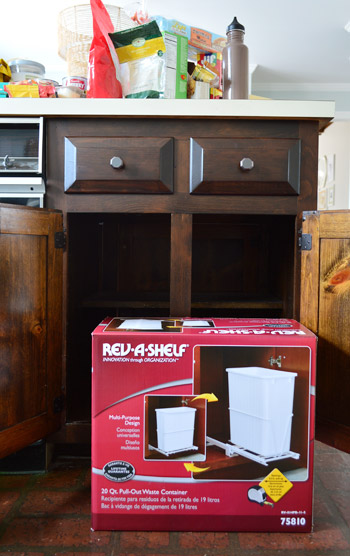
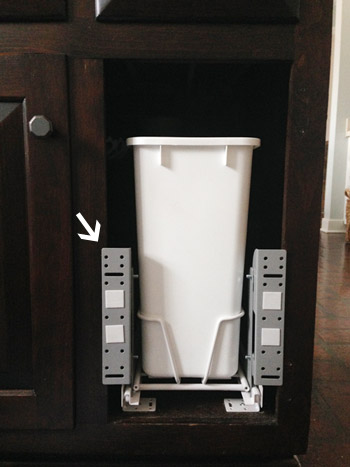
Rather than just jam a trash bin in there, we decided to purchase a product that many of you recommended in the comments on Tuesday – one of these Rev-A-Shelf pull-out containers. They also sell a larger version with two cans, but we didn’t have a cabinet that would easily accommodate that configuration – and we figure one small can will encourage us to empty it more regularly (we have a plan for our recyclables too, but we still need to flesh that out).
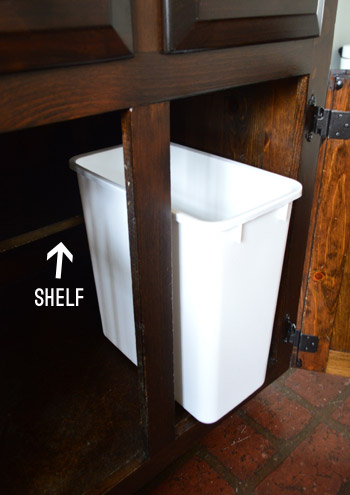
The somewhat frustrating thing about this cabinet was that it wasn’t a natural fit for the system, thanks to this barely visible half-shelf (it’s in all of our lower cabinets, and it prevented the can from sitting all the way back). That shelf doesn’t just slide in and out – it’s nailed in on all sides so it’s permanently built-in, as opposed to being removable or adjustable. Urgh.
But that didn’t stop me. I knew I’d just have some wood cutting in my near future. So I followed the instructions, lined up the paper template in my shelf, drilled some pilot holes, and then screwed the two tracks into the floor of the cabinet.
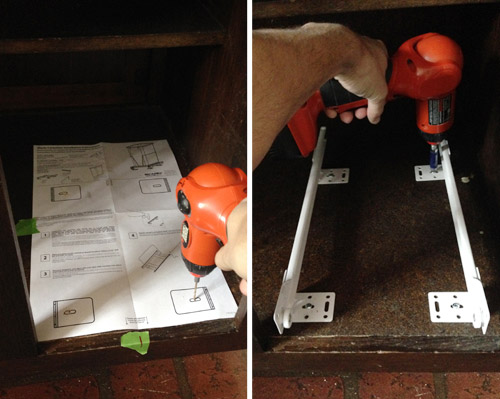
Then I snapped the other pieces into place, which took very little time. The entire conversion would’ve taken no more than ten minutes if I didn’t have my little half-shelf issue to deal with. But at least having the track in place meant that I could mark the shelf with where I needed to cut (note the green tape).
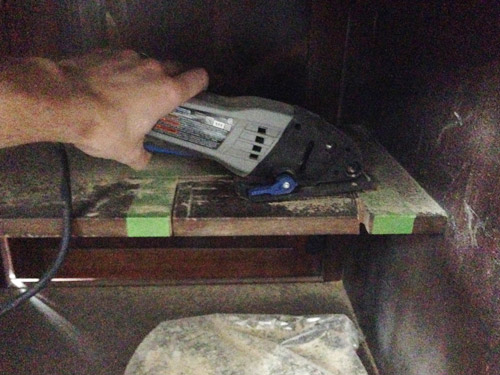
I only need to notch out a 3″ deep by 8″ space for the can to slide into, so I broke out my Dremel Sawmax (here’s the one we have) to do my dirty work because it’s fairly small and good at plunge cuts (i.e. I can plunge the blade into the wood at any point). It was a fast cut to make, but sure was messy. It spewed sawdust everywhere, as you can sorta tell from my awesome iPhone pic. You’ll have to forgive me. I was actively being sprayed with sawdust.
With everything cleaned up, the can slid back into place, and even the vases put back – I could’ve called this project done… but I wasn’t satisfied.
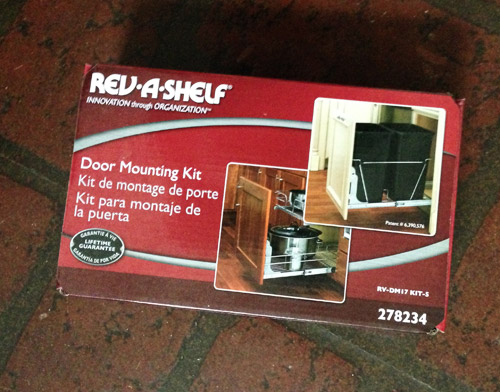
Next to the pull-out cabinet converter, I saw that Rev-A-Shelf also sold a Door Mounting Kit, which intrigued me because it meant that I could further make our old cabinet function like a newer one.
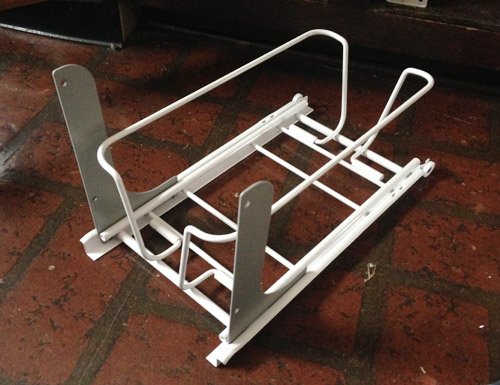
The installation of this was less straightforward – partly because the instructions were a bit vague. But the gist was that you had to install these two bracket “fins” to the sliding portion of the trash can tray.
This was easier said than done considering the nuts and screws were tiny and hard to hold in place. Made me wish I had tiny Kristen Wiig hands.
Once those were attached, you bolted on some larger brackets – which is where you’d eventually attach the cabinet door.
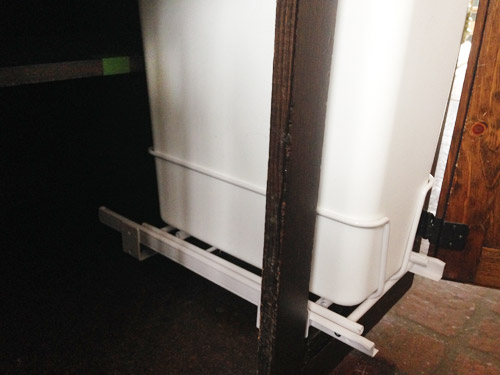
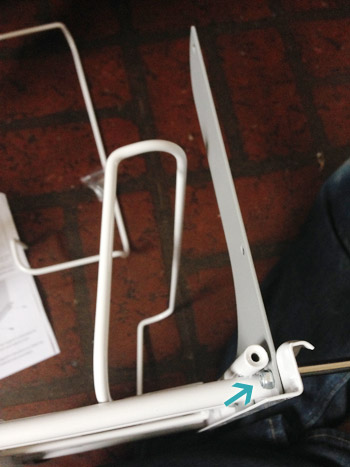
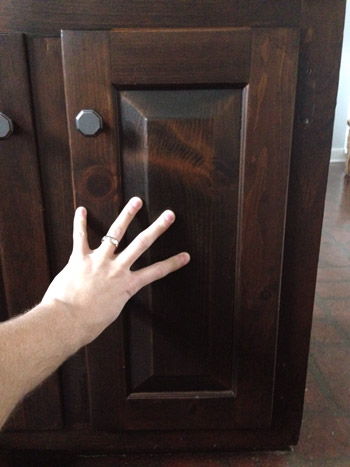
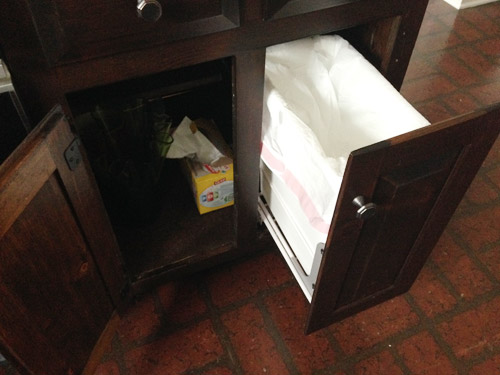
When I put everything back in place (except for the cabinet door, which I had removed) I immediately realized I had a problem. Although I followed the instructions, they didn’t account for old doors like mine, which sit half-recessed into the cabinet frame (they literally are half-sunk, so there’s a lip that rests on the frame and an inset area that slides into the opening for a tight seal). You can see from the picture below how the brackets were overhanging our frame, meaning this cabinet door wouldn’t sit flush like the rest of them.
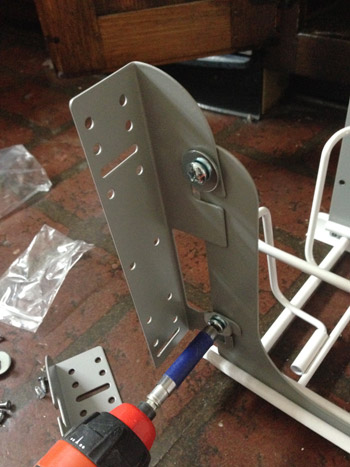
So I improvised. I took the brackets off and switched them around so that they faced inward instead of out. Problem solved. Oh, and here’s the genius part. This whole time I was worried about attaching the cabinet door back in the right place. How would I keep it straight and lined up with the other door? With the double-stick tape they included, that’s how.
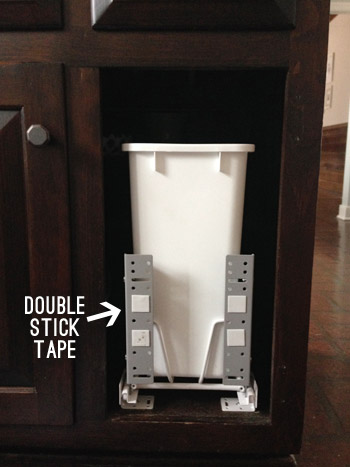
The tape wasn’t a permanent solution, but it allows you to hold your door up, get it right where it looks good and then press it against the tape.
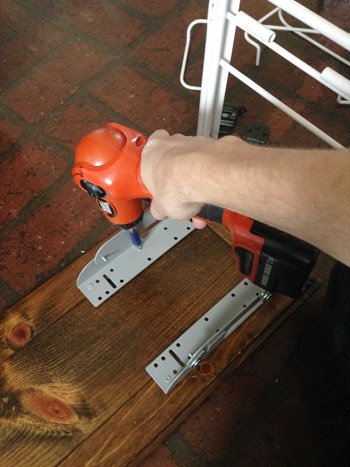
Then you can gently pull the whole thing out – door still stuck in place – and screw it together more permanently from the back (just be sure you’re only putting screws into the thick frame of the cabinet, otherwise you might see some poking out the other side).
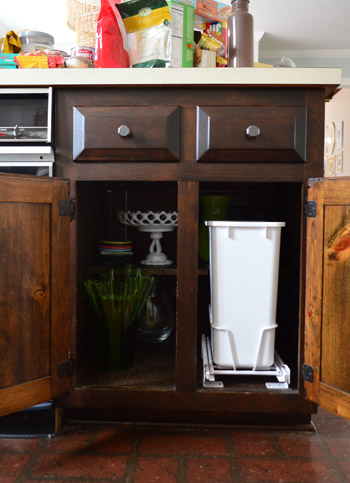
With the cabinet door secured to the brackets, things went back into place once more (can you tell there was lots of putting together and taking apart in this process?). But the end result was not too shabby, if I do say so myself.
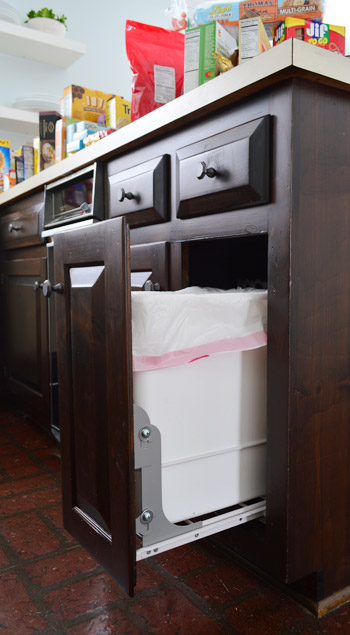
Although I’m a little sad to give up the size of our old garbage can, I’m really impressed with how easy it was to install this new system. And how in some weird way it makes these old cabinets of ours feel a little newer. The nice thing about this is that we can reuse the system in our new kitchen, or even keep it in place in these old cabinets when we reuse them in the garage to make a little workshop down the line (won’t I be the fanciest man in town with a pull-out garage trash can?).
The only thing left to do is touch-up the screw holes where the hinges used to go on the right side. Although I’m secretly dreaming about a way to reinstall them as sort of “dummy hinges” so that both doors look symmetrical. But that’s a project for another day…
We picked up some other baskets, bins, and pantry organization gizmos on the same trip that yielded this trash can contraption, so once all of our priming and painting is done we’re excited to get stuff back in the pantry – hopefully in a much more organized manner. And considering all the snow that we’re getting, I think we’ll have plenty of time to futz around in there over the next few days. Then the pantry party is officially on.
P.S. Wanna see more home improvement updates? Here are a whole bunch to peruse.
*This post contains affiliate links*

Leave a Reply