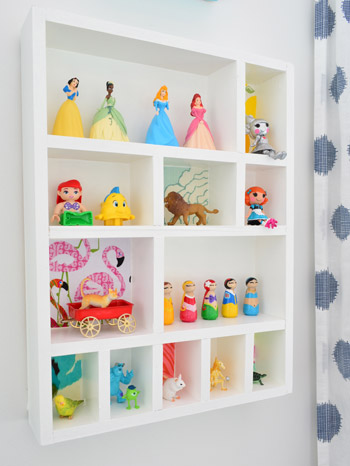
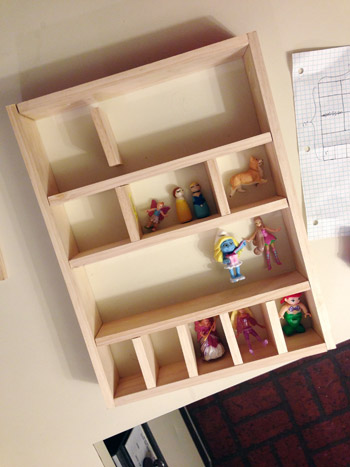
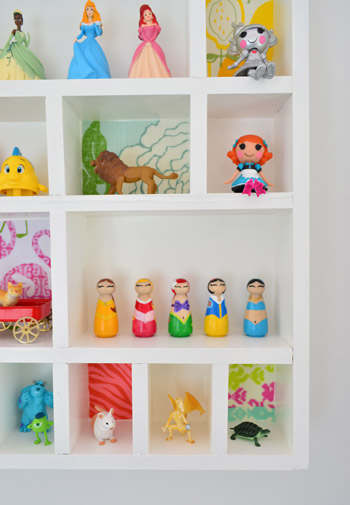
More years than not we are working right down to the wire on Clara’s homemade Christmas gift (as in, things are drying in the garage on Christmas Eve) – and this year was no exception! But the fun part about sharing them the week after we give them to her is that we get to include cute photos of her enjoying them… which is definitely our favorite part to witness. Introducing Clara’s new figurine cubby:
Girl loves it.
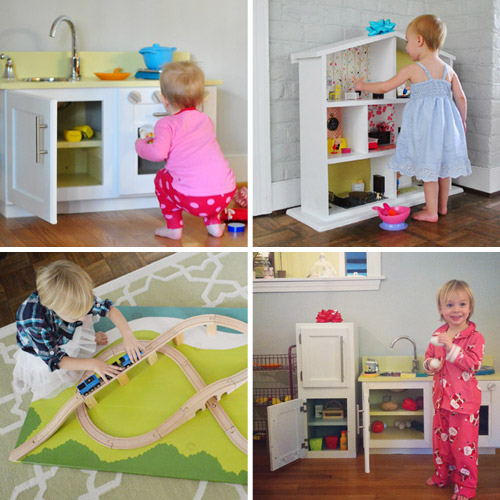
After racking our brain about what we could make her this year (a tool workshop? a fruit stand? a cardboard playhouse?) we decided that Clara still gets a lot of use from the larger things that we’ve already made her (like her play kitchen, her refrigerator, her dollhouse, and her train board – all of which are still out around the house). So we didn’t want to build another large floor-space-using thing since we don’t really have an obvious place to put it.
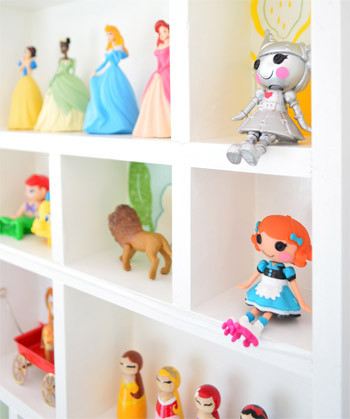
But there was a definite interest of hers that we knew we could address vertically (aka: on the wall). The girl loves little figures. Whether they’re small animals, tiny winged fairies, lego people, or even random items like ninja turtles and plastic dragons, the bean has a serious passion for those tiny knick-knacks and toys (our bare feet on the other hand, are not a fan).
So we thought a wall-hanging box with a bunch of cubbies for her little friends would be a fun spot for her to house them – and we even decided to personalize it with fabric from her photo project that she picked out beforehand (not knowing what it would be for). That way she’d have a hand in “customizing” her Christmas surprise.
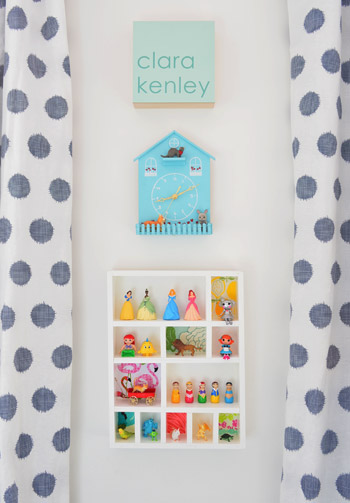
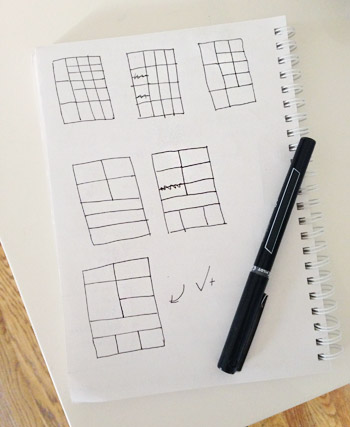
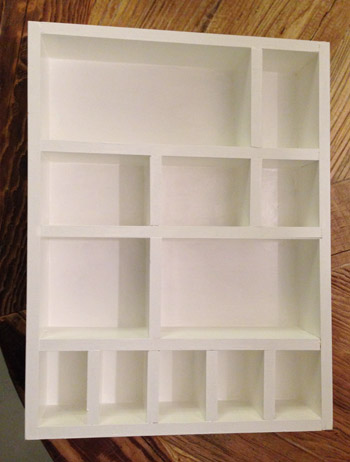
We chose this spot on her wall below her blue clock since she already loves putting figures on the small ledge of the clock (although only about three of them can fit). We thought a 13″ x 17″ sized box would fit best under there, so we started by sketching a few shelf configurations.
At first we considered doing a slew of cubbies that were the same size (like this charming figurine shelf) but we also wanted to accommodate different sized toys. In the end, we thought a variety of cubby sizes would work nicely since Clara likes to group some of her figurines (like all of her peg princesses) while keeping others apart (in her words: “silly mommy, birds don’t play with dragons!”). So after landing on a final shelf plan, we started building.
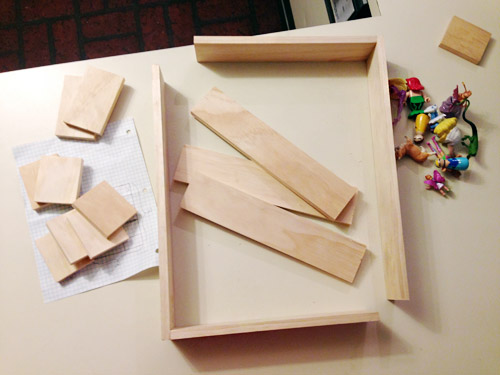
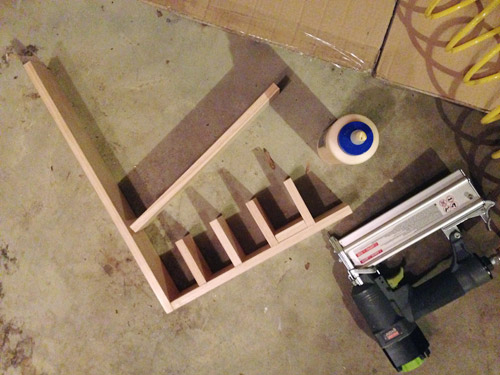
Once we had a rough sense of dimensions, we bought a bunch of 1/2″ thick craft boards from Home Depot (totaling around $20, including extra for bad cuts) and John cut the top, bottom, and side pieces along with a variety of divider pieces for the interior.
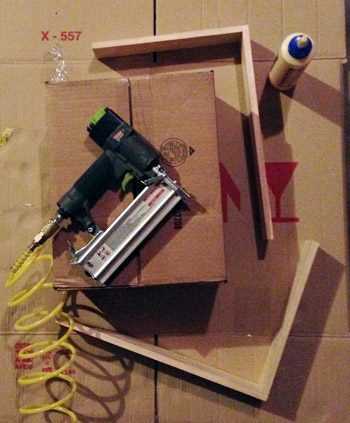
You can see in the picture above that the outer frame pieces are semi-attached already. We did that using wood glue and some 1/2″ brad nails. To try to get the corner all square John held it against the corner of a box when nailing (which also helped brace them together while using the nail gun).
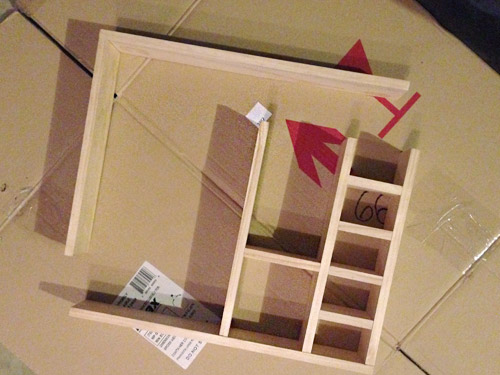
Before assembling anything else, we took a moment to bust out some toys from Clara’s collection to double-check our plans. You know, to make sure the sizing and spacing made sense. Aaaand it didn’t. Well, not totally. So we shifted things around a bit more and I ran into the garage and cut a few more pieces to make it work.
Once all the pieces were cut, we started building from the bottom up. Using a spacer that I had cut, we set the first row of vertical dividers in place with glue and nails (from the bottom). Then John put the first horizontal shelf on top and glue/nailed them from the top as well.
We let that dry overnight and then added the next row of shelving in the same way.
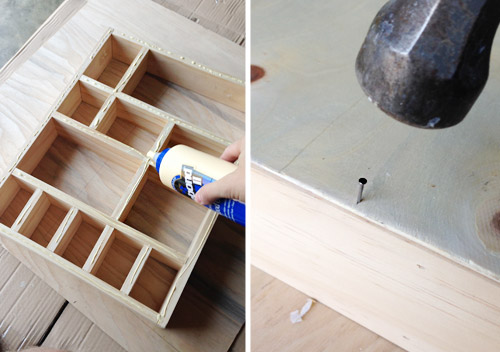
Once all of the insides had been attached, we finished off the frame by attaching the other L-shaped piece we had first constructed. Then John added a thin piece of leftover plywood as a back (cut to size on our table saw) with – you guessed it – glue and nails. It kinda felt like adding the cardboard back-pieces to Ikea bookcases.
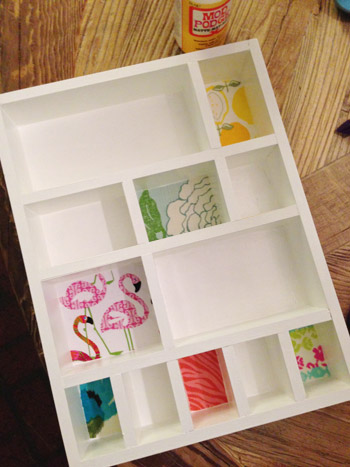
Then it was just one coat of primer and two coats of Simply White paint in semi-gloss (which in retrospect would’ve been easier to do before attaching the back piece).
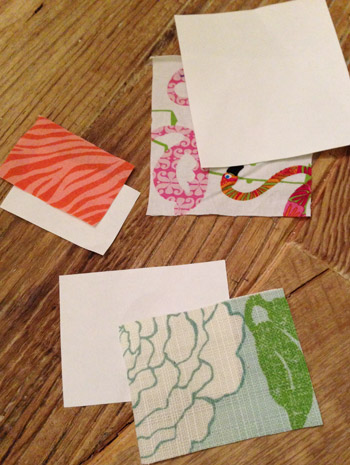
Once it was built, primed, and painted, it was onto the fun part. Asking Clara which fabrics she liked best. Turns out the girl is very decisive, and she landed on her favorite right away (“the one with the pink flamingos!”) and also pretty quickly pointed to five others, while dismissing a bunch of options with a “nope” or a “next!”

Then when she was all tucked into bed on Christmas Eve, I scurried to get the fabric in place. First by making little paper templates for the cubbies where I wanted to add fabric rectangles (I used them to cut the actual fabric nice and accurately). I didn’t want to add fabric to all of the cubbies for fear that it would look too crazy, so again I drew inspiration from this figurine shelf and did about 50% of them, while leaving the other half white.
I considered using starch to adhere the fabric, but then thought “can’t I just Mod Podge them?” A quick google search answered my question (“yes!”) and since I already had that on hand, it was nice and fast (without any last minute craft store runs). I used a small craft brush to paint the back of the cubby with the Mod Podge (not the fabric itself) and then I carefully placed the fabric right against the Mod Podged shelf-back and pressed it all so it was wrinkle free and stuck nicely in place. Thirty minutes later it was 100% dry and completely secure. So simple.
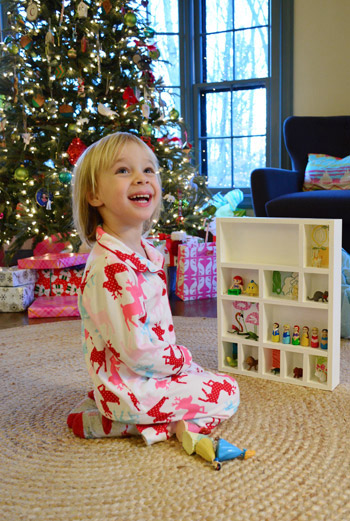
Clara was really excited to see her gift in the morning. Not only did she love that her little friends now have a place to call home, she also liked seeing the fabric that she remembered choosing the night before. I really do think kids get the biggest kick out of being a part of the process, especially in their room, so it was sweet to see her face light up and hear her say “You remembered my flamingos!”
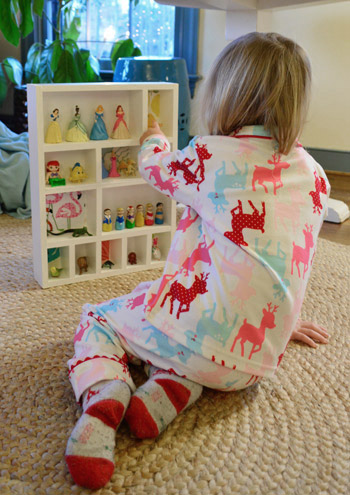
We weren’t sure if she would actually play within the cubbies, or just use them as a home base for keeping things housed when she’s not actively using them, but it turns out she likes to do both. She plays “apartment” with them in their cubbies (apparently Ariel doesn’t mind sharing a room with a dragon) and she has also been pulling some (ok, all) of them out to play with them elsewhere, but has been awesome about bringing them back “home” when she’s done.
So that’s what we built, painted, and fabric-a-fied for Clara this Christmas. Our total was $20 since all we purchased was the wood for this project, but if you don’t already have things like wood glue, paint, or Mod Podge on hand it could run you around $5-20 more. Oh and to hang it we screwed two d-rings like this directly to the back of the cubby, and then hooked them over screws which we secured to the wall with anchors for a nice firm hold.
Did you guys make any homemade kid gifts? A few people have shared some amazing play kitchens with us in the last few days. Has it really been two years since we made Clara’s? Crazytown.
Psst- Wanna know where we got something in our house? Just click on this button:


Leave a Reply