This week I was actually inspired by a request from Clara, which came by way of John’s mom. She was laughing as she told me that she overheard Clara telling her cousin that she didn’t have a clock in her room. Random, right? So I thought: I’ve never made a clock… but I bet I can make her something fun – maybe even something that she can interact with somehow. They sell those clock kits, so it can’t be too hard, right?
So here’s where I ended up…
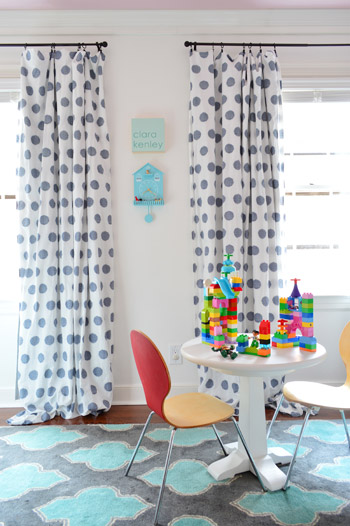
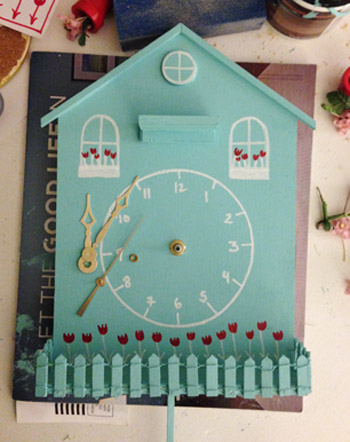
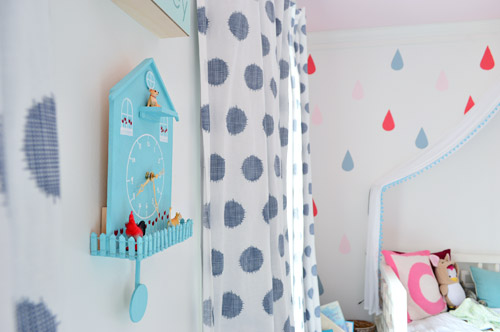
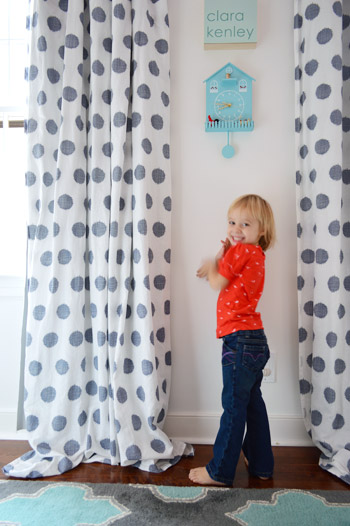
And here it is living it up on the wall in Clara’s room.
I originally thought it could be fun to use a birdhouse and add the clock hands to it, but a lot of them jutted too far away from the wall and didn’t have enough of a “face” for a clock kit to complete full rotations without hitting some part of the birdhouse and getting caught. Then I came across this DIY cuckoo clock, and I loved it! She has awesome directions and even offers a free downloadable template for anyone who’d like to get exactly the same look, but I was looking to adapt it, so I just used the house-like concept as a jumping off point and decided to add some fun little 3D details that I thought Clara would appreciate.
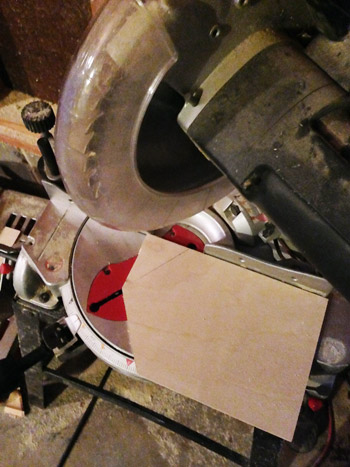
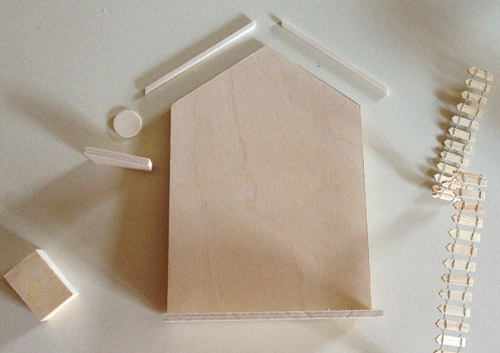
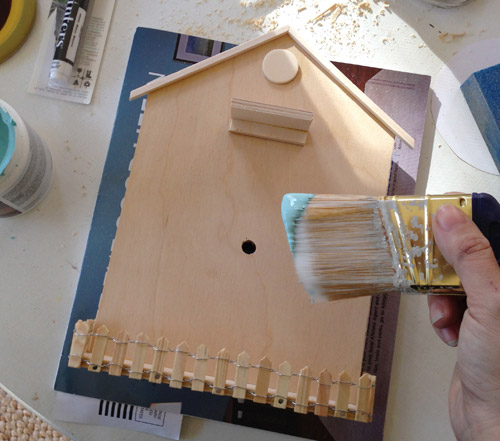
So I hit up JoAnn and grabbed a small 12 x 12″ sheet of quarter inch plywood for $3 (thanks to a 40% off coupon), that I came home and cut down to be the shape of a house with the miter saw (if you don’t have access to a saw, this wood was so thin and light that I bet you could have scored it over and over again with an exacto knife and cracked off the corners to get the same affect).
I had also grabbed a few little objects at the craft store when I grabbed my board for the background, like a small picket fence ($2.99), a little bag of variously sized disks of wood ($2), and a thin trim piece (90 cents) that I could use to add a little roofline. Here they are all disassembled…
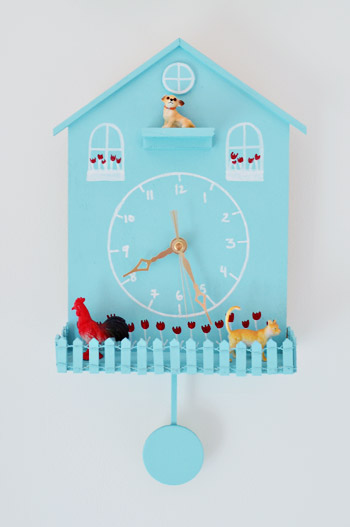
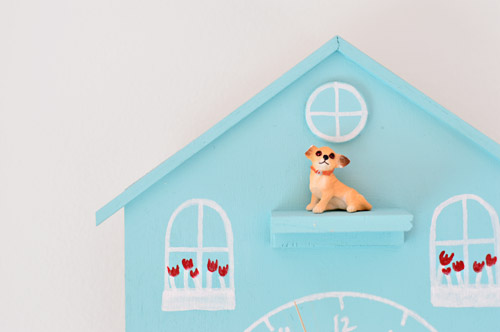
And here they are all put together. I just used craft glue to create a little ledge along the bottom as well as a smaller shelf about 3″ below the roof (that wood was leftover from my board that I used to create the house-shaped background) and also glued the little trim pieces along the top to create a little roof-like detail with a round disk of wood under it to mimic a cute little round window.
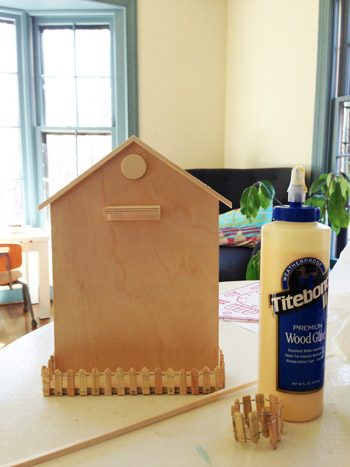
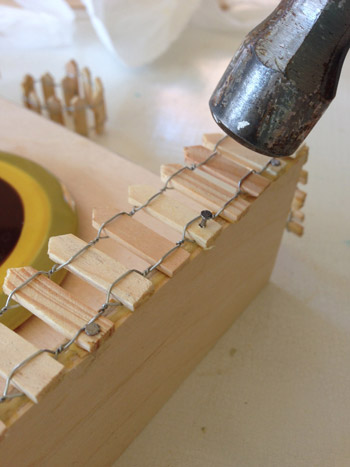
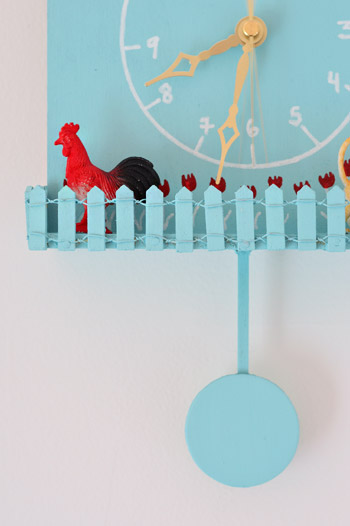
The tiny picket fence was one of my favorite details, which I just glued and nailed with some small picture nails, so that it wrapped around the entire ledge on the bottom.
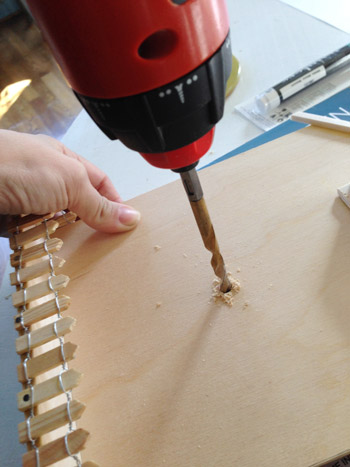
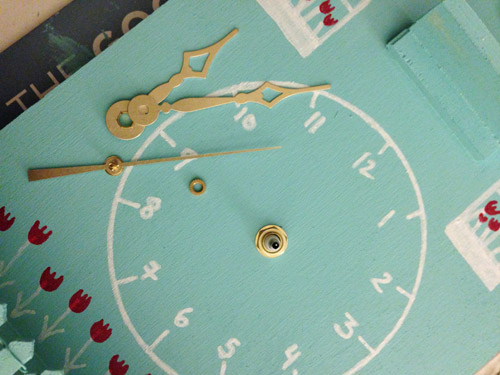
Then I marked the center of where I wanted my clock hands and drilled a hole big enough for the clock mechanism to slip through.
Next was painting time. I asked Clara what color she wanted (fully expecting her to say pink) and she said blue! Go figure. Thankfully, I had an old test pot of Embellished Blue by Behr leftover from this project, so I applied two coats for some nice even coverage.
After that had fully dried, I moved onto the sketching part of the project. First I used an old coaster to trace a circle for my clock face with a white paint pen.
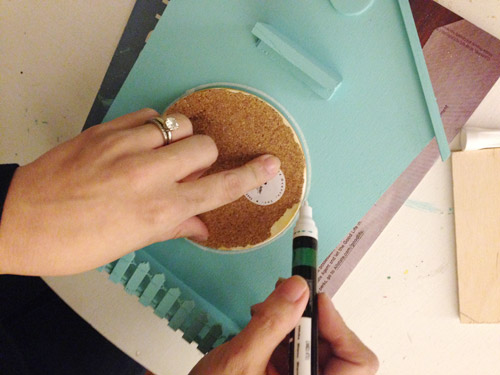
Then I free-handed some cute other details, like a window frame around the round piece of wood I had glued on under the roof, and a few other windows with stems coming up from some window boxes (my inspiration cuckoo clock gave me courage since her sketchy/imperfect drawings were so charming to me). I also added stems along the bottom behind the picket fence and in both windows so I could use a red sharpie to add some flowers in those spots.

Here’s everything all sketched out. Once that dried (the paint pen only took about 10 minutes to be fully dry) I moved onto my clock assembly. I had grabbed a clock kit from JoAnn for $6 (you know I used a 50% off coupon, right?) and originally considered painting it, but ended up liking the vintage-y gold finish. It just felt sort of cuckoo-clock-ish to me, I guess.
It’s pretty simple to snap the clock together. You just put the mechanism in the back, slide the spire through the pre-drilled hole, and then slip on the hands and the nuts and bolts they provide in the recommended order.
It probably helps to see the back of the clock too, so here’s how that looks. The black thing with the battery is of course the clock kit, and since that sticks out from the wall, I glued three pieces of scrap wood back there to make it more stable (so it sticks out from the wall the same amount along the top and bottom. Then I added one of those little metal hangers on the top block to hold the whole thing on the wall.
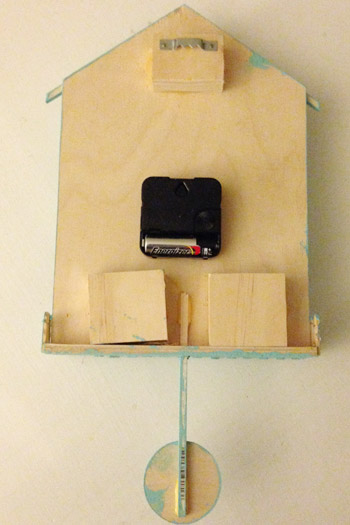
I also drilled a little hole in the base of the shelf and inserted a 4″ piece of trim leftover from the roof with a larger disk of wood, which I painted blue like the clock. It doesn’t swing back and forth, but I love that it adds to the quaint cuckoo clock feeling.
Overall, it probably took me two hours to shop for it, cut, glue, drill, paint, sketch on it, and add the clock. And my total cost was under $15 ($6 for the clock kit, $3 for the wood backing, and $5.90 for the accessories like the roof pieces, the round disks of wood, and the picket fence.
I think it ended up being another one of those crafty projects (like this one and this one) that could make a really cute holiday gift. Even if you just go simple and paint the clock white with gold or silver paint pen details. Without the extra shelves and the fence it could even be an under $10 project.
The best part of all is that Clara is SO INTO HER CLOCK. It’s adorable. I knew when I added the shelf along the bottom and the smaller shelf along the top that she’d get a kick out of seeing various little animals and dragons and fairies on those ledges (you’ve seen her playing with her pretty extensive collection of those here). We didn’t want to hang the clock too low since it’s somewhat delicate and the clock hands can easily get poked into the wrong “time” – so now our ritual is that every night before bed she tells us who she wants on the top shelf (like “Burger Statue!”) and who she wants on the bottom shelf (“Red Rooster and Kitty!”) and we put them up there for her and tuck her in.
Have you guys ever made a clock with one of those kits? Honestly the hardest part was probably drilling a big enough hole to slide the spire though, but that wasn’t even that hard (I just used a few different drill bits, gradually getting bigger, until the hole was the right size).

Leave a Reply