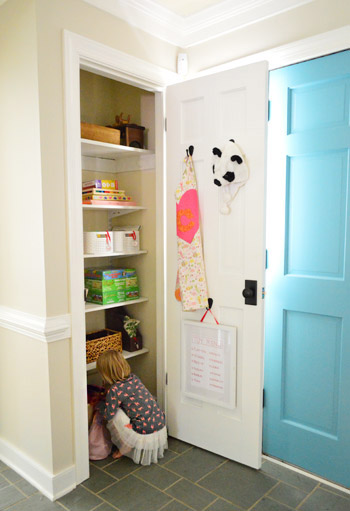
The closet next to our front door was an obvious place for our coat closet when we first moved in. But since our definition of “coat closet” seems to include random stuff like cleaning supplies (vacuum, dust buster, etc) as well as miscellaneous files and bags, we quickly realized that it was smarter for us to use the deeper closet under the stairs for that stuff instead. It’s slightly closer to the garage anyways, so it’s actually a more convenient spot for daily coat access (not that I’m ready to admit summer’s over yet).
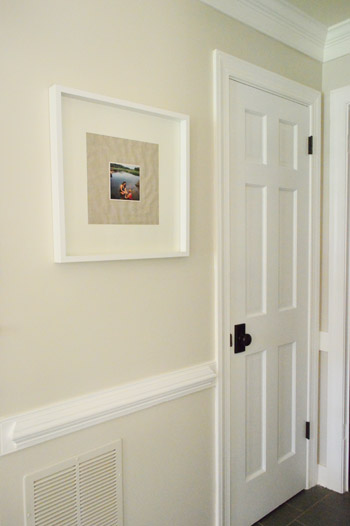
But that left this lonely guy next to the door without a job to do. And what’s the opposite of having a job? Playing with toys. That’s what.
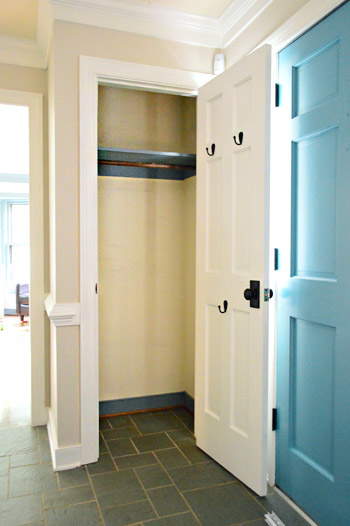
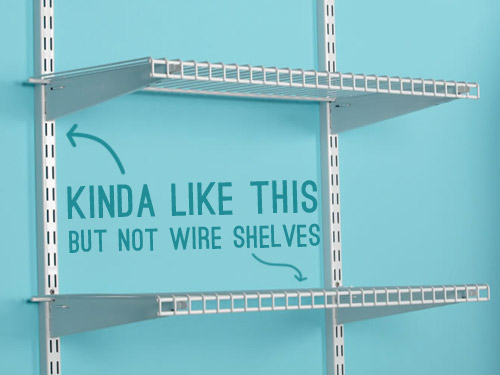
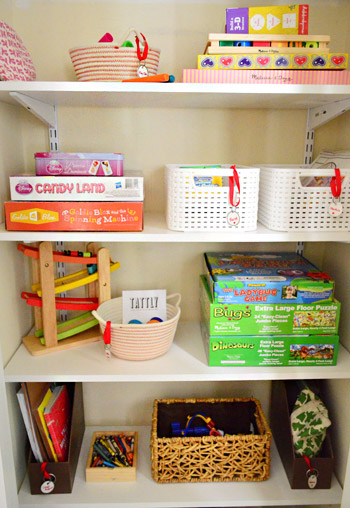
Well, not so much playing with them as storing them. I’ll get to the “why?” of this toy closet in a moment, but let me start with the “how?” since it was kind of lacking in the shelving department. We considered building some more shelves like the existing one up top (i.e. nailing wood braces to the wall and resting a board on top). But we decided we wanted something with more flexibility (so that we could alter the shelf spacing over time). So after perusing the options at a couple of stores, we landed on this Rubbermaid option at Home Depot (but with wood shelves, not wire ones).
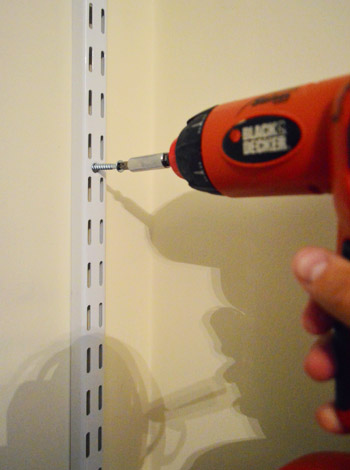
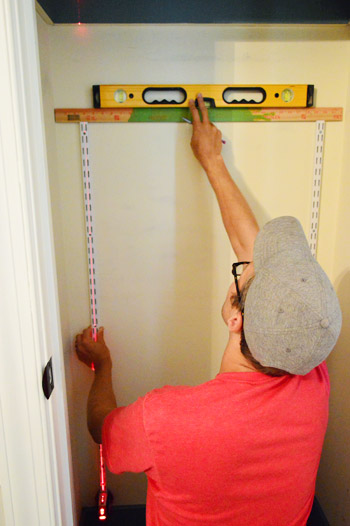
Installation was pretty straightforward. Pun intended, since you do have to be careful about keeping your tracks straight and level when hanging them so your shelves don’t look all wonky. I used my laser level to help me mark my drill spots so they lined up and the shelves would be nice and straight.
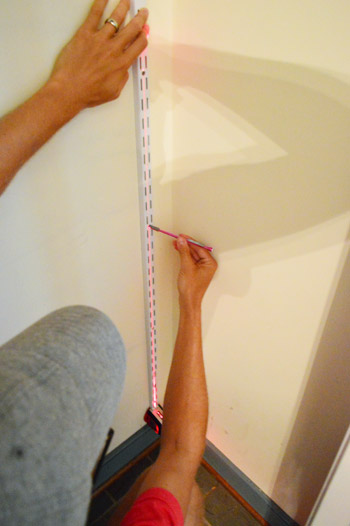
Rubbermaid sells a hardware pack that comes with anchors and screws, so it was kind of a no brainer. I just drilled a hole in the wall at each spot, tapped in the anchor, and then screwed the track securely in place.
When placing the second track I again wanted to make sure it was level with the first. Don’t mind the green slime on my yardstick. It was a victim of this paint spill in the garage.
Once both tracks were in place, I clipped in the brackets and rested the shelves right on top of them. Our closet was just an inch-ish narrower than the 36″ stock white shelf they sold, so it did require a quick cut on the table saw for each one.
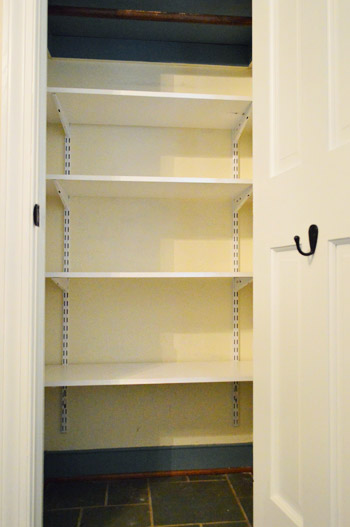
Certainly not the sexiest shelving unit I’ve ever laid eyes on, but considering it took me about an hour to install and it’ll be behind a closed door most of the time, we’re satisfied customers. Especially since it made this closet approximately 89.542% more functional, and we can move the shelves to be closer together or further apart, depending on what we’re storing. Here’s the cost breakdown:
- Four 12″ x 36″ shelves: $14
- Eight 12″ brackets: $28
- Two 48″ twin tracks: $13
- Two hardware packs: $4
- TOTAL: $59
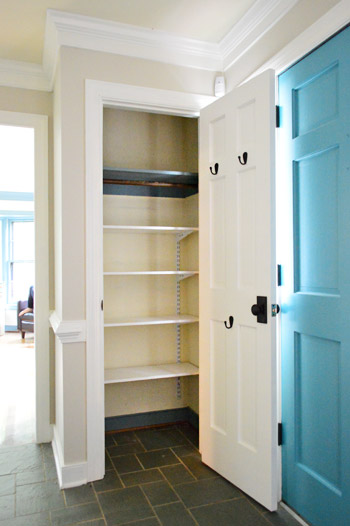
With “construction” done, Sherry gave the existing blue shelf and baseboard a couple coats of white primer and paint and then loaded in the toys after everything dried.
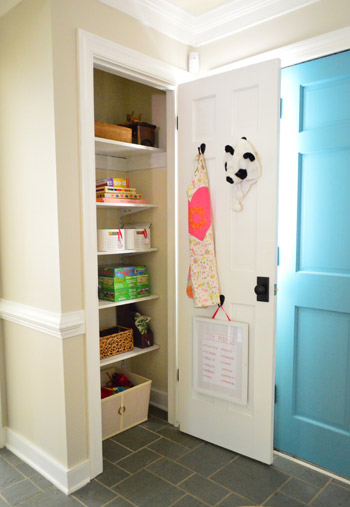
We know some of you might be scratching your head at this. A toy closet in the foyer? And with things she can’t even reach? Plus, where can I get one of those panda hats? Well hang on to your bear-less heads, for I will explain…
Clara’s at an age where it’s tough for more than a few favorite toys (like her play kitchen or her dolls) to keep her interest for more than a minute or two. So she can be that typical three-year-old tornado that burns through an entire jumbled basket of cars, balls, puzzles, and games in five minutes. We also have a few things that we don’t keep readily accessible to her since they’re supervised activities, like painting, markers, play-doh, etc. So that’s where the idea for this toy closet, er, toy library comes in. We figured we could still keep a basket of her favorite toys out in a few rooms where she plays (along with larger things like her dollhouse and play kitchen) but the rest of those easily-dumped-and-ditched items might feel more special and exciting to her if they’re not always jumbled up in a basket that’s right under her nose.
We call it a “library” because it’s meant to have the same effect that library books have on her versus the books that we have around all the time. Library books seem special and new, keeping her excited and attentive longer. So we’ve taken a bunch of her existing toys and activities out of the everyday access spots and organized them in this closet (which is centrally located, so it’s actually a convenient spot). Here’s how it works:
- Clara often plays with a few favorite toys that are still out in baskets, but if she decides she’d like something from the closet, she just asks us and we help her get the item that she wants
- She can only “check one thing out” at a time, so one thing must be returned before another is taken out (this is already really inspiring her to clean things up before asking for something else)
- We hope this will work for us long-term (growing up Sherry and I both had a closet with shelves full of board games and movies, so we think even for older kids this could come in handy – especially since we can adjust the shelf spacing).
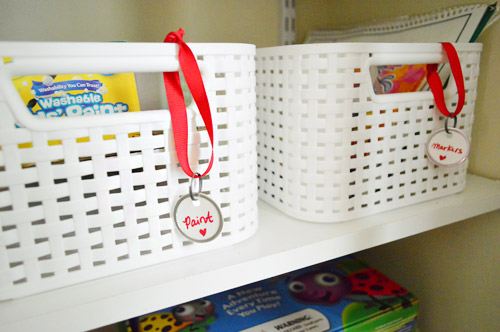
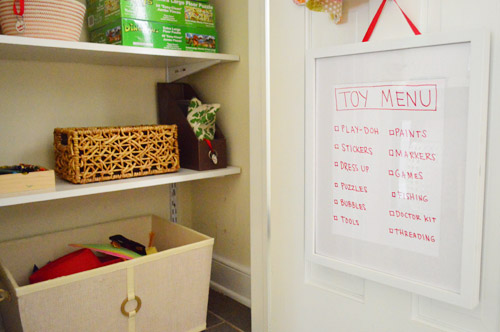
We debated organizing with cute image or photo labels (since Clara can’t read the words yet) but since it’s a grown-up guided activity (meaning we’ll be the ones getting things off most of the shelves for a long time since they’re out of her reach anyway), we stuck with text labels for now. Sherry even repurposed a frame to make a little “menu” of what’s inside so she can quickly offer up some suggestions to Clara without digging through all the baskets and bins to remember what’s in there.
The toy library closet has actually been in use for a couple of weeks now (we wanted to wait to report on how it’s working for us – just in case it was a huge bust and we decided it was a better tool closet or something), and so far it’s working even better than expected. I sort of anticipated this being one of those “a 3 year old won’t bend to your need for systems and order, Petersik!” moments but Clara actually loves it. It seems to be helping with her attention span and how long she plays with things (we’ve had a couple marathon marker coloring sessions lately) – and it’s definitely helping her better grasp the concept of cleaning up one mess before making another.
So yes, we may be the weirdos who greet our guests with a basket of finger paints and an over-sized dinosaur puzzle, but the former library employee in me is quite proud of our little closet. Ooooh, maybe we should make library cards?! Too far, Petersik. Too far.
If you’re In the mood to peruse more shelf projects and ideas, this post has a collection of 16 DIY shelving ideas.
Psst- Wanna know where we got something in our house or what paint color we used? Just click on this button:


Leave a Reply