After excitedly declaring “the hardwood floors are done!” just in time to move in, we got a bunch of requests for a follow up post with details about the “tricky stuff” like how we handled transitions, cutting boards shorter, cutting them thinner, how we addressed the top of the stairs, and how long it all took. So let’s dive back into floor world for a second. The entire floor-laying process took us about 6 days from the placing of the first board to the nailing of the final strip of quarter round. Sherry was able to help me for some of those days, but other days were just me myself and I while Sherry was back at the old house with Clara (to keep her out of the sawdust).
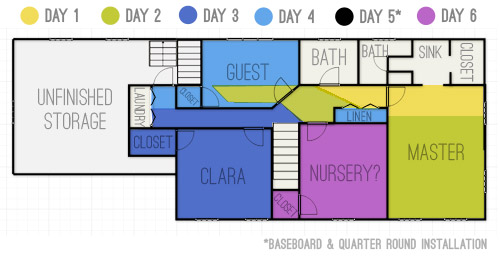
Note: Some days were shorter and tackled solo while others were mega-long with two of us working, so take this little graphic with a grain of salt, and know that four hands are faster than two.
Day 1 was a pretty slow start because we were still finding our groove. But even once we’d found our rhythm slapping boards down, a flooring installation is still riddled with various side-tasks that can eat up a lot of time. Even having installed a floor before, we had mentally blocked out many of the non-laying-floor activities so some of them caught us by surprise again. Things like…
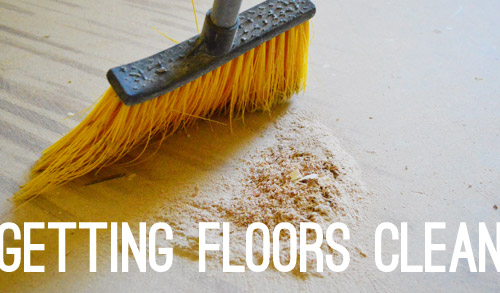
Getting Floors Clean: Since your subfloor needs to be free of dust and dirt, we swept and vacuumed each room thoroughly before we started on Day 1. But since the install was a messy process (more on that soon) we went over each floor again as we moved from room to room. You know, just to be sure.
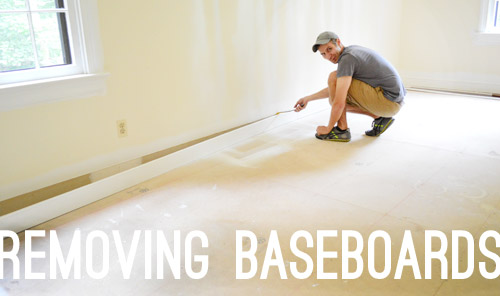
Removing Baseboards: As mentioned before, we ended up having to remove our baseboards before the install. It took a couple of pulls with a crowbar preceded by slicing a utility knife along the seam between baseboard and the wall to diminish paint peelage. It was a simple process but it can add up to a fair amount of time when we’re talking 4 bedrooms and a long hallway.
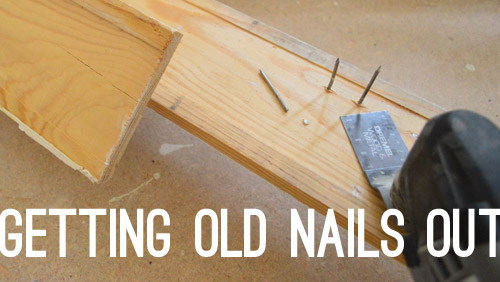
Getting Old Nails Out: Since we planned to reinstall the old baseboard, we wanted to get all of the old nails out so it’d be easy to sit them flush to the wall later. Rather than hammer them through the front (damaging the paint job), we found that our Dremel’s metal cutting bit sawed them off nice and flush.
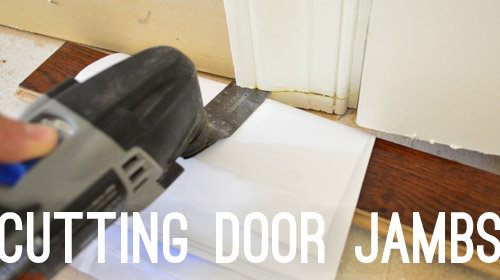
Cutting Door Jambs: Speaking of the Dremel, it was a life-saver when it came to cutting the door trim and jambs (all 12 of them!) so that the floor boards could slide under them, helping to create that seamless look between rooms. To determine the height of my cut, I used a scrap piece of wood (plus a scrap piece of underlayment) to rest my blade on as a guide. Oh and a scrap piece of paper just to protect the wood in case I needed to use it later.
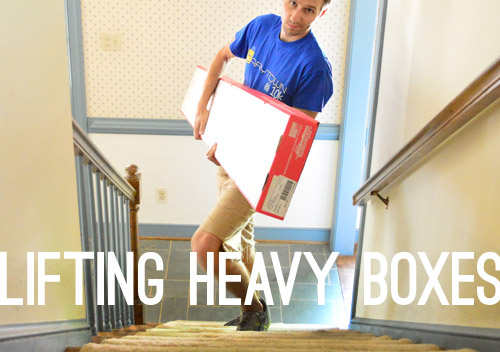
Lifting Heavy Boxes: All of our boxes of flooring were downstairs in the dining room, so every hour or two we’d need to carry up a few more to keep ourselves well stocked in whatever room was being worked on. Since boxes can vary in color slightly, we always tried to grab planks from three different boxes at any given time. So whenever it was time to take a pause from leaning over flooring (our aching backs) to carry a few 60lbs boxes up a flight of stairs … well, it wasn’t really a break, but it had to be done.
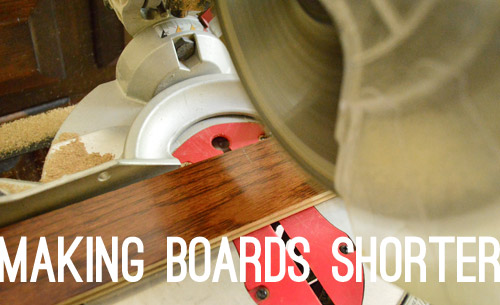
Making Boards Shorter: When you reach the end of a row of floor boards, you’ll probably have to cut the last piece to fit. We used our miter saw to make quick, straight cuts and whenever possible, tried to cut the end boards for 2 to 3 rows at a time so that we were minimizing time spent going back and forth.
Since the ends of these boards would eventually be covered by baseboard and quarter round, we knew they’d all look flush and finished as long as they weren’t too short (you’d see the gap sticking out from the quarter round). It could also be bad if we cut them too long down the line (they’d still look seamless at first, but if they expanded when it got hotter, they could warp/shift) so we were careful to leave the manufacturer’s recommended expansion gap hidden behind the baseboard.
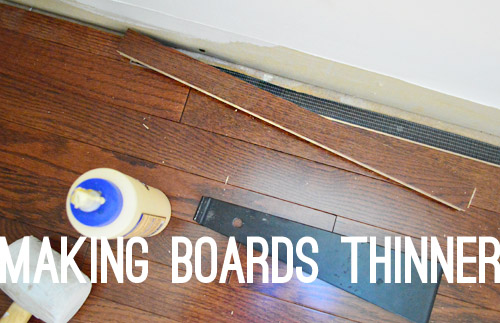
Making Boards Thinner: At the beginning or end of a full room, we often found ourselves having to rip boards the long way so that the last row would fit. To do this we used a table saw since it can make cuts of any length. Once again, we knew these would be hidden behind baseboard and quarter round, so it just came down to allowing for the recommended expansion gap.
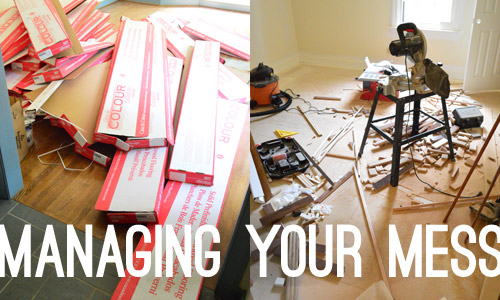
Managing Your Mess: With all of this cutting came lots of sawdust and scraps, not to mention empty boxes. We designated the spare-room/possible-future-nursery as the lowest priority (i.e. if we didn’t get it finished before we moved in, it wasn’t that big of a deal) so it became our cutting room. That way we weren’t hiking up and downs the stairs all week every time we got to the end of a wall and needed to make a cut. But when it came time to finish that room on Day 6, it meant we had to spend a good portion of Day 5 cleaning it up so it was dust free and ready for flooring.
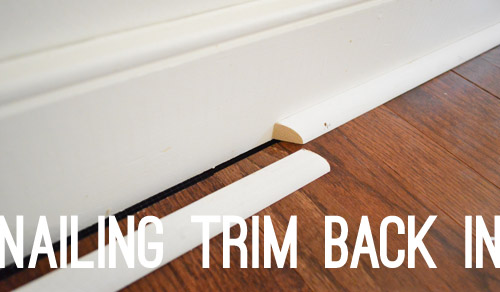
Nailing Trim Back In: As we hit Day 5 and all but the last room was done, I decided to reinstall the baseboard (and add new quarter round) in the other rooms so I had fewer piles of baseboard in my way (they were cluttering up almost every room at that point). Relying on my nail gun to reattach the already cut-to-size baseboard made the job pretty quick (maybe 2 hours?) but having to measure and cut the new quarter round slowed me down. In the end it surprised me that I spent an entire work day doing this, but it also was that turning point where the new floors finally came together and the rooms started looking a lot more finished.
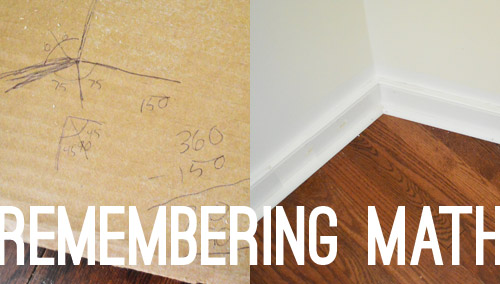
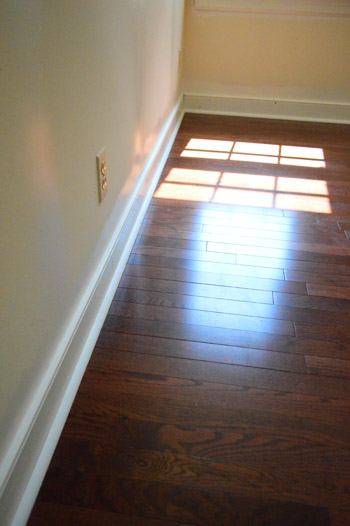
Remembering Math: We have the privilege of having an angled wall (which you can see better in photos like this). Which meant I got to conjure up some semblance of 9th grade geometry so that I could cut my boards and my quarter round at the right angle. I’m not even going to try to explain how I figured it out. I think there was a complementary angle in there somewhere. But it definitely wouldn’t hurt to have a calculator (even if it’s just on your phone) as well as a scrap piece of paper and a pen in case any unexpected math pops up during your installation.
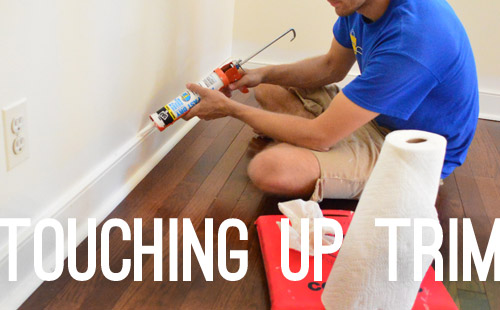
Touching Up Trim: Removing and reinstalling our baseboards banged them up a little in a few areas (kinda made us feel silly for so carefully painting them beforehand) but we were pleasantly surprised with how fast re-caulking the seam against the wall went, followed by some touch-up paint here and there. It actually wasn’t too bad. So the lesson we took from this was that installing baseboard and quarter round is the long part. The caulking and touch ups (if it’s already painted) aren’t bad at all.
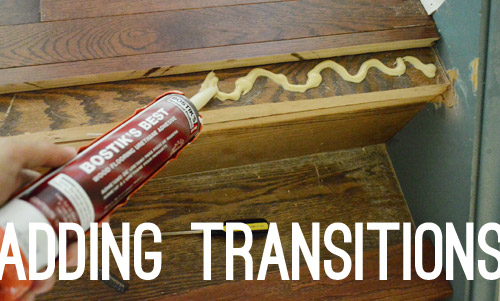
Adding Transitions: These are the spots where the new floor meets another flooring surface. Since we went seamlessly between all of the bedrooms we didn’t have too many of these, but that didn’t spare us from adding one at the top of the stairs. At the advice from the Lumber Liquidator guys, we cut off the end of the existing step (called a “bullnose”) and added some special adhesive to hold the new bullnose piece in place (which we purchased to match our new floor when we made our initial order).
We also followed up with a couple of nails with our nail gun just to hold that nice and steady. Here’s a shot where you can see the existing oak flooring on the stairs and our new floors at the top of the staircase. It’s not a perfect match, but it’s close enough. It’s less obvious in person than this photo, maybe because of the way light reflects on different planes and because photos look flatter than real life?
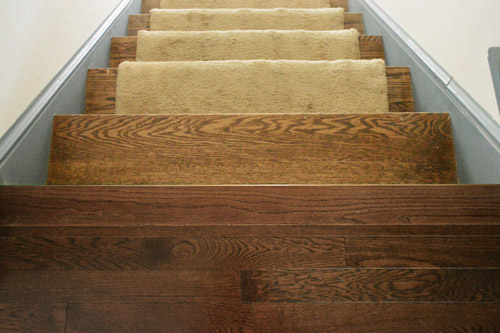
Once we had that bullnose piece at the top of the steps installed, the long journey of putting in the new floors was officially done. After which we furiously packed like our lives depended on it. No rest for a DIYer, eh? Speaking of which, that carpeting on the stairs gets the stink eye every time we come upstairs, so that’s definitely on the list…
Did any part of installing floors catch you guys off guard? Or are you working on another project that has “little” steps that seem to be more time consuming than you accounted for?
PS- Here’s the original post about how we laid our hardwoods for additional info about the underlayment, how we installed each board, etc.

Leave a Reply