All aboard! (Can I get a choo choo?)
As promised via our little Instagram/Facebook sneak peek yesterday, here’s the story of how we made a little train board for Clara. Why a train board? Well, Clara is nothing short of obsessed with the one at Barnes & Noble (a nice big track is screwed into place on a little pedestal board and kids flock from all sides of the book store to play with it). In fact if we pull into the parking lot (which also leads to a ton of other stores) before we even turn off the car Clara is shouting “we’re getting to play with the trains!”
So when John suggested that we make our own version of one with a train set that we got for Clara’s second birthday from a few relatives of ours, I remembered seeing this one over on Aubrey and Lindsey’s blog so I googled around for a few others to gaze at (like this one). As for our specific objectives, we had a few goals in mind:
- to use all of the Melissa & Doug train pieces that we already had and make a nice big track
- to use solid wood if we could for the board part (just to avoid the off-gassing issue of MDF/plywood since solid whitewood is nice and light – and cheap)
- to paint something fun on the surface to give Clara more play ideas (ex: the train is going to the beach, the train is going to the forest, the train is going over the water)
- to paint it with low-VOC paint, seal it with low-VOC sealer, and attach the tracks with screws from beneath to avoid fumey glue (just in the same eco vein as the wood choice)
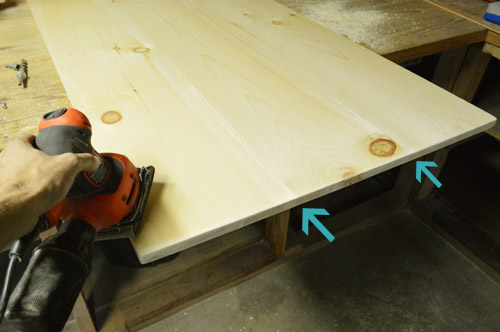
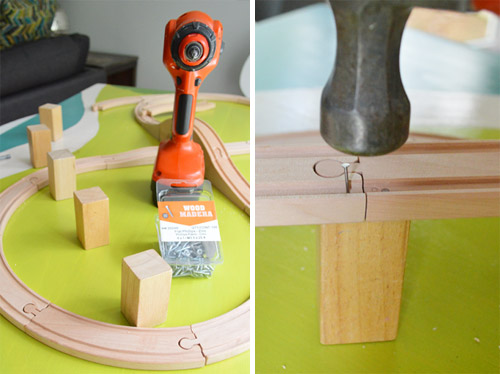
So here’s how we got ‘er done using nine dollar’s worth of sample paint from Home Depot and one plank of 12″ whitewood for $19 (also from Home Depot) – for a total of $28 spent. First John got a twelve foot long 10″ x 1″ board of whitewood and had them cut it down to make three equal 10″ x 1″ x 47″ boards right in the store. Then he joined them together with his Kreg Jig (you could also use flat bracing pieces of wood or metal along the back to connect them and add some felt pads to make sure nothing scratches the floor). Then he sanded everything to keep the board from feeling rough or splintery. See how the seams are barely visible (these arrows point them out for ya).
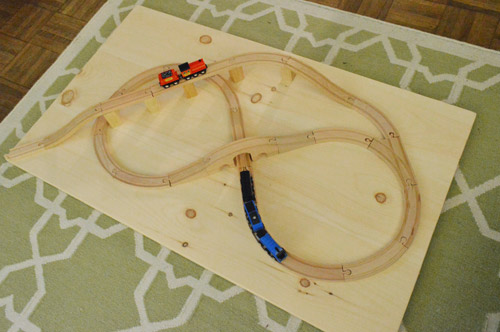
Next we pieced the train tracks together in about a million different configurations before finally deciding to go with this one (it has hills, an elevated part, a bridge, a tunnel, and even an area where the train will shoot down an incline and off the board – which we thought would be Clara’s favorite part):
Then we brainstormed what we thought the background should look like on a piece of paper and came up with this (the light green is grass, the blue is the ocean, the stripe next to the blue is sand, and the dark green is the forest):

Then I sketched that layout onto the board with a pencil – just marking the lines of delineation between the water, the beach, the forest, etc.

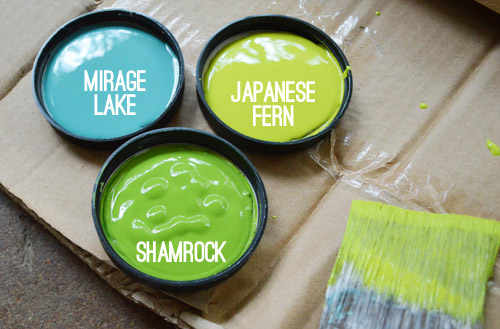
Then we ran to Home Depot and grabbed three $2.95 sample pots in Japanese Fern, Mirage Lake, and Shamrock all by Behr Ultra (which is low-VOC).
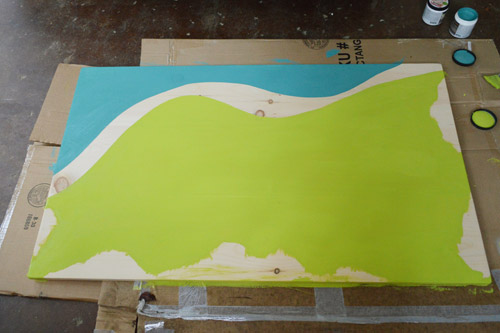
After we brought them home it was time to take the whole track apart so we could paint the background (tip: take a photo of the track configuration that you’ve landed on before dismantling it so you remember how to recreate it when you’ve painted your background). I started with the water and then I added the grass (these two don’t touch, so I didn’t have to worry about if the blue paint was still wet when I applied the green):
Oh and I didn’t prime anything because we didn’t mind this looking like painted wood (we thought a few knots showing through could be authentic and charming). But if you don’t want them to show through, a coat or two of stain-blocking primer should do the trick before you paint your design.
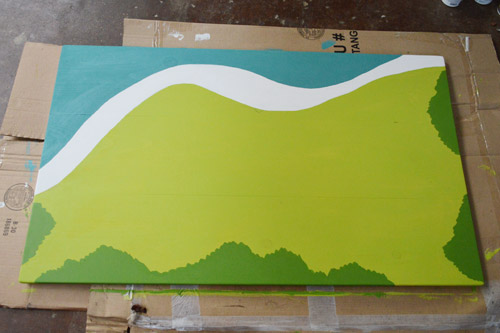
Then I gave that stuff a while to dry since I would be going up against the edges of those for the sand and the trees (and didn’t want things to smear) and came back a few hours later to paint the forest. That was the most fun because there’s that sort-of-bushy shape.
Then I added the sand, which was just leftover no-VOC white paint (we loved the idea of a white-sand beach between the ocean and the grassy plains, haha).
Then we let the whole board dry and I applied a few thin and even coats of my favorite eco poly (Acrylacq by Safecoat). We’ve had the same quart of it since before Clara was born and it’s still going strong (seriously, I can’t recommend it enough- not only is it low-VOC it’s actually non-toxic). I just brushed it on in thin and even coats, being careful not to belabor certain areas (if you brush things over and over they can get gummy, so I moved quickly across the board, let it dry, applied another coat, left that dry, and applied one last thin application).
As for why we decided to temporarily attach the tracks to the board:
- at this age for Clara, putting the tracks together herself just led to frustration (crying/throwing stuff) so it wasn’t really a good time for her when things weren’t attached.
- yet, we noticed how much fun she had at B&N when things were nailed down (it still led to a lot of creative, independent play with talks about trains stopping under tunnels, trains crashing, trains running out of fuel, people stopping at specific destinations, etc).
- if she ever has a hankering to build her own track down the line, we can always free up this track by just removing the small screws on the underside of the board – so it’ll still be really functional and flexible for spur-of-the-moment-building if it’s detached later.
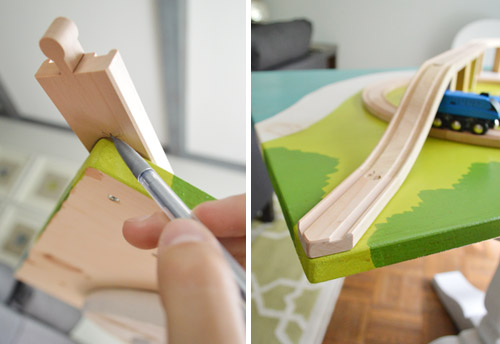
We just saw how much more fun she had at B&N with the fixed track (no tantrums or frustration of trying to make things go together, etc) so we thought a fixed track made the most sense for now. So after we gave the poly lots of drying time (48 full hours) we laid out the track on top of the newly sealed board and attached the whole thing with screws from underneath the train board. In other words, John removed the tracks one by one, drilled a pilot hole from the top of the board through to the bottom…
… and then held the track in place on top of it and screwed up to attach the track to the board from underneath).
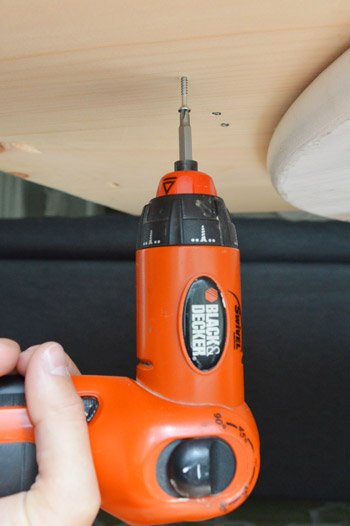
That’s how he got the track to stay in place without looking like it’s covered in screws (using counter-sinking screws meant they sunk into the back of the board and didn’t stick out and scratch the floor). We also added felt furniture pads to keep the board from rubbing on the floor/table/ottoman if it gets lots of use.
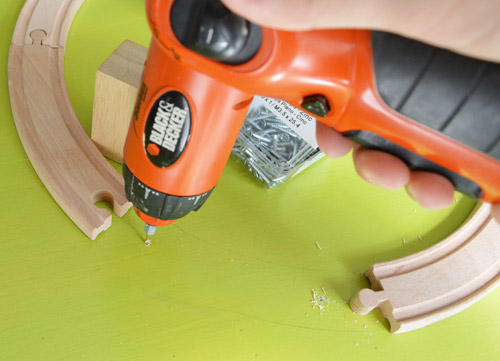
As for the elevated part of the train, we attached those blocks to hold the track up the same way we did the rest of the track (a pilot hole through the board from above followed by a screw driven from the back of the board up into the block to hold it in place without seeing any hardware). Then to hold the track in place on top of each of those blocks, we drove a small finish nail into the groove of the track and into the block, which actually proved to be really sturdy without being super obvious (you have to get pretty close to even notice them at all).
When it came to making that one piece of track look like it led off the corner of the board, John just traced the shape of the board onto the bottom of the track, and cut it along that line that he drew (and then sanded it to make it nice and smooth). Then he just drilled that track in from below like the rest of them (he actually had already attached it, which you can see in the pic on the right, so he removed it, cut it, and drilled it back in).
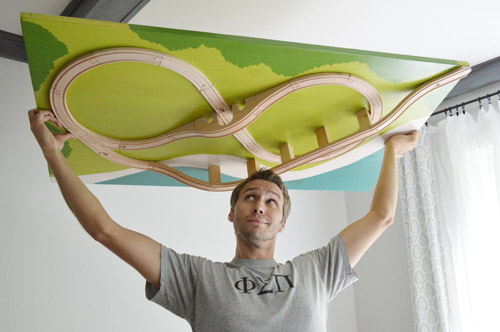
Next came the big test. Holding everything upside down to make sure it was all attached. Thankfully it’s all nice and sturdy. As in, Clara has taken great joy in kicking the elevated part and it’s all holding strong.
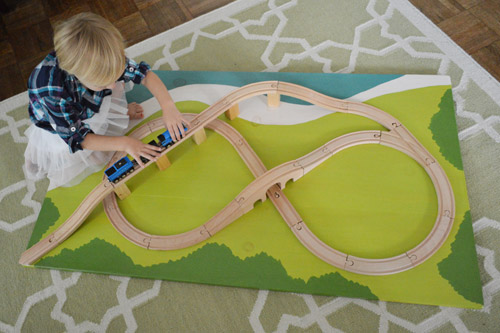
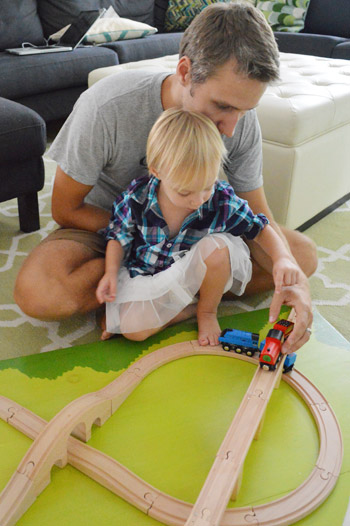
Choo-choo, baby. Here’s the whole shebang in action:
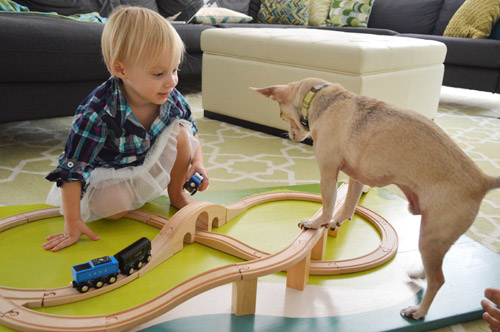
Clara loves it. As expected, there’s lots of chatter about people going to the beach, the forest, and over the hills and valleys, and contrary to our guess – her favorite feature is actually rolling them down the middle hill and into a big pile-up. Sometimes she even lets us get in on the chugga-chugga action.
Are there any other train board fans out there? At first I thought making new tracks would be part of the fun, but seeing how much Clara loves the fixed one at B&N, I’m glad we made her a souped up board with a fun little background to make playing with it even more exciting. Things like adding an environment behind it and having trains shoot off the board have certainly upped the train-playing ante around here. And John may or may not have played with it a little himself after Clara went to bed last night. Not kidding.
And perhaps the best thing about it is that it’s nice and flat, so it can slide completely under the sofa for storage when it’s not in use. Here it is halfway in:
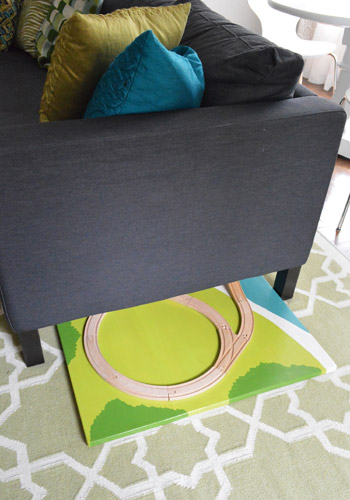
That’s actually one of the reasons we thought a board would work better for us than a table, since we used all the tracks and trains that we had to build this, so we didn’t need additional storage or anything). It’s nice that we can stash it away in a second and that seems to make it even more special for Clara (she loves things that we bring out and tuck away, like markers and Play-Doh a bit more than things that are always out at her disposal). Maybe it’s like those special “limited edition” holiday Oreos? They always feel more special than the regular kind to me. Haha.
So that’s the full $28 train board rundown. What have you guys been building/painting/sanding lately? Any fun kids stuff in the works?

Leave a Reply