Vanessa sent us her kitchen makeover that clocked in at just over a hundred beans and it made us more than a little giddy. But we’ll let her take you through the story of how she got so much bang her buck. Here’s her letter:
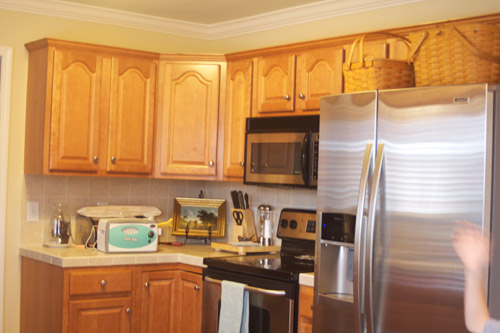
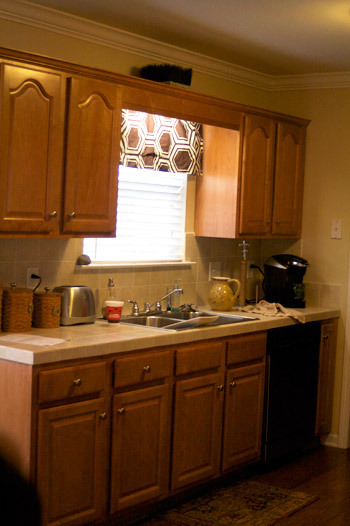
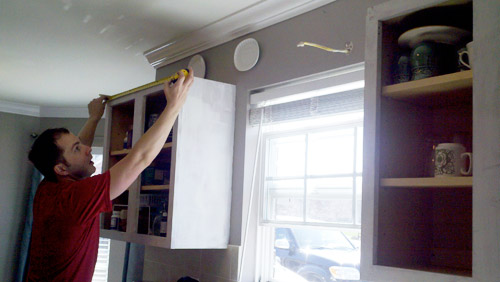
In 11 years of marriage, my husband and I have lived in seven cities and sometimes have moved multiple times in each city. Needless to say, I have become a pro at making each house a home. One thing I have always wanted to do, but have been too chicken to tackle it – is paint my kitchen cabinets. Now, in our seventh home, I finally decided to do it. All. By. Myself. When we moved in, things looked like this:
After priming and painting several coats, I rehung the cabinet doors and began sanding the edges. I then used some distressing oil around the corners where I’d sanded. After letting the oil sit on the door for a minute or so, I simply wiped it off (you can see the oil sitting on the picture on the left below, and what it looked like after I wiped it off on the right).
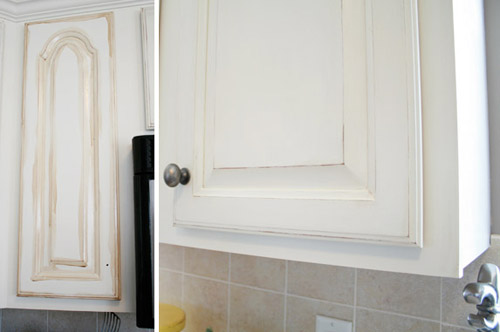
I love the way the oil brought out all the little scratches in the wood and created a sealer of sorts. Once all the cabinets were distressed, I replaced all the knobs that I bought for a steal! I chose an antique pewter for a nice contrast against the cream, but to tie in with the stainless appliances.
One thing I had always hated about the kitchen was the apron that connected the two cabinets on either side of the sink. My awesome husband took down that piece along with the cabinet molding. Then he recut the molding to fit around the two cabinets. It is amazing how much more light came in with that simple fix.
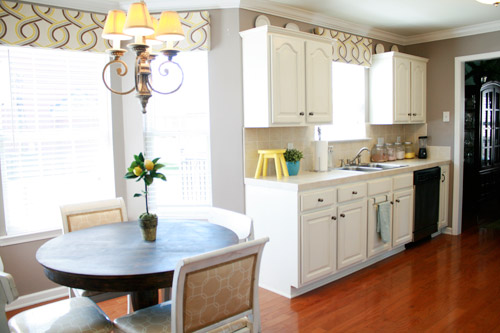
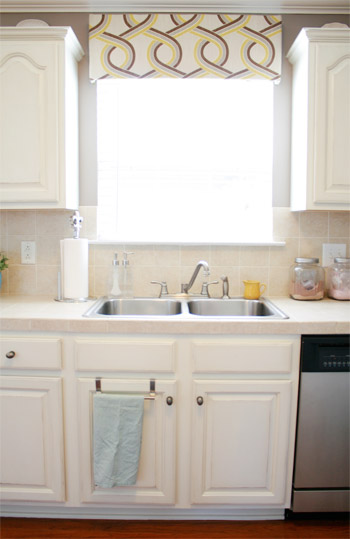
In addition to refinishing the cabinets, I also made new window treatments. I used a tutorial from Little Green Notebook for some awesome pelmet boards that were so easy to make!
Source list:
- Paint: Valspar cream oops paint $5, Danish oil for distressing $11
- Primer: Zinser oil-based $14
- Cabinet hardware: Resale shop $10.50 (21 @ 50 cents each)
- Valances: P. Kauffman fabric (Old Time Pottery) for $20, other supplies $11 (used this tutorial to make them)
- Accessories: Yellow step stool (Hobby Lobby) $12, small yellow pitcher (Goodwill) $1, three glass jars (Target) $6 each
- That’s $102.50!! Woo hoo!!
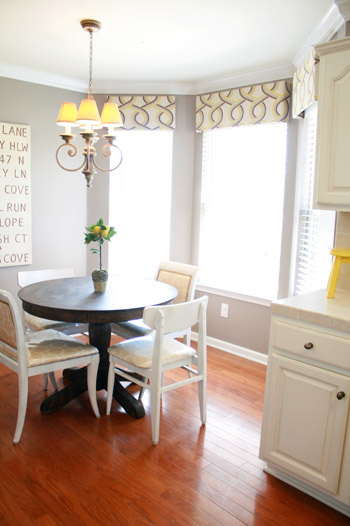
And as a bonus little tidbit, the kitchen chairs were Goodwill finds that got a new life for less than $100. The table was originally black (from Target) that I already owned. I simply stripped it and re-stained it for less than $20. All the other accessories, I already owned. If you consider these previously completed projects in the final total, the makeover still comes in around $300. I say, that’s not too bad for a full kitchen makeover, right?! -Vanessa
Not too bad at all, Vanessa! Actually, it’s pretty darn amazing. We love how fresh and light it feels, and the existing backsplash and counters work so well with the new look. Anyone who’d like more pics / details can hit up Vanessa’s blog, but first let’s play the favorite part game. Sherry loves the window treatment fabric and that fun yellow step stool, meanwhile I loved reading about distressing oil since we haven’t tried our hands at it yet.

Leave a Reply