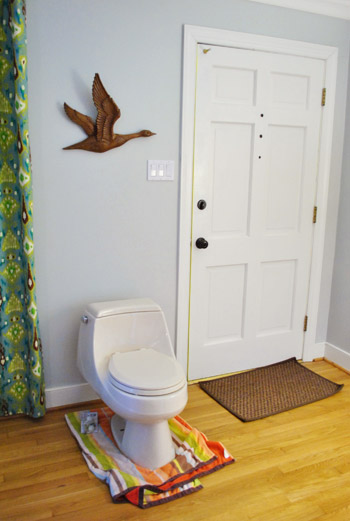
Remember the almond toilet that came with our master bedroom (which we recently switched out for a taller and cleaner-looking white one)? Well, for a while the old almond guy – who looks oddly white in this picture below – just sat in our entryway. What, is that weird?
The reason? We decided to try our hand at Craigslisting it. Once John found out it was an over $1300 (!!!) toilet by Kohler (more on that here) he was convinced we could get some money for it from someone in search of an upscale almond toilet. You’d be amazed what people buy on Craigslist by the way. And a few days later… we sold it! For $80! The nicest family (a man with two young boys and a baby girl) came over to grab it after work one night last week. I know it’s nerdy, but it felt so good to know that our old john was going to a loving home. Haha. The funniest part was that when they all left with the toilet and we were waving at the window with Clara (she requires that we wave at everyone walking away from our house) she said “I go in car too!” Yup, the girl apparently liked the toilet and the new family so much that she wanted to leave with them.
Although we were initially looking at the $80 that we made on the sale of the old “fancy toilet” as a nice little credit towards our new one (which was $88), a few days later we heard about a sweet local family (a single mother named Chevelle with six children) that Habitat For Humanity is helping out. And we learned that for an $100 donation we could buy them a toilet for their new soon-to-be-built house.
So we happily put our $80 Craigslist profit plus twenty bucks of our own into an $100 toilet donation for Chevelle’s family. If anyone else feels like helping them out – here’s the link. Habitat is such a great organization. We’re fans. But anyway, now that we’ve covered the subject of used (and new) toilets, let’s get on to the whole door trimming thing.
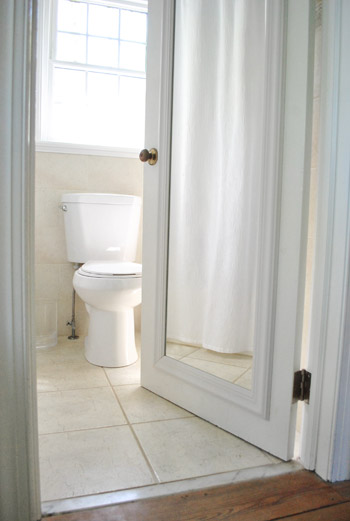
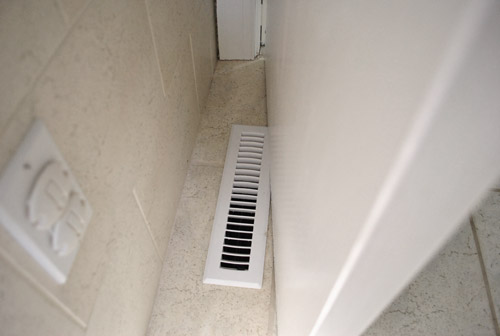
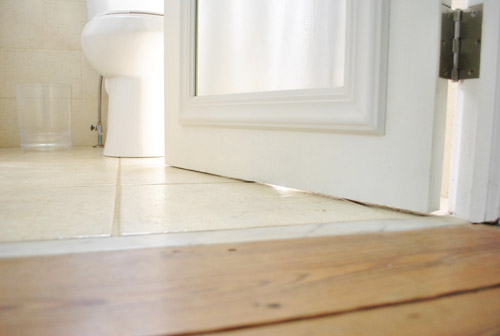
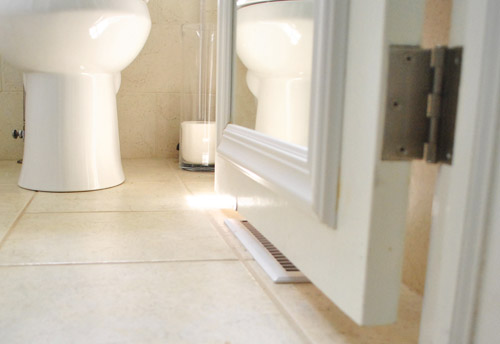
You probably remember us mentioning that the bottom of our bathroom door needed to be trimmed so it would open all the way instead of getting caught on an air vent in the floor.
Not only was it annoying that the door wouldn’t fully open due to grinding up against the vent, but we also couldn’t have a bath mat because the bottom of the door would just wad it up and push into it since it couldn’t just pass over even the thinnest options. Which meant wet puddles on the floor outside the tub every day. Which just happens to be right in front of the toilet. Do you know how gross it is to go to the bathroom with your feet in puddles? Granted they’re clean bathwater puddles, but still – your brain can go to a dark place. And if you have socks on and you walk into the bathroom: wet socks. The worst.
So this week’s bathroom door-trimming update is also this week’s Dude Get On That Already challenge, because… dude…. how have we not gotten on this sooner?
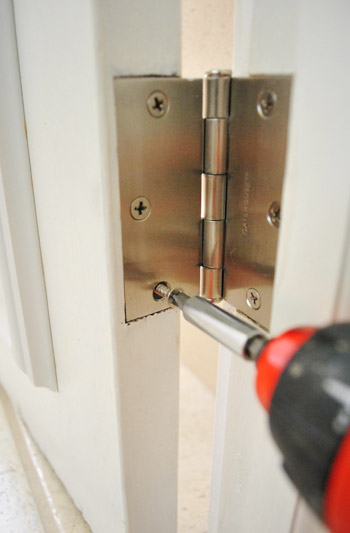
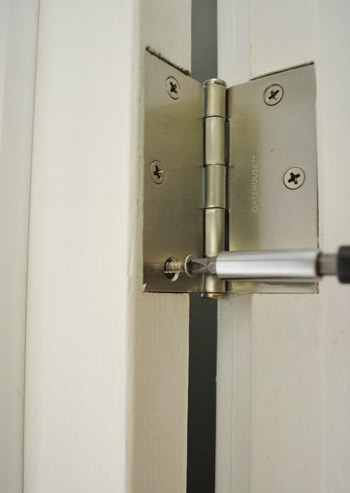
To remedy this situation, we cut down the door. It really wasn’t bad at all. First we removed the door by removing the hinge screws to slowly release it (two people = the best way to do something like this to avoid the door slamming down to the ground and scaring the bejeesus out of you).
Then John and I carried the door out to the patio where we had set up the table saw. John pushed the door against the guide next to the blade as I pushed the door slowly into the blade to get a nice clean cut off the bottom. Update: Matt very kindly taught us a safer way to cut down a door, so read about that here. Safety first!
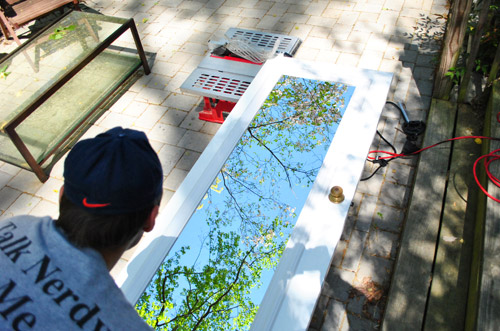
We probably took between half an inch and a third of an inch off since it was such a tight fit before and we wanted to make sure it would clear the vent on the floor and the future bath mat that we’d be adding to solve the whole puddle problem.
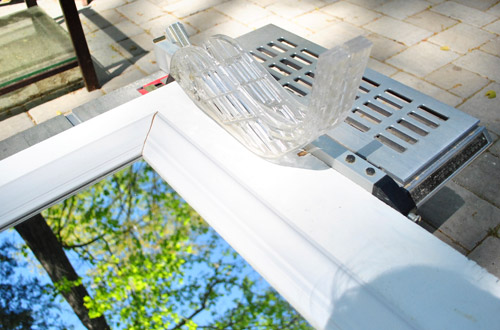
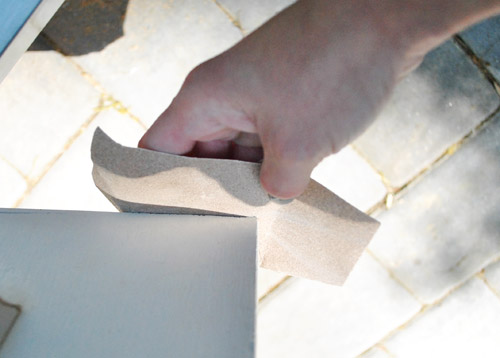
Then I sanded the bottom of the door to clean up any roughness before we rehung it (since once we rehung it we’d have a hard a$$ time getting sandpaper under it to smooth that area out).
Then we rehung the door about a half-hour later by using the same screws that we removed from the hinges.
Oh happy day! We cleared the vent! Still have to do some quick paint touch ups along the bottom lip, but it’s looking pretty good.
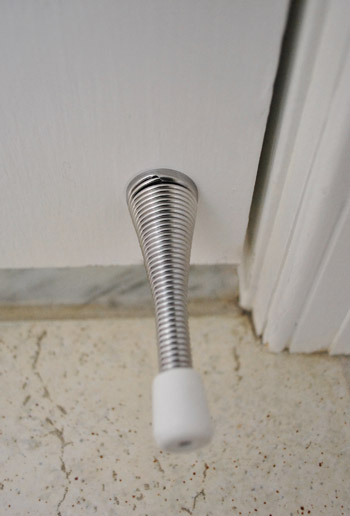
Then I took a minute to add a doorstop on the bottom right edge of the door so the towel hooks on the back of the door wouldn’t slam open into the art that’s hanging on that side wall.
So now our bathroom to-do list looks like this:
paint the walls so they have some contrastreplace the boob lightpaint the cream trim whitehang some bathroom-friendly artcraigslist the toilet and replace it with a classic white onedo something to add privacy to the windownix the ugly and cluttered showerhead caddyremove the door so we can shave the bottom (and add a door stopper so it doesn’t squash the art)- finally get a bath mat
- replace the border tile around the room (maybe in phase 2?)
- move the blue pendant light to hang centered in front of the window (phase 2?)
- replace the floor tile down, just to break things up since there’s so much of it (definitely phase 2)
John and I are still discussing when we’ll tackle things like cutting out that border tile and replacing it (along with rehanging the light to be centered on the window) so we’ll keep you posted if it’s right around the corner, and will be back with a full budget breakdown for all of Phase One if we decide to hold off on that other stuff for a little while. But enough about us. What about you guys? Have you sold any secondhand toilets? Bought any new ones? Cut down any doors?
Psst- To follow this bathroom sprucing project from the start, check out this planning post, this painting post, this light-swapping post, this art and trim-painting post, this toilet-updating post, and this window frosting and shampoo wrangling post.

Leave a Reply