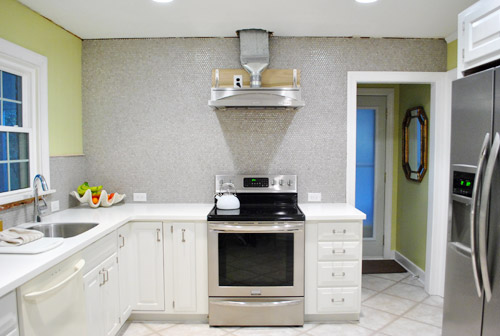
Even though I’m sure you figured we’d just grow to love the look of our crazy exposed hood (“oooh, it’s so unfinished chic”) we were ready to get this hood-covering train in motion. Oh and as for the height of the range hood, we just followed the manufacturer’s recommendations (the JennAir website offered a range and we went right in the middle of that range at 34″ above the counter).
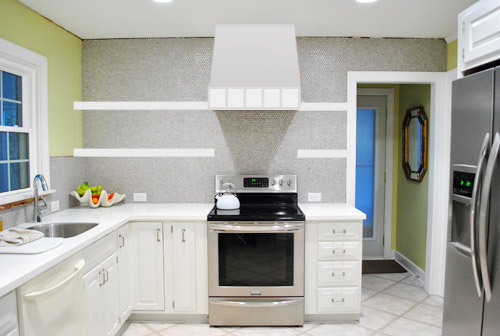
As for the hood cover, the first thing we did was use photoshop to mock up two different options to figure out what we thought would look best. This was our original thought, since it looks most like a lot of the hoods in our inspiration pictures. The squares on the front are supposed to be panels we’d make using trim.
But it looked a bit top-heavy to us, so we tried this version instead:
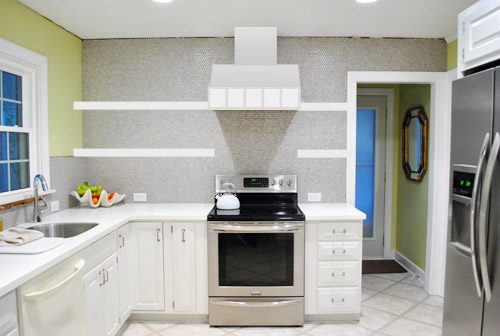
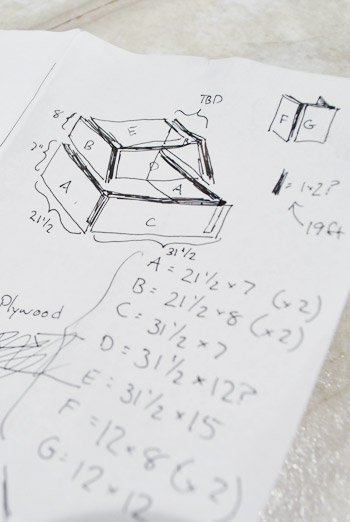
We liked that much better, so I took some measurements and drew up a “technical” drawing of the plan. I roughly sketched the hood to scale (using some graph paper under this white sheet) with pen and then used a thicker marker to design the cover around it.
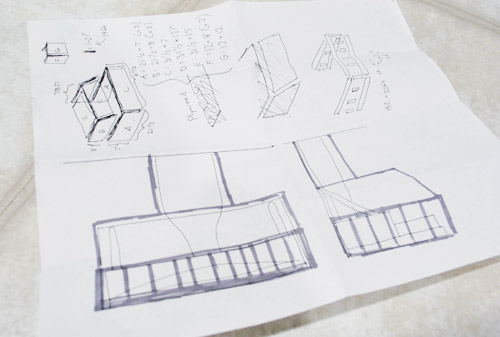
And in the other corner you can see where I started to figure out what sort of wood I would need to actually build this thing. I’m not going to even try to explain what this means now, since it will become clearer as you see the actual cover come together. But just know my goals with this thing were to:
- Make it sturdy (and use moisture/steam/grease resistant plywood so it would last)
- Make it as light as possible (I didn’t need worry about another heavy thing falling off of the wall)
- Make it pretty
When I returned from the store with some plywood panels and 1 x 2″ boards in hand, I got right to building. I was going to build from the bottom up so I started off by building a frame and cutting some plywood panels to size:
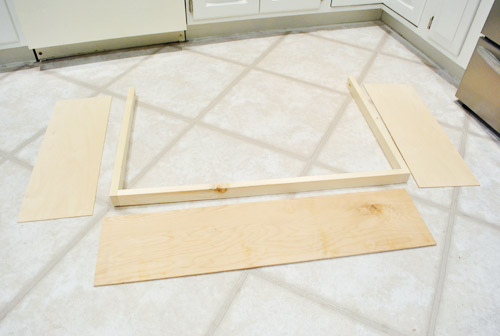
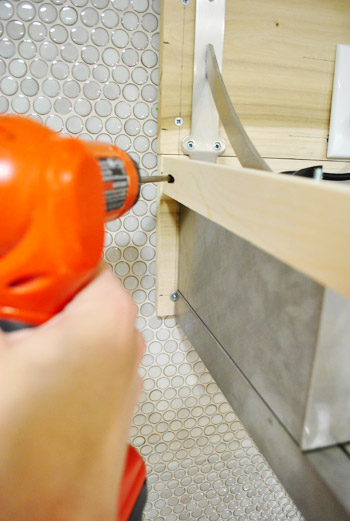
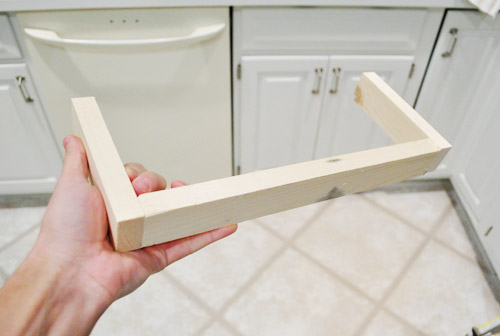
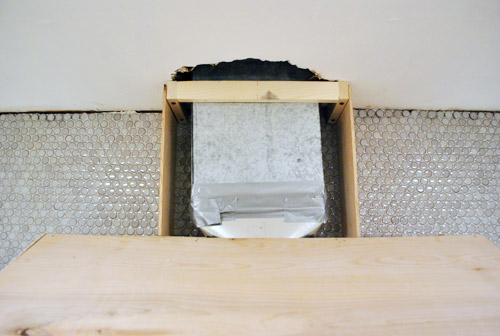
The frame is basically three pieces of 1 x 2″ screwed together in a U-shape using my Kreg Jig. To attach it to the wall, I made a couple more holes with my jig so that I could screw it tightly to the wood plank that we used to mount the hood (see, I told you that weird overhang would make sense!).
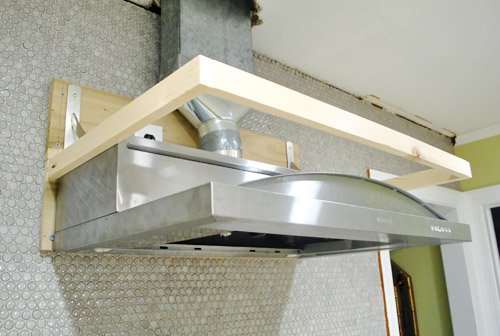
It looked a little something like this. Note that it’s not touching the actual hood at all, so our cover will essentially float around the entire thing (our high-efficiency range hood should have no issue directing moisture/steam up into the hood and up the vent, and our wood surround should stand up to everyday use like many wood hood surrounds built by various cabinetmakers and handymen/handywomen). We’ve heard from a ton of folks in blogland who have built or hired out wood covers since revealing our crush on them and we’re happy to report that everyone seems to have had a great experience with them (no moisture or steam issues with the wood around the hood). It actually makes sense since non-covered range hoods usually have wood cabinets against either side of them and they don’t typically have issues with those sort of things either.
Note: these pics were taken before we realized we should use metal foil tape and not duct tape for those vent joints, but we’ve since swapped it out and will share those pics in another update post about other things we have to share, like how we patched our giant honking ceiling holes, etc).
With the frame in place I started nailing the thin plywood panels in place.
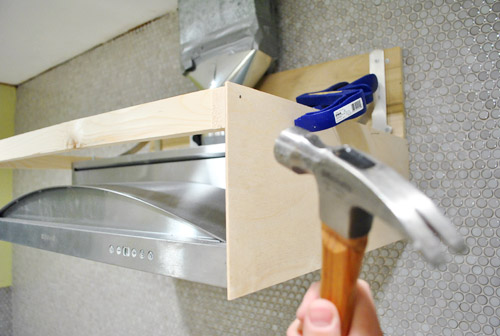
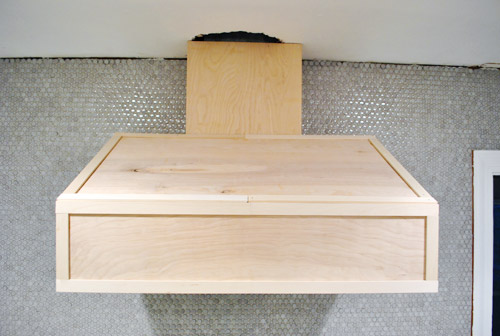
Here’s what it looked like with the first three sides done.
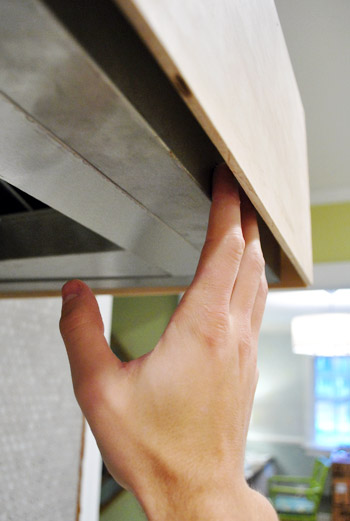
Remember the reason that there’s a small gap around the outside is to leave room for us to reach the control buttons on the front of the hood. There’s enough room for our fingers to slip in, without being a totally garish amount of space.
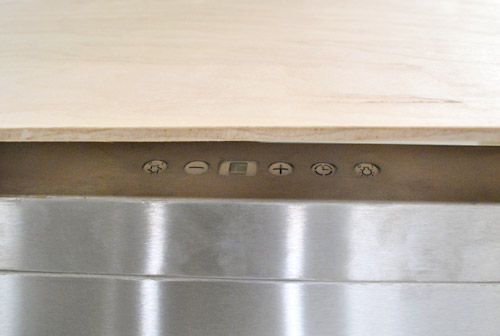
And if you’re Sherry’s height (or me slightly ducking) you can even see the buttons so you don’t have to wonder what you’re pressing (to see any buttons on the underside of a hood you usually have to duck a bit to see them, so we like that ours are just as accessible, albeit slyly hidden).
To add the next “tier” to our cover, I had to build a slightly smaller version of the previous 1 x 2″ frame. Since this would be the one against which the sloped part of the cover would sit, I ran it through my table saw at an angle to make it easier for the angled piece of plywood to lay against it. I didn’t measure or anything to make the angle perfect – it was just an educated guess since I figured anything would be an improvement over it meeting the original square edge.
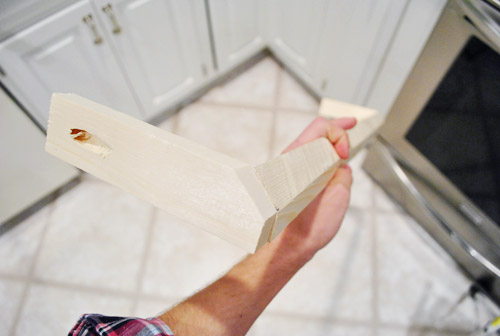
Here it is attached to the upper portion of the hood.
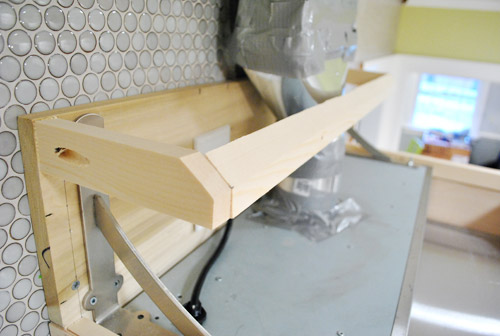
Even though the next set of plywood panels would sit just fine on the top edge of the previous set, I did add a small piece of 1 x 2″ to give me a place to secure them with a nail. And yes, I gave it another guesstimated angled cut to help that sloped piece sit better.
This picture should help make more sense out of this. See the sloped plywood panel in place?
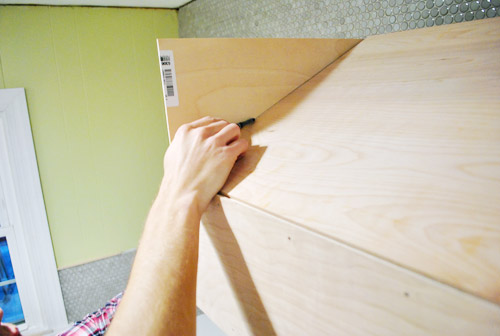
The next two sides would be on only non-rectangular pieces of plywood. Since this angle had to be exact, I held the piece in place so I could mark the exact line that I had to cut.
Then I ran them through my table saw to get these fun little quadrilaterals. Wow, I don’t think I’ve used that term since Mrs. Miller’s 9th grade geometry glass. That’s the class where I decided I should wear my glasses during tests because they would help me feel smarter (even though I just needed them to read the blackboard). Nerd alert.
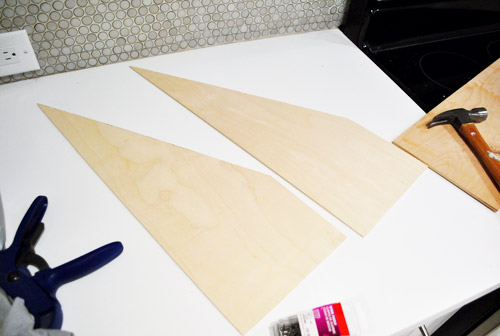
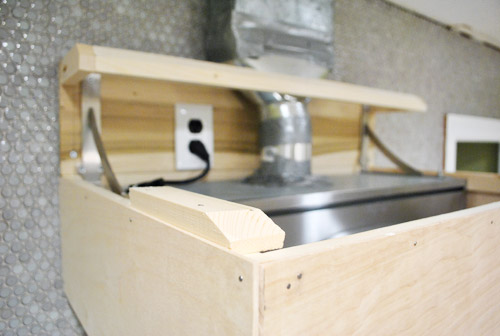
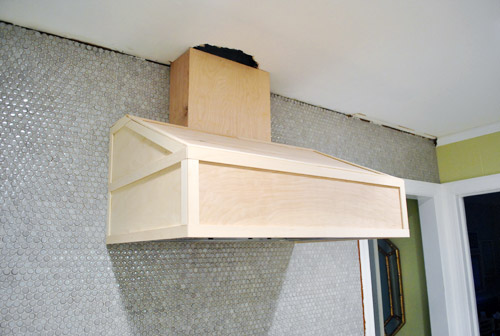
Anyways, here are those two panels attached on the sides. It’s starting to look like something, no? Of course it’s still very clunky and unfinished looking without trim, but we’ll get there in a minute…
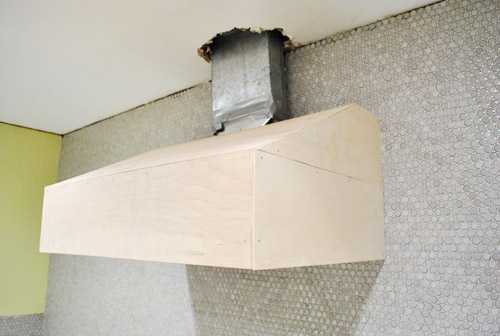
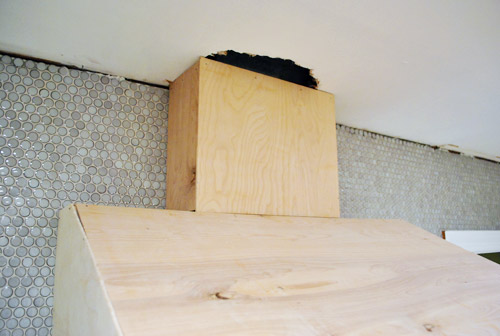
For the third and final tier, we had to cover the vent pipe with the section I affectionately called “the chimney.” First I cut my tiniest 1 x 2″ frame to date. Ain’t he cute?
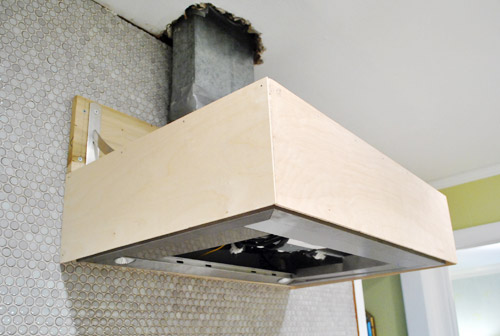
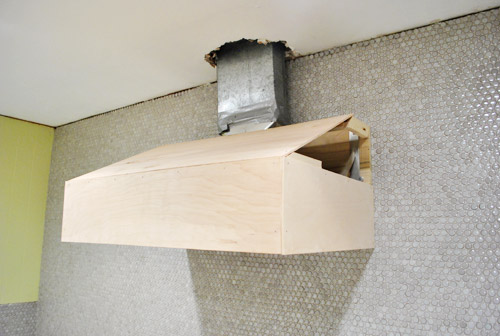
And then I screwed him straight into the ceiling (hitting nice firm wood that I knew would hold it nice and snug – you never want to drill up into nothing- that hollow feeling is the worst). The only problem was that I hadn’t accounted for how gargantuan the hole was for that vent pipe. Guess we’ve got more patching to do (Sherry’s my spackling queen). And we’ll eventually be installing crown molding around all of this too, so it’ll look nice and polished in the end.
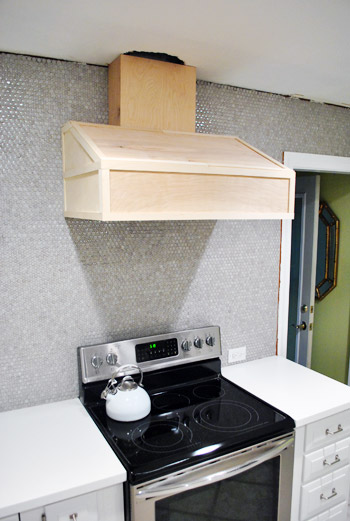
Here’s the chimney covered with the plywood panel, essentially completing the major construction phase of this project.
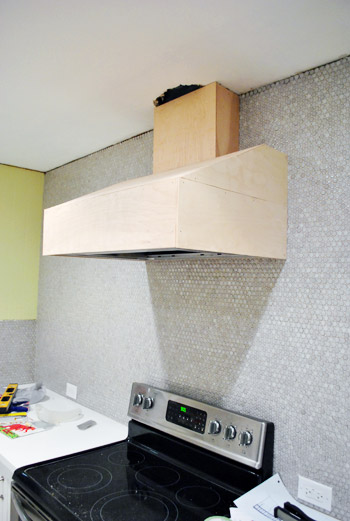
So here’s what it looked like at that point. Hood is sufficiently covered. We still have access to the buttons. It’s plenty secure and we’re happy with the shape of it. It’s just looking a smidge unfinished. Okay, maybe more than a smidge.
This is where trim comes in. And I’m telling you, it’s one of those “details make the difference” things. I decided to make the trimming portion on this fairly easy on myself. In keeping with the theme of “make it light weight” I decided to use some super lightweight plywood. And to minimize nail holes (and having to hammer against the cover) I opted to glue everything in place. This method should definitely hold up to heat and moisture and all other kitchen loveliness (grease!) – especially once it’s primed and painted with the same super durable Benjamin Moore Advance paint that we used on our cabinets – so we’ll keep you posted.
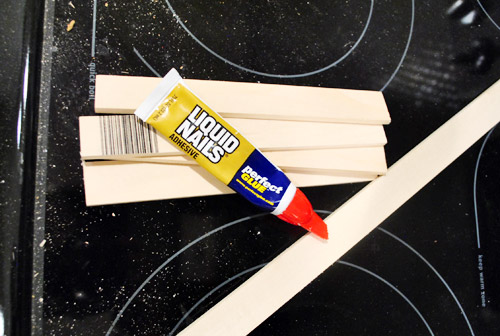
We also ditched the idea of doing panels across the front and sides (as shown in our original renderings) because we kinda liked the clean look better (and worried smaller boxy panels might not jive with our existing cabinets). It also made my job a bit faster, meaning I had the first row of trim cut and glued into place in no time.

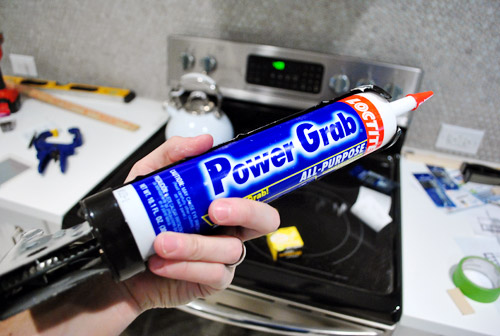
I did like working with the LiquidNails because it gave you a bit of play for the first 10 minutes (hence the tape above to stop it from moving when playtime was over). But I ran out about halfway through (it was an old tube leftover from something else) so I started using this leftover tube of Loctite instead… and kinda wished I had used it from the start. I wasn’t able to wiggle things into place as much (I had to peel it off and restick it instead) but things really stayed in place – meaning no more green tape was needed.
The top portion of trim took me a bit longer (especially because I ran out of wood and had to run out for more in the middle of everything), but by the end of the day I had it looking like this:
The angled cuts on the side took a bit of time too. We opted not to put trim on the chimney part because it’s not really supposed to be a “decorative” part of the hood. Plus there weren’t any open seams between the plywood or anything that needed “finishing.” Once we patch that ugly ceiling hole and add crown molding around the entire top of that wall (and hood) we think it’ll look swankypants indeed.
It’s not 100% perfect. For one, it needs to be primed and painted (we’ll do that when we prime and paint the open shelves we’re about to build) and it needs some caulk in a few places just to make it 100% seamless. But I’m just proud that I accomplished my three goals. It’s sturdy and durable. It’s lightweight. And it looks pretty (if I do say so myself).
Now of course it doesn’t have some of the bells and whistles that a professional hood might have, but once it’s primed and painted it should perform just as well as a painted cabinet would next to or above a hood. And it certainly was cheaper than the $3 – 4K price tag we saw some places (check out this post to see a price that had Sherry spitting liquid at her laptop). In the end it cost me about $90 to complete, mainly because I didn’t realize how much wood/trim I’d need. So I think that brings our total for the hood up to $150 (since the hood itself was $60 thanks to craigslist). Wait, that doesn’t include brackets/wood to hang it, so make that around $175. Still not bad considering we paid $250 for our last kitchen’s stainless steel hood (and it wasn’t an industrial strength JennAir one like the beauty we scored this time).
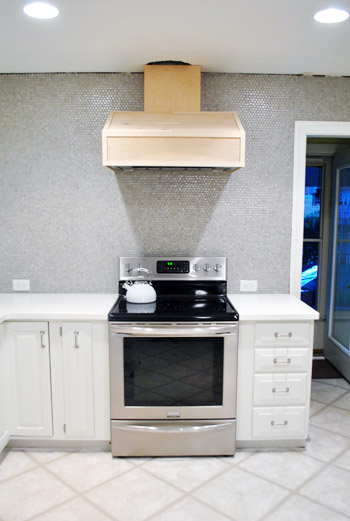
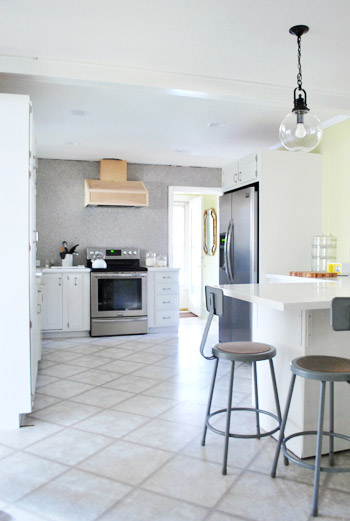
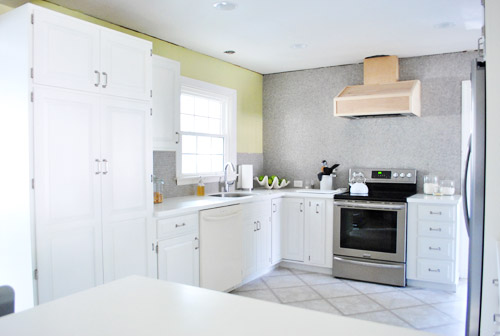
Even though it’s still a big, tan-colored box on the wall – I did take some “after” photos of the kitchen for ya. Mainly because with book photoshoots starting in our house this week I wasn’t sure of the next time our kitchen would look this clean again. It’s definitely still looking pretty raw in there (we need crown molding, shelves, a ton of color that Sherry can’t wait to add with art and accessories, new floors, an installed dishwasher, a light over the sink, etc) but we’re getting there.
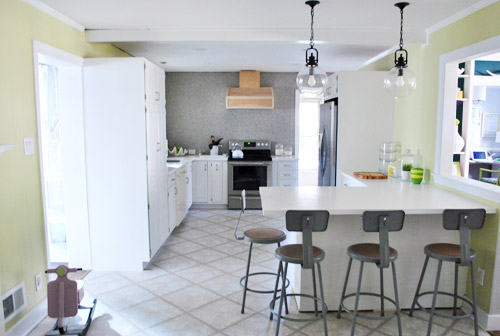
As much as it’s kinda weird for us to see something hanging from this wall that’s been empty for two months, we do like that we’re starting to break up the sea of tile a bit. In some ways it just draws your eye more to that wall so you can stand there drooling. Not that we do that. Much.
It mainly just makes us eager to get that thing painted, get the ceiling patches sanded and painted, and get those open shelves hung. Sounds like a good project to talk about next, eh?
In the meantime, let’s talk about range hoods. Ever built one? If not, I never had either until a few days ago, so you never know what you might find yourself doing down the road…

Leave a Reply