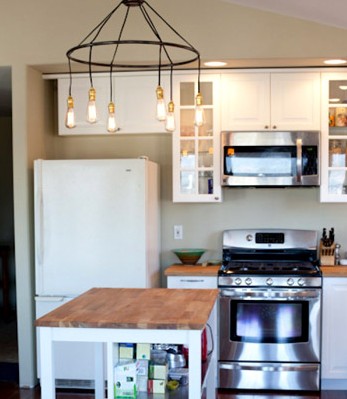
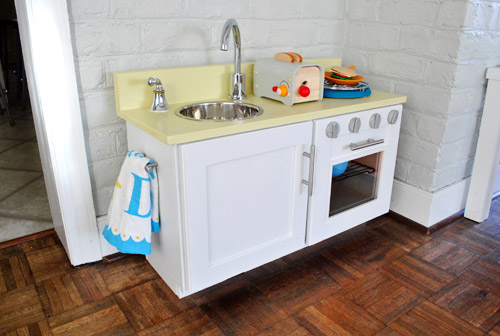
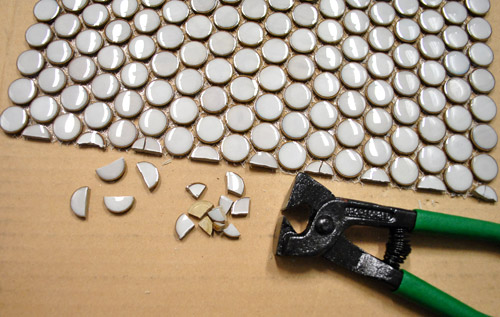
Oh man, backsplash-ing is 50% scary and 50% suuuuuper excitiiiiiiiiinnnnnggg! Sorry, got carried away there. Maybe it’s 90% super exciting and 10% eeeks. Anyway, we began wrestling with it a few days ago and it’s taking a bit longer than expected (we spent nearly three hours just figuring out how to cut it, prepping our work space, and mixing up thinset before ever getting started). But by the end of the day (after Clara had gone to bed) we had accomplished this: Isn’t it awesome? Well, at least the beginning of awesome. I keep doing awkward things like stroking it and saying “oh yeah” and then blushing and backing away slowly. There’s plenty about the
Archives for January 2012
A Few Mail-Friendly Christmas Gifts
It’s time for: Secret Santa: Revealed. That makes me laugh because I imagine some man with a deep serious voice introducing a show with that name after Dateline or something. Anyway, since a bunch of you have asked for the Secret Santa dirt (and I couldn’t wait to spill who I had and to learn who had me!) here it is: I had… (drumroll? anyone? can I at least some table slapping or something?)… House Of Smiths! It was so much fun to pack up two little surprise care packages for her. The first one included two decorative frames from Michael’s that I personalized with some paint in the name of some Christmas cheer (they
How We Take Better Blogging Photos
We’re not the best photographers, but we are trying to get better as we go. And that’s why we find ourselves doing things like this in the middle of homespun photoshoots. See how neon blue it looks behind me in that picture? That’s because when shooting our artificially-lit kitchen, any natural light looks like that. Usually not a problem, except when some window light shines through and makes a subtle blue splash on the freshly painted cabinets that we’re trying to take pictures of. Sherry doesn’t always notice these things, but they drive me crazy. See the blue-ish light reflecting off the doors and the side of the peninsula? It’s taunting me. So with the
Opening Up A Closed In Kitchen
Since we’re clearly in a kitchen state of mind, we had to share Kacie and her husband Kyle’s makeover. With the help of their parents, they took advantage of their home’s open floor plan and created a sweet and much-more-functional spot to fry up some eggs in the morning. Here’s Kacie’s email: My husband and I just finished our first remodel! When we moved into our house one year ago we knew we were going to redo the kitchen and the flooring. The kitchen was completely closed in and all of the cabinets were poorly placed – there was only one usable drawer! I absolutely love to cook and this was not a cook’s kitchen:
How To Make DIY Blackout Curtains
File this under “A Lazy Mom’s Trick To Get More Sleep.” I made no-sew, mind-numbingly-easy, shortcut, DIY blackout curtains. Enough adjectives for you? I’m an over-explainer. Anyway, this isn’t the professional way, it’s the cheater way. Haha. First the why. Although the faux wood blinds on Clara’s bedroom window provided a decent amount of light-blockage, I knew blackout fabric would make the room pitch black in the middle of the day (which means it might help with the just-one-forty-five-minute-nap that we’ve been getting these days). To JoAnn fabrics I flew, and purchased 5.5 yards of blackout fabric (which sort of felt like the white fabric on roller-blinds). Thanks to a 50% coupon I got it
How To Paint Your Cabinets
Painting your kitchen cabinets is a perfect way to give a dated kitchen a fresh look, without splurging on a big overhaul. It doesn’t cost much and with the proper preparation, it’ll look great and last long. We’ve outlined each of the steps below, including a video recap of all of the steps that we used to updated our wood kitchen cabinets. (Rolls up sleeves, looks into the mirror, smiles, fixes weird fly aways, and whispers “let’s do this.”) It’s finally here. The day that we get to wake up and pad into a kitchen that used to look like this… And see this… So here’s how we did it from soup to nuts. Wait,
Christmas Gift Ideas For Husbands, Wives, & Kids
Let’s get into what Santa brought us. This was an exciting Christmas because in all of our seven December 25ths together, we’ve never woke up in our own beds to open the presents under our own tree as a family (i.e. we’d always traveled elsewhere). We did meet up with a bunch of relatives later in the morning to open gifts as one big crazy Petersik family, but we snuck in some present opening time as just the four of us earlier in the morning. Especially since Santa brought one little Petersik something extra special this year (as mentioned in great detail here)… Along with her play-kitchen Clara got lots of clothes, books, toys, and
How To Make A Homemade Play Kitchen From A Cabinet
We did it. Holy cats, we did it. Just a few days before Christmas we started Clara’s homemade play-kitchen (in secret of course, since she thinks Santa brought it)… and we actually finished it on Christmas Eve! Yes folks, it was a Christmas miracle. We went into it with a goal of spending under $99 since this basic play-kitchen from Ikea is that price – but we wanted to add a bit more detail like oven knobs that actually turn, an oven light that goes on and off, a wire baking rack inside the oven instead of a shelf, and a real faucet (not plumbed of course, but movable!). So here’s how we made our own
Fab Freebie: The Simple Life
***This giveaway is no longer accepting entries – see who won below!*** Random.org is wishing a very happy new year to TWO of you by selecting you as our winners. And those lucky people is… KC (who after a recent move to a smaller space would really love to pare down her home to the bare essentials) and Katie (who needs to gets her computer files organized since she can’t find anything). Congrats! Since ringing in the new year usually means ringing in some resolutions about simplifying or getting organized, simplify 101 might come in handy. They offer online workshops (as well as free guides) to help folks get organized, stay focused, and reach their
Painting Our Wood Cabinets Cloud Cover by Benjamin Moore
Ok, so we completed the door-painting process a few days ago (picture us doing the droopiest super-tired happy dance that you’ve ever seen) and we’re now into the “waiting game” portion of the cabinet painting process. But we couldn’t wait to share all the photos of everything both during the painting-process and now that they’re all glossy and finished, so here ya go: We used Benjamin Moore’s Advance paint in Cloud Cover in a satin finish (it’s a soft tonal taupey-gray color, so it’s not quite as bright as our glacier white counters for a subtle layered look). Benjamin Moore Advance paint (in the satin finish) actually came recommended by a few pro cabinet painters