We knew pretty early on in our appliance shopping that we’d need an oddly tiny fridge to fit into the existing fridge hole that we had going on in our kitchen (yes, fridge hole is a technical term).
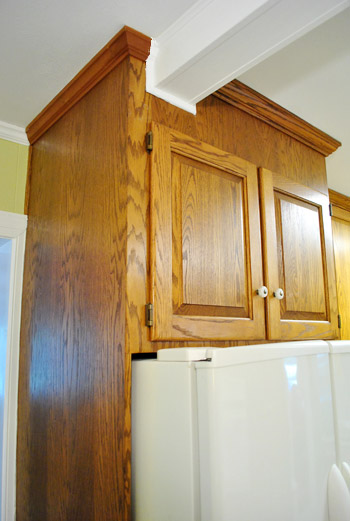
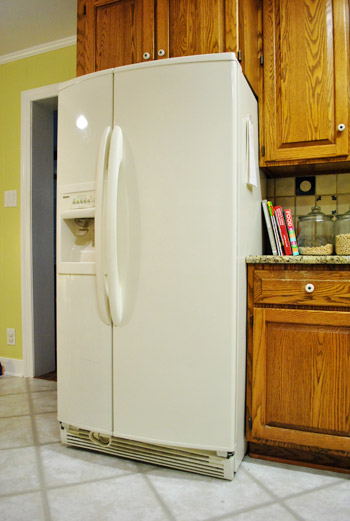
And after some searching we realized we were probably more likely to discover the Loch Ness Monster than a perfectly sized fridge (preferably in stainless with side by side doors, since we loved that so much in our first kitchen – but we were flexible). So we slowly came around to the idea of removing the built-in box around the fridge to free things up a lot more when it came to dimensions. That way we could cut off the hollow unused top of the upper cabinet and rehang it higher to allow for a taller fridge – and then rebuild the sides at the new depth so the new fridge would look more flush/custom.
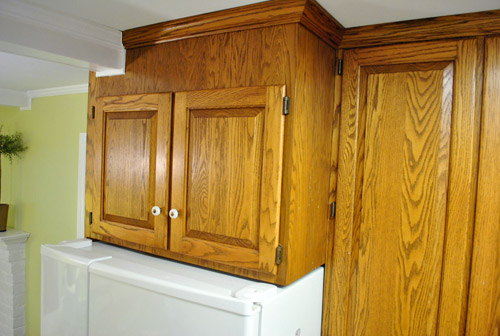
See, even if we kept the built-in side and cabinet exactly as they were and somehow found a small enough fridge to slide in, we’d have to rebuild the side panel for a more flush look (we didn’t like that the old fridge stuck out about 6″ beyond the side panel and the hinges on top were visible). Plus we always thought the beam looked funny jammed into the side of the cabinet like that – so we weren’t sure what we had planned, but it probably would require some minor beam surgery. We figured we’d just play it by ear and adapt our plan as we went. You know, the usual method around here.
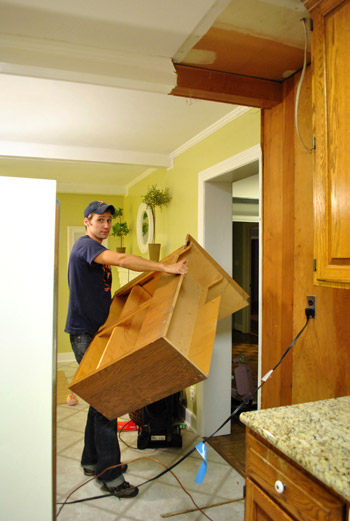
So removing the side panel and cabinet above the fridge was our official dive into the pool of kitchen demo (although we’re planning to work with / adapt many of the existing cabinets so we won’t be gutting the place or anything). Step one of our side panel/fridge cabinet surgery? Removing everything from the cabinets. To be safe, we removed everything from the cabinet next to it as well (since we thought it might have to come down in the process). Clara was of little help, unless of course our project was “putting toy pigs on the step stool.”

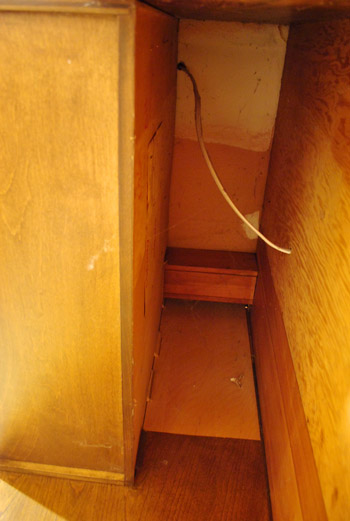
With cabinets emptied, it was time for the bean to go off to bed. As she snuggled up to her stuffed giraffe and drifted off to dreamland, we were having fun rolling the fridge out of its little cubby so we could steal a peek behind the scenes. Besides revealing a weird electrical cord to nowhere (already called the electrician, we’ll keep ya posted), by standing where the fridge usually sat and looking up we were able to determine that the cabinet was attached only at the sides and top – not the back. And that the weird beam actually appeared to go all the way through the cabinet. Who knew?
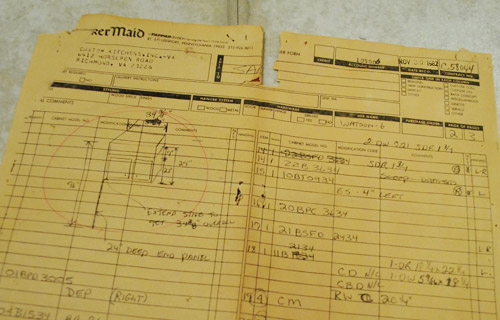
It also revealed an order form from back when the cabinet was installed… in November of 1982. So yeah, I’m only eight months older than this kitchen. The cabinet company is called QuakerMaid, which some research revealed is a pretty nice custom cabinet maker. So we’re glad we’re working with these cabinets since they’re a nice standard size and still in pretty good shape considering they’re almost thirty years old (our first kitchen‘s cabinets were original to our 50’s house, so they weren’t even big enough to house standard dinner plates). Note: That’s not our address below, it’s the old cabinet maker’s location, which is no longer in use.
But enough about our little kitchen artifact. Back to the whole cabinet removal thing.
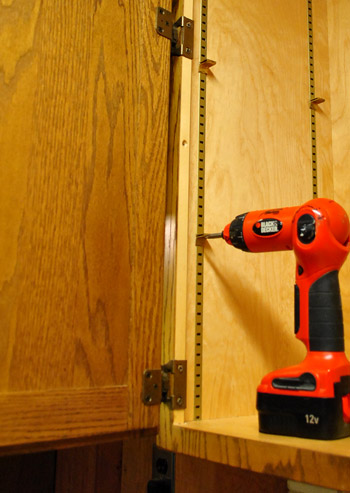
Detaching it from the cabinet beside it was easy. We found some long screws drilled through the tall cabinet into the fridge cabinet. So we zzzzzzip zzzzzzip zzzzziped ’em loose and half expected the cabinet to come crashing down on us (John was supporting it from beneath, just in case). But it wasn’t that easy. Nothing ever is, right? That’s ok, we love a challenge.
At that point it became clear that it was that one solitary floor-to-ceiling side panel on the left side of the fridge (as you face it) that was now keeping the entire cabinet afloat. And since it was built into the floor and ran all the way up to the ceiling, after a few attempts at salvaging it by popping it off (there were no exposed screws or places to really grasp it well since it was so flush on all sides) we decided to go the barbaric route and just slice right through the darn thing. This way we could keep as large of a panel as possible (instead of sledgehammering and splintering it to death) in case we need some extra matching cabinet wood down the line for future alterations. Thank you jig saw!
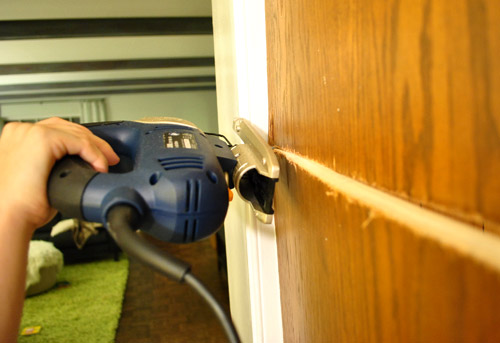
Oh but first we put the three long screws back in through the cabinet on the right to keep everything from falling down. Miraculously it worked. John and I took turns (power tools = our jam) each putting one long cut through the side panel… and it basically swung free.
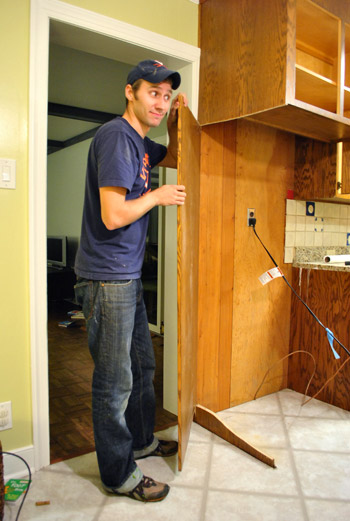
Then it was as simple as re-removing those three screws from the cabinet next to the fridge that were solely supporting it (while John stood under the cabinet to make sure it didn’t come crashing down). The kicker? Clara slept through some of the loudest drilling and sawing of all time. Seriously, it was amazing. Love that girl.
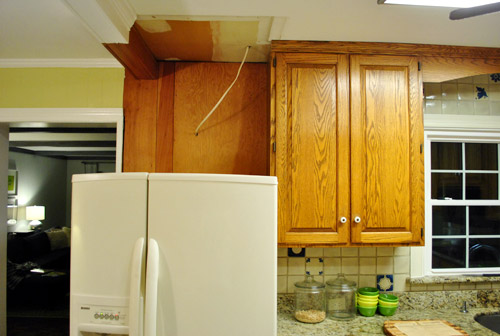
And it revealed that the beam did in fact go all the way through (we always figured it was added after the cabinets and just stopped short where it hit the front of that cab).

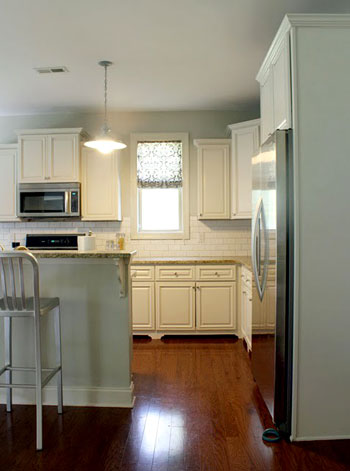
Seeing the full beam basically confirmed our inclination to not make the altered cabinets go all the way to the ceiling. Don’t get us wrong, we love the visual height and extra storage gained by taking cabinets to the ceiling. But we just can’t bring ourselves to cut off the beam again (it looked so weird ramming into the cabinet – and it actually has to stay since it covers a marred ceiling where two old rooms used to meet). Plus the other built-ins like the pantry on the other side of the room aren’t ceiling height either – and we’re definitely keeping them. So we actually think that once we get everything painted and looking right again our decision will return some much needed balance to the entire room. Of course we’re planning to add some trim to the top of all the cabinets to polish everything off, sort of like this kitchen:
But ours currently looks like this:
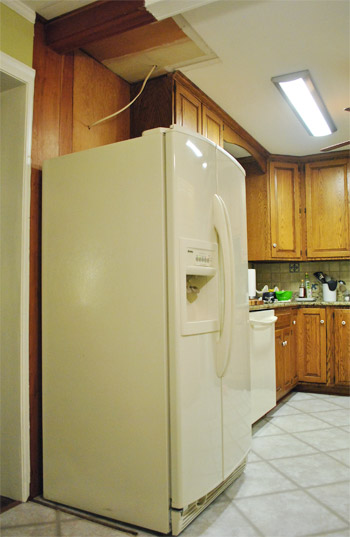
A mystery wire, some unpainted ugliness, and – the best part – room for a taller fridge.
But just as our dream fridge was getting taller, we started wondering if that was enough. And when our wheels get spinning it can be a dangerous thing. See, we got to contemplating a more major fridge move (it still looks kind of crammed into that corner to us). But our new fridge location idea involves a lot more drilling/lifting/general labor. And we were way too tired. Maybe tomorrow. Pics and more details as soon as we (hopefully) get ‘er done!
Pssst- Check out one of the sweetest night-stand-to-play-kitchen conversions I’ve ever seen over on BabyCenter. So creative!

Leave a Reply