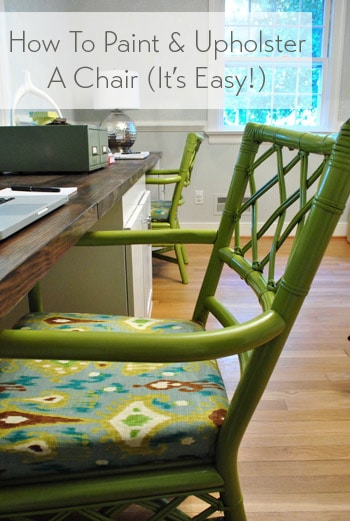
Well, we can check cheerful desk chairs off of our wish list for the office.
You can read all about how I prepped, primed, & painted them here. And now for the quick upholstery deets.
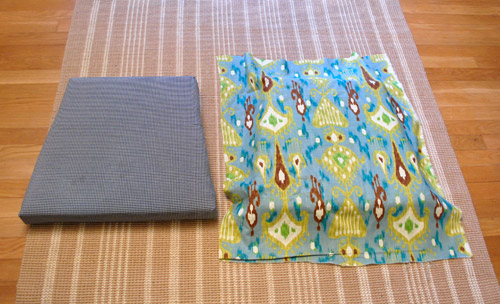
I had some leftover fabric from the dining room curtains on hand so I laid it over the detached seats and centered one of the grellow thingies (that’s a technical term) and trimmed the fabric around the cushion, leaving enough that I could easily pull and staple to the backside. Update: Here’s an affiliate link to the same fabric on amazon for anyone looking for it.
Making sure it was staying centered, I carefully turned it over and shot four staples into it while pulling it nice and tight (I have a basic manual staple gun for around $20 from Home Depot). Those staples went in at noon, three o’clock, six o’clock, and nine o’clock.
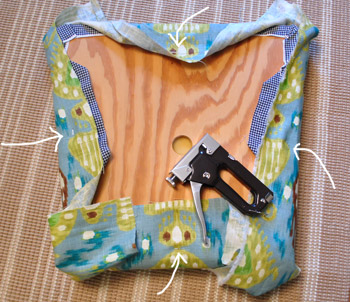
That way I could flip it back over and ensure things still looked straight and that the fabric was pulled tight enough (if it wasn’t, it would just be four staples to pop out instead of a dozen). After confirming the pattern still looked nice and straight from the front, I flipped it back over and spaced out about six staples per side (while pulling the fabric tight along the way).
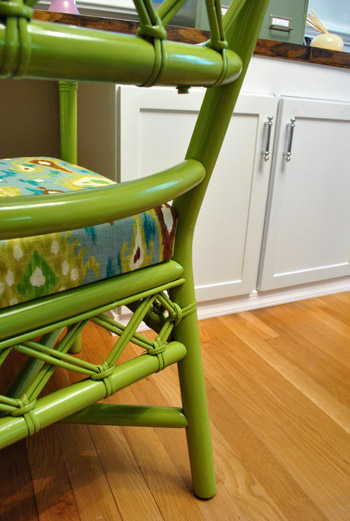
When it came to the corners, I just treat those like wrapping a present. It’s hard to describe in words that don’t make it sound like a super complicated ten step process (it’s not) but I basically just fold the fabric into little triangles like the side of a present and staple them until they look good from the front. The front is all that matters – so the back can look all weird like this:
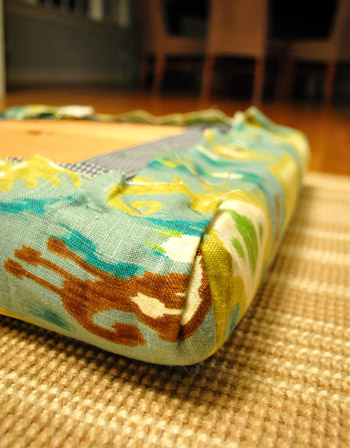
As long as you turn it over and things look great, you’re golden.
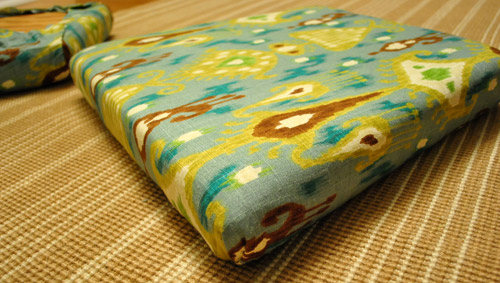
So I just did the same thing with the next cushion (lining up the grellow thingies in the same way so it would look like Cushion #1’s twin). About 30 staples later that cushion was done too.
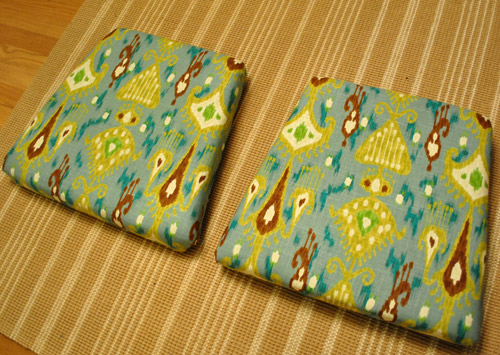
The entire upholstery project probably took me thirty minutes from start to finish. Maybe 45 because I kept pausing to watch Housewives of Beverly Hills. Oh and the reason I just went over the fabric that was there was because we didn’t have any cushion/fabric related issues (other than the fact that we didn’t like the fabric). So it wasn’t like we had odor problems or a flat lifeless cushion to deal with (which would have involved removing the fabric and the cushion and getting new foam from a place like JoAnn Fabric).
Then of course the hard part was waiting for my spray painted chairs to fully cure so they were nice and hard and ready for every day use abuse. I gave them two sunny days outside (which also helps speed up off-gassing since spray paint can be stinky until it’s fully cured)…
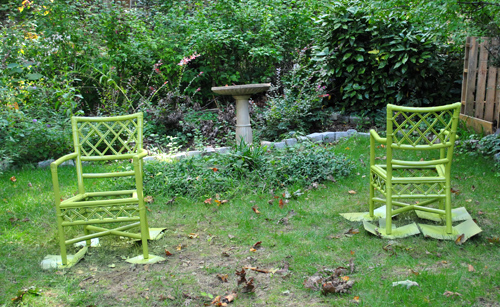
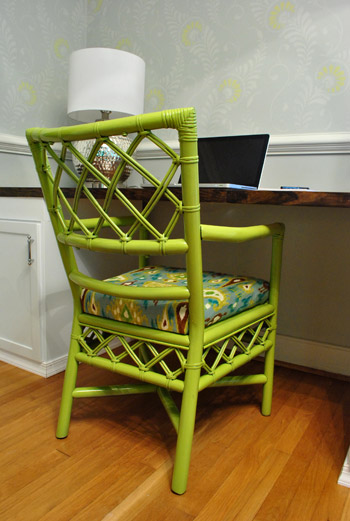
… and a third day in the sunroom (with the windows cracked and the fan going to continue to allow them to completely dry before bringing them inside). Then late last night I danced a giddy little chair-time jig and slipped the newly dressed cushions onto those so-fresh-and-so-green chairs (securing them with the same four screws that I removed from the underside to free them here). The result was nothing short of magic. But the cool kind involving levitation and mind-reading. Nothing weird like a bad card trick or a double sided quarter.
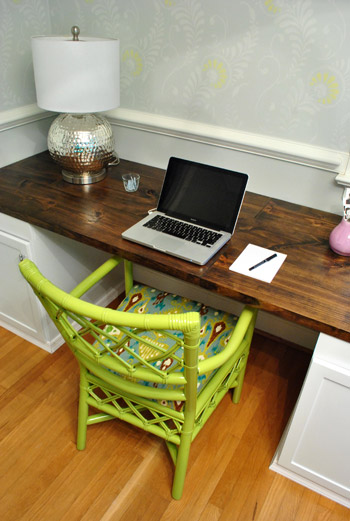
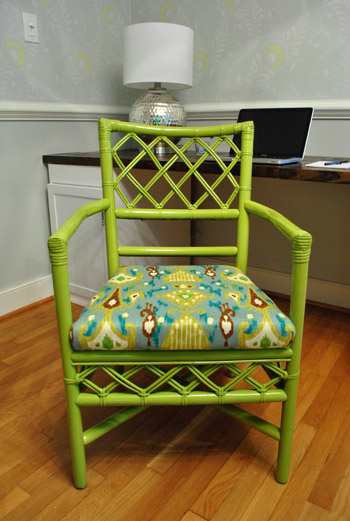
This photo’s coloring is probably the most true to life (below). They look so great with the white cabinets and the dark wood counters.
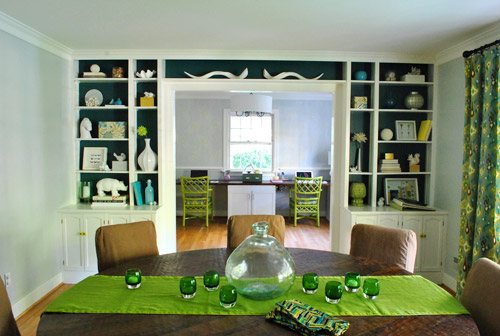
Yeah, we’re kind of obsessed. We love how the more intense greeny-yellow in the chairs’ paint & fabric relates to the soft pop of color in the stencil. Instead of taking away or competing with the stencil, they just seem to bring out the grellow pop on the wall- so they enhance/add to it (if that makes sense). Although I’m not sure how well it’ll come across in pics (colors seem to vary by monitor). In person the pairing is pretty darn amazing.
Since the stencil is so subtle and the chairs are so bold, they sort of layer in together – so it’s not chaotic and weird (which would probably happen if the stencil were more high contrast or the chairs were more washed out). The key is to keep things at different levels (ex: bold pillows on a more subtle tone on tone rug or sofa). Since if everything textile, accessory, and furnishing were fighting to be the star it might get kinda… Lady Gaga. Not that there’s anything wrong with that if it’s what you’re going for.
The best view of all is through the dining room. Me-ow. And I love that the table runner is easily switched if I feel like cutting the green… but for now I dig it. Can’t wait to add some large scale art above each chair for some much needed height in the office (but nothing too crazy to compete with the chair + stencil combo).
But now, back to the close ups.

Our office just got a whole lot happier. And we did too. Picture me serving up a nice cheesy grin.
These $35 secondhand babies have certainly come a long way. Here they are right after we bought them from a local secondhand store:
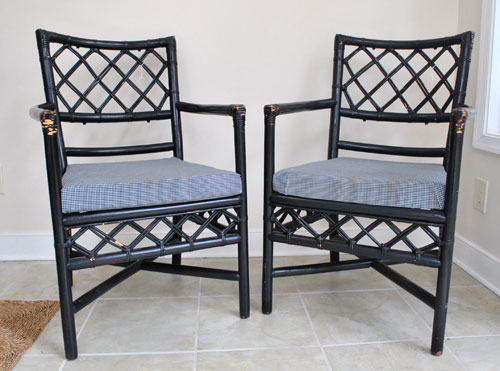
And since we already had the fabric on hand, our makeover total was just $18 (the cost of three cans of Ivy Leaf spray paint from Michael’s). But if you wanted to add the initial cost of the chairs ($35 a pop) and the fabric ($12.99 for a yard, which was all I needed for both seats) it comes to a nice even $50 (and fifty cents) per chair. Which makes me all sorts of hyper since similar chairs (like these and these) are in the $200-$250 range. And don’t look now, but this guy is $694 on ebay. Woah nellie.
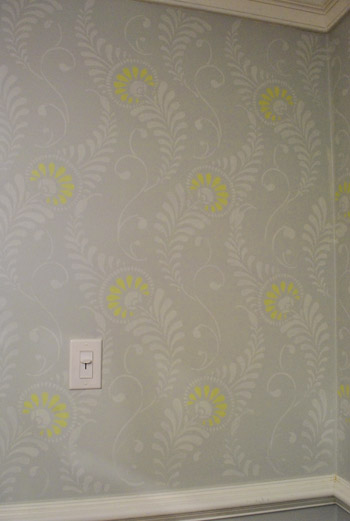
Oh and just to keep it random, I snapped another pic of the stencil. Because it makes me happy, and it’s so hard to capture. Elusive little guy. Of course the pop of color looks yellow in this pic, but it’s a lighter shade of the chair in real life.
Have you painted or upholstered any chairs of late? Do you have extra fabric laying around that you’re itching to use? Do you have the same magic hierarchy as I do (with levitation and mind reading at the top and bad card tricks and double sided coin gags at the bottom)?
Psst- Check out the first half of this chair makeover here.
Psssst- We just announced this week’s giveaway winners. Click here to see if you’re one of them.

Leave a Reply