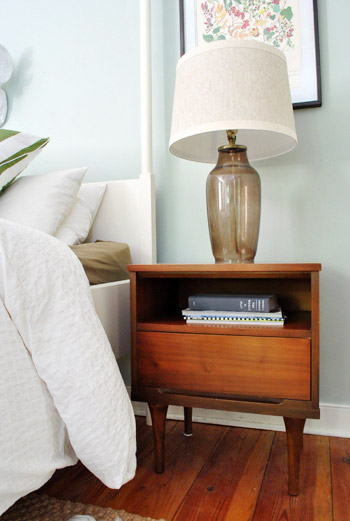
Archive for September, 2011
Fab Freebie: Canine Design
***This giveaway is no longer accepting entries – see who won below!***
Burger barked a few times at random.org and it spit out our two winners. They are… Ruth (who’s jealous of the “sleep wherever you want” factor) and Mattie (who envies the happiness her dog finds in a squeaky toy). Congrats ladies! Everyone else – don’t forget about the discounts listed among the giveaway details. They’re still valid!
Tomorrow is Burger’s 5th birthday (I’m sure you already had it marked on your calendar), so this week’s giveaway is distinctly doggy-themed in his honor – thanks to two puppy lovin’ shops. The first is Oliver Blu Designs whose punchy animal silhouettes find their way onto shirts, baby gear, wall art, and stationery. So TWO of you will win a 10 x 10″ stretched wall canvas, a set of 10 personalized notecards, and a baby bodysuit in the breed of your choosing (might we recommend the chihuahua?)
But it wouldn’t be a dog-tastic prize without something for your dog, right? That’s where Hollywoof Styles comes in. Our two lucky winners will also score $50 to spend on their awesome handmade collars and leashes. Just don’t tell Burger, okay?
- PRIZE: A gift set from Oliver Blu Designs (10 x 10″ wall canvas, set of 10 personalized note cards, child’s bodysuit) and $50 to Hollywoof Styles.
- TO ENTER: Comment on this post with the words “BOW WOW!” and tell us…
- BONUS QUESTION: …what you’re most jealous of when it comes to the canine lifestyle. Not having to pay bills? Getting to sleep all day? Enjoying a carefree romp through the grass? Being able to catch a frisbee with your teeth? Or (dare I say) not having to wear clothes?
- GIVEAWAY CLOSES: Wednesday, September 28th at 8pm EST
- NUMBER OF WINNERS: Two
- PRIZE SHIPS: The 50 United States (although we do try to wrangle as many international giveaways as possible)
- DISCOUNT: 10% off orders at Hollywoof Styles AND Oliver Blue Designs with code YHL10
- USUAL STUFF: One entry per e-mail address is permitted. The winner will be selected using random.org and announced on Thursday as an update to this post. That’s right, come right back here on Thursday for the announcement of our winner. Good luck…
Note: We weren’t paid or perked for hosting this giveaway, we just do ‘em to thank you awesome folks for stopping in. See our Giveaway FAQ page for more info. Pics courtesy of Oliver Blu Designs and Hollywoof Styles.
Getting A Little Trim
As you read in last week’s Day In The Life post, we recently tackled the add-trim-to-the-hooter-and-the-hotter-office-desk project. The basic game plan was to add some simple baseboard or molding to the bottom of our cabinets so they looked more like built-ins. In other words, the bottoms were looking a little unfinished…

I took measurements and headed off to the store with my little cheat sheet. Notice how I mark which way my cuts go? When I’m making angled miter cuts I’m so anxious about cutting the wrong way that I leave myself as many reminders as possible.

One very critical measurement, not shown here, was the trim height. We had less than 3″ of distance between the floor and the cabinet doors, so traditional baseboard wasn’t gonna work. I actually ended up (dramatically) bringing home trim that was very similar (actually, maybe exact) to what we used around our bathroom mirror. Total cost for three 8ft pieces = $14.

I measured my pieces and again left reminders about what angle my cuts needed to be…

…so that even at the last second I could make sure I didn’t have my blade or trim piece in backwards or something.

I checked each piece as I cut it just to make sure the lengths and angles were right.

After everything seemed to be lining up, it was time for the nailing portion of the day’s festivities. I hammered the small finishing nails in most of the way with my hammer, then finished it off with my nail punch (which helps get the nail set into the trim slightly without banging up the surrounding wood).

Of course the edges weren’t 100% perfect, but that’s what a bit of caulk is for (just rubbed into the edge with a finger). It’s also good for hiding those slightly sunk nail heads (thanks to the nail punch). Though we actually haven’t done either of those things yet. Oops. Soon…
I put two or three nails in each piece of trim, securing it to the cabinet – not the floor – and was done in almost no time. If the white of the trim weren’t so darned close to the white of the cabinets already, we’d probably have painted them immediately. But they actually look great as they are (so we plan to paint them when we caulk stuff, just to finish things off).

What wasn’t looking so great was the mess of cords in these pictures. We’ve just sort of been ignoring them up to this point, but after taking the pic above we suddenly realized that they were ruining the finished look of our new trim. So we decided to finally do something about it.
Sherry’s side was easy because she only has two plugs in one small power strip (her computer and lamp – although for some reason her lamp wasn’t plugged in for the picture below). The outlet is hidden behind the desk, so we thought ahead and plugged the power strip in before finishing the desk. Luckily I was able to just tuck her strip out of sight behind the cabinet since there’s a smidge of space to allow for the plug (there’s no space between the countertop and the wall, so it looks 100% seamless from above – you only see that small crack where the cabs don’t sit right against the wall if you’re on your knees under the desk). Oh and ignore the raw bottom of the countertop in all of these pictures (it’s also not seen except by someone who is Burger’s height, but we’ll probably do something about it someday because we’re anal).

My side was a bit crazier, since I had a larger power strip (from our old office set-up), more plugs (computer, phone, external hard drive, etc) and that big honking wireless FiOS router. Behold the hot mess:

Since tucking it away like Sherry’s side wasn’t an option (stuff was way too bulky to slide behind the cabinets), I opted to hang the power strip on the wall right under the counter, that way it’d be virtually out of sight. The power strip already had notches for screws on the back, so I just used a homemade guide to make sure I drilled my holes in the right spots.

In case the pic isn’t self explanatory enough, my basic system was:
- I taped a piece of paper to the back of the strip and poked holes through the paper with a red pen, marking the notches.
- I then held the strip where I wanted it on the wall and taped the paper to the wall
- When I gently pulled the strip away, it un-taped itself and left me with two red guide dots
- I just drilled right through the paper so I had perfectly placed holes for my anchors and screws
- Then I hung the strip on the wall and plugged everything back in (and slid the router behind the cabinet)

Still looks a bit messy in the pic above, but when you stand back to look at the whole room it’s not very noticeable at all. So your eyes can just concentrate on the freshly added trim instead. Note: of course we still have to hang art and window treatments and add bright lamps/shades and rearrange tons of desk stuff, so other than the newly completed desk there’s not much about this room that’s done.

Just as a reminder, here’s what the room looked like without the added trim and cord organization. We think it was well worth $14 for the extra polish that it adds:

Oh and here’s what the room looked like right after we moved in nine months ago, just for some way-back-when reminiscing:

This room in general has really come along in the last month or so. Which is nice since we spend so much time in there.

Oh, and I had once talked about trying to add some trim to the side edges (where they almost meet the wall) to complete the look, but Sherry and I had about fifteen pow-wows on the subject and finally decided it wasn’t worth the trouble (to make it look truly flush I’d have to do lots of cutting around the baseboard and that didn’t sound like much fun – and doing it half-heartedly would probably just make it look worse). So once we caulk those newly added trim corners and nailheads, I think we’re pretty much calling this desk project D-O-N-E. Here’s how much we spent in total on our 13 foot long wall-to-wall double desk:
- Cabinets (from Habitat For Humanity ReStore): $6.30
- Kilz Clean Start No-VOC Primer: $0 (leftover from painting the kitchen paneling, but it would be around $20 to buy for those wondering)
- Electric sander & sandpaper: $0 (already owned, but would be around $25 to buy)
- Benjamin Moore Advance paint (in Decorators White, satin): $40 (thanks to 10% off haggling/begging)
- Pre-primed & unprimed wood to build up cabinets (from Home Depot): $51
- Framing lumber for counter (from Home Depot): $27.30
- Stain & poly for top: $0 (already owned, but would be about $8 and $20 respectively if you didn’t have any)
- Drillbit for boring cord holes in counter: $4 (from Lowe’s)
- Trim for bottom: $14 (from Lowe’s)
- TOTAL: $142.60

Not surprisingly, our attention has already moved on to another project in the office and we CAN’T WAIT to share it with you. Lets just say that Sherry’s epically sore, there’s paint in her hair, and she’s nowhere near done. More details (and pics) tomorrow for sure. Until then, have any of you guys added trim to make something look more built-in. Or launched a full-scale cord organization? Tell me about it.
Psst- To check out our entire desk building adventure from start to finish, here’s the post about planning the layout of the room, here’s the post about buying the cabinets, here’s the post about other cabinet research we did, here’s the post about sanding/priming the cabinets, here’s the post about building them up to desk-height and painting them, here’s the post about building and staining the counter, and here’s the post about drilling cord holes into the counter.
Blogiversary IV: What The Heck We’ve Learned
We thought we’d wrap up blogiversary week with one last post for anyone else writing a blog and/or trying to make a business out of it. We don’t like to think of ourselves as formal blogging experts, but since we always share our learn-as-we-go insights when it comes to home and DIY, we figured it made sense to share what we’ve learned in the past four years of blogging too. Oh and we included pictures of Burger to help illustrate some points along the way. You know, for kicks.

Rule #1: A blog should be born from passion (not a business plan). At least for us, that seemed to work. We write about DIY because we love it, not because we picked it off of a list of “hot topics that might make you money.” Writing about what you truly love makes all of the not-as-fun “maintenance” parts of blogging worth it, and helps make the fun parts that much more fun to do.
Rule #2: Blogging is not a get rich quick thing. Again, at least not in our experience. It’s more like a write-over-2,000-posts-over-four-years-and-make-a-modest-living thing. So in the beginning you might just be sniffing counting pennies, but remember rule #1… you’re doing what you love!

Rule #3: “Success” is an insanely random beast. We have no idea why our little blog grew like it did. There are thousands of amazingly creative blogs out there, so it’s not like we think what we do is terribly unique (see this post). Our best guess is that’s it’s some combination of hard work and a series of lucky breaks (more on that here). Though our geekiness, honesty, and borderline annoying can-do attitude might contribute as well.
Rule #4: Don’t try to be anyone but you. This honestly should be rule #1 because it’s the first and most important (albeit extremely tried and true) tip that we could ever pass along. Mimicking a blog that’s already big won’t get you there, nor will acting snarky if you’re not (or acting not-snarky if you are?). So if you’re not a taco loving chihuahua, don’t try to play one on TV on your blog. It’s much easier to detect phoniness online than you might think, and people will connect with you more strongly if you’re just being good ol’ fashioned you.

Rule #5: Not everyone will love every post/idea. We’re still working on this (hence Goal #4 yesterday) but Bill Cosby was right when he said the fastest way to please no one is to try to please everyone. There will always be folks asking for more of something while others want less of it. But in the scheme of things, it’s your blog. And blogging (like design) is subjective – so there’s not one “right way” to do it. It definitely helps to accept that opposing opinions are par for the course, then just hold strong to Rule #4 and you’ll be ok.
Rule #6: Blogging is a desk job. As you saw in our pie-chart-tastic post on Tuesday, we spend 80%-ish of our working hours doing something on the computer (writing posts, editing photos, responding to emails, writing columns, answering comments) so even though our subject matter is pretty “active,” projects are probably a smaller part of what we do than most people think.

Rule #7: Blogging’s also a creative after-hours not-desk job too. Which is our favorite part. The fact that painting a room, building a desk, or creating free art is a part of our job rocks our socks off. And that’s a big reason why we keep doing what we’re doing, because we recognize how incredibly fortunate we are to get to make a living doing what we love (which brings us back to Rule #1).
Rule #8: You work harder for yourself than anyone else. We’ve heard this from lots of people who have their own business, and it’s 100% true. The pressure is on when things like buying food and paying the mortgage all depend on your “venture.” And it’s especially hard to unplug when you work from home, since the line between laptop time and family time is blurred (we’re still working on it, hence Goal #1 of yesterday’s post). Just try to get some fresh air every now and then. We come up with some of our best ideas when we’re on a road trip or out walking around the neighborhood.

Rule #9: As your blog grows, the expenses will grow too. Many of our friends are surprised to hear that we have business expenses (hence this post on Tuesday), but between paying for hosting, site support, insurance, business fees, accounting, and quarterly taxes there’s definitely a price to blogging (not to mention all the projects that we take on, which have to be budgeted for as well). So it might help to prepare for that stuff by learning how to stay organized, track your money, and balance a budget. Heck, getting chummy with an accountant or two can’t hurt either.
Rule #10: It’s all worth it! So just relax, have fun, and see where you end up. In spite of some of the hard behind-the-scenes stuff about blogging, one thing is for sure: we love what we do. And we wouldn’t rather be doing anything else. Seriously. Four years ago when we started this whole shebang we never dreamed that we’d end up here. But we did. And for that we’re extremely grateful. So remember to enjoy the ride. Heck, feel free to wag your tail a bit.

Ok, now we want to hear from you guys. To those who blog, we’d love to hear what you’ve learned (I’m sure the lessons are completely different for everyone!). And if you’re not a blogger, we’d love to hear a few things that your current profession has taught you (are we the only nosy folks who find other people’s jobs fascinating?). For example, in advertising I learned to be flexible, not get married to an idea, be passionate, and wing it.
With that, we have reached the end of our big ol’ fourth blogiversary. Thanks so much for celebrating with us! We’ll be back to our regularly scheduled home improvement projects on Monday. So in the words of Clara The Songstress, cheers to the weekend!
Psst- We’ve updated the end of Wednesday’s poll post with stats about who you guys are (at least the 5,000 folks who took our Facebook poll). So just click here and scroll down for those deets.


