We were humming along on our way to updating our $6 cabinets with some primer and glossy white paint until the whole hurricane thing took out our power (update: miracle of all miracles, it’s back on, and we’ve never loved electricity more). So the three day outage robbed us of our cabinet mojo since John has some building to do (which necessitates the use of a few electric tools like drills and saws) before we paint and reassemble everything in the office.
Thankfully we did get to tackle all of the prepping and priming before the outage, and took about a million photos of the process (who’s surprised?). So we figured that part of the makeover is worth a big ol’ wordy explanation for anyone at home who might want to follow along in detail, whether you’re also refinishing wood cabinets to make a wall to wall built-in desk or you’re just interested in refinishing your wood kitchen cabinets (which we also did back in the day). Note: this method sadly won’t work on laminate cabs – so it’s just for solid wood.
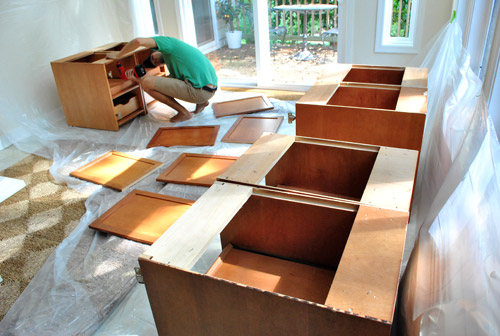
First, we removed all of the hardware on the doors along with the doors themselves (and the door hinges). Oh and we used two plastic drop cloths to create a Dexter-ish setup to protect the floor/walls from primer drips, paint splatter, and sanding dust – just so we wouldn’t have to worry as much about keeping the sunroom pristine.
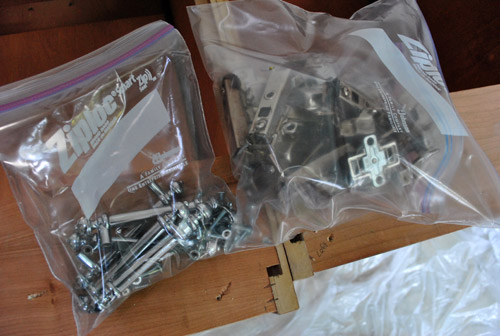
Then we put the door handles and accompanying screws into a plastic bag and all the hinge parts from each of the six cabinets into another bag. Two bags are key so you know which screws go with what (no mixing up handle screws with hinge screws), and can put everything back together in the end and hopefully not have an extra screw or part that you have no idea about (which is pretty much the story of our life whenever we assemble Ikea furniture for some reason- do they toss extra things into each box just to freak you out?).
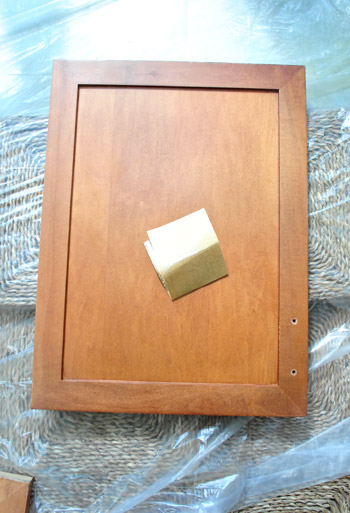
Then I got ready to sand each door down by hand with some low grit paper (50) followed by higher grit sandpaper (200), just to cut the glossiness so the primer and paint would grab on and hold for the long haul.
After one good round of low grit stuff, I myself experienced a makeover. I went from a dorky but normal-ish gal to a sweaty heavy-breathing mess. Seriously, I wasn’t ready for that jelly. Speaking of which, who else is freakishly excited about Beyonce being prego?
So then I opted to break out the big guns (aka: our little Black & Decker electric sander). Thank goodness this was back before we lost power.
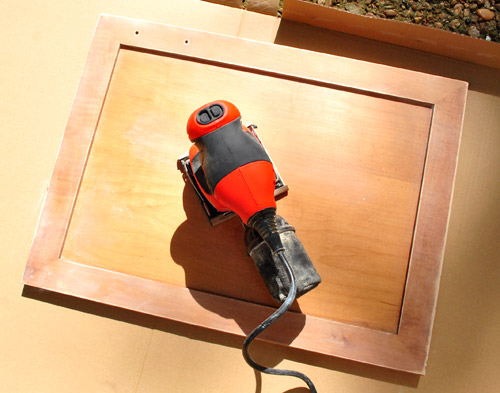
Little man got it done for me. It still took a while to sand down each door with low grit and then higher grit paper, and I did end up with a weird numb right hand from all the vibration, but I was happy to have help (as opposed to the grass roots manpowered method that I started out with). The entire door-sanding step probably took me a good hour to do each of the six doors twice (with low and then high grit paper).
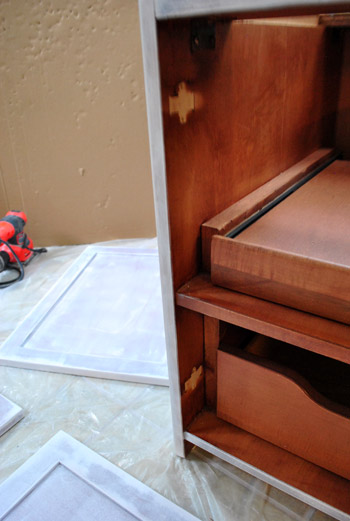
As for the backs of the doors and the cabinet interiors, from day one we decided that we wanted a nice clean glossy front for our wall to wall built-ins, but to keep the backs and the interiors (and slide out interior fittings) of the cabinets the same natural wood tone that they were to begin with. I bet you’re wondering why, or doubting this’ll look good, am I right? Well, we certainly know that not everyone would go that route, but the new KraftMaid drawers that we installed in our first house’s kitchen renovation had wood interiors and we really liked them (you can actually see some of them here full of tools:
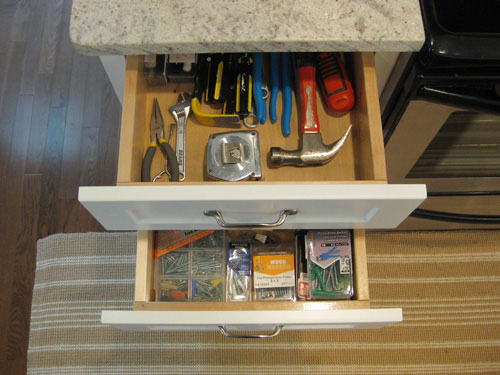
They had glossy white drawer fronts, but inside they held up a lot better to natural wear and tear than anything painted (since we’re weirdos who will stash hammers and screwdrivers almost anywhere). And we actually don’t mind the whole wood + white look (sort of like the dresser we refinished for Clara). Although in this case we decided from the outside that the cabinets would look entirely crisp and white (no contrasting top color), and only when you swing them open will you see the wood tone.
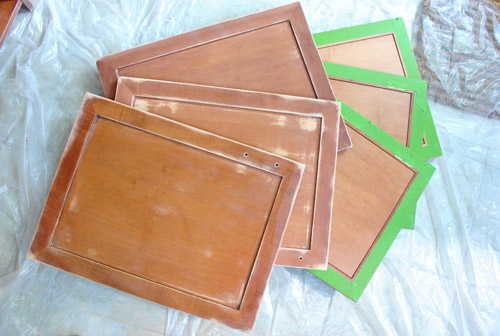
So here’s a shot of three doors face up (all sanded and ready for primer) and three face down (with Frog Tape carefully applied around the edges so we’d end up with a nice clean line between the painted fronts/sides and the natural wood finish on the back). We also considered doing both sides of the door white and just leaving the cabinet interiors wood, but decided that durable unpainted backs-of-doors was a better decision for us – but some folks might opt to paint the front & back of the cabinet doors a color and leave only the cabinet interiors unpainted, and that works too. It just comes down to personal preference.
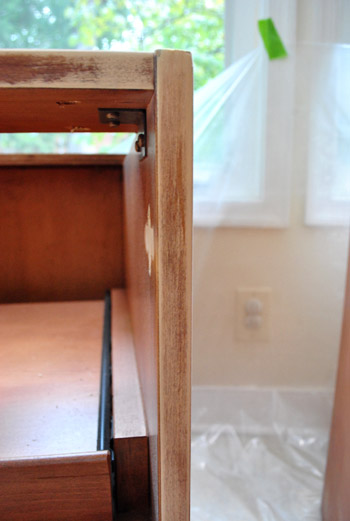
But back to the whole prep process. Next I took Señor Sander to the fronts and sides of the cabinets (which would also be getting a coat of primer followed by some glossy white paint so the entire exterior of the cabinets would look seamless and white). In contrast to the door-sanding part, this was a sanding step that I couldn’t do outside. Well, I guess I could have carried all six cabinets outside, but instead I just relied on our Dexter-tastic dropcloth setup (and the suction bag thingie on the back of my sander). It actually wasn’t too dusty. See, no smoke cloud (which I totally expected to see):
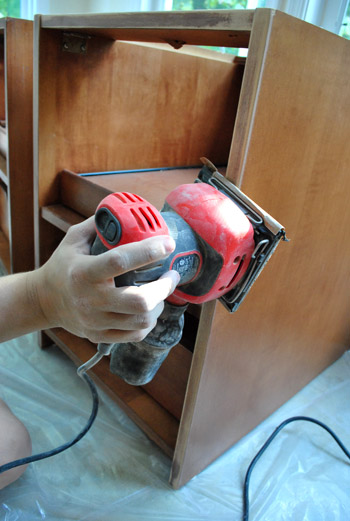
It was important to me that I got a nice roughed up edge around the cabinet frame, since the door would constantly be banging against it, and I wanted my paint-job to stick like glue for a nice long time (we had really great luck painting the original cabinets in our first house’s kitchen about two years before taking on a full kitchen renovation, and they looked mint for that entire time – which definitely gives us some confidence in this method).
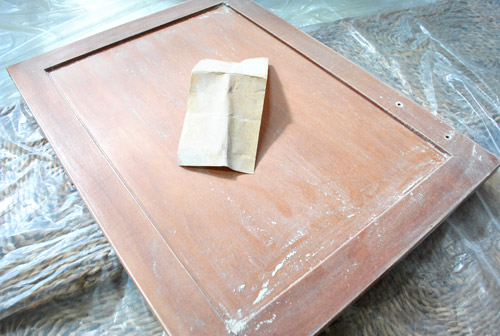
Then it was primer time. We opted to go with Kilz Clean Start, which was the same No-VOC primer that we used on our kitchen paneling with success (after trying two other low/no VOC options without much at all). I applied it with a small foam roller for a nice paper-thin coat without having to worry about brushstrokes.
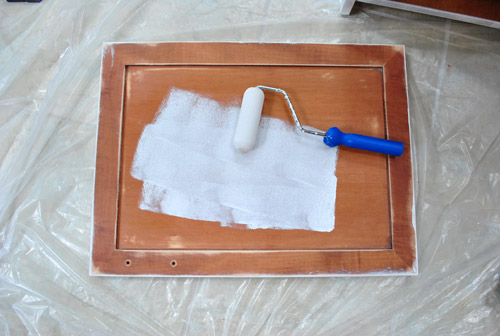
Primer always looks pretty rough when it goes on (since it’s just one thin coat, and isn’t meant to sit smoothly, it’s meant to be kind of roughed up so it can grab paint and hold it tight). I thought sharing this photo might help anyone who applies primer and then wonders if they did it wrong if it looks uneven and imperfect. Chances are you did it perfectly, that’s just how it looks.
Of course I had to use a brush to get into the frame around the edge that my roller couldn’t quite squeeze into. But notice how my brush isn’t dripping with paint in this pic. I wiped it firmly along the edge of the paint can on both sides, so there wasn’t any gunky drippy issue. Just a thin coat of paint applied around that frame. And then I picked up my foam roller again and rolled the door one last time to smooth everything out so there weren’t any rogue brush strokes around the front of the frame.

Oh but do each door one at a time (roll the sides, the front, brush the cracks, and reroll the front one last time). Because if you roll all of your doors and then go in with a brush on each frame and then try to reroll everything after that it’ll be a lot of time between those steps and it might not look as smooth (the roller could even pull up half-dry paint, so doing one door at a time keeps the paint wet enough to be “worked with” for a little bit).
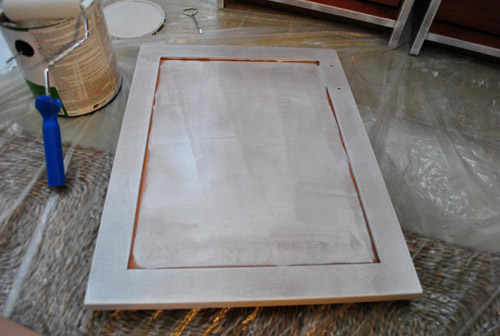
Next it was on to the sides and frames of the cabinets that I sanded down about an hour before. John was going to tape off the entire interior frame of the cabinets so we’d have a nice clean line between the white paint and the wood finish just like the doors, but being ever so cocky confident in my rolling ability, I knew I could lightly roll the frames (without too much paint on the roller- this is key!) to achieve just as clean of a line as tape, and it would save us time (and Frog Tape, which is like currency at our house).
Thank goodness I was right. It looked nice and smooth. Well, as smooth as one coat of primer can look (remember, primer is meant to look uneven and kind of disastrous by nature – so fret not if your priming step doesn’t look perfectly even and smooth since a few thin and even layers of paint on top of it should get you there).
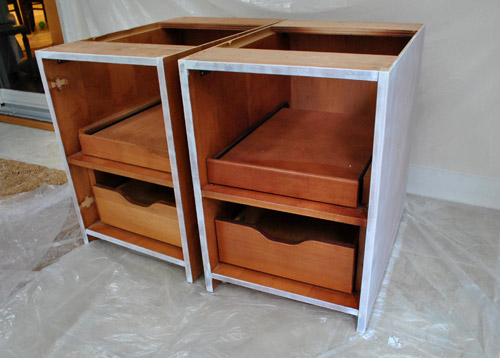
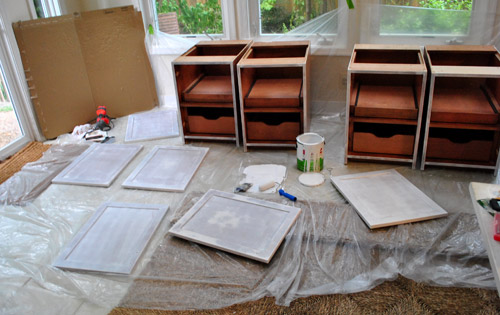
So here’s what the room was left looking like after all that hardware & hinge removal followed by door and frame sanding, and door and frame priming. Oh and see how some of the doors look whiter in certain areas? Some of them had little scratches or imperfections in certain spots, so I sanded them down slightly longer in those areas. This means the primer reads a bit more white on those spots just because the darker wood finish was removed and then primer was layered on. The good news is that doesn’t matter in the end because once a few thin and even coats of paint are applied it’ll all look seamless and bright white. At least that’s always been our experience. Probably shouldn’t count my chickens just yet though…
Now we just have to fire up the saw and build up the cabinets about three inches. Then we’re planning to assemble them in the office (they’ll be way too heavy/awkward to carry into the office after we screw them together to create three double cabinet bases) and I’ll apply those last 2-3 thin and even coats of paint when they’re in place (since painting them before assembling/moving them makes us fear scratches and dings that could occur when we move/assemble them). But by assemble them I just mean screwing them together to create those three pairs of double cabinets (not putting the doors and hardware back on – which we’ll definitely do after painting them, as usual).
Then it’s onto the counter. We’re still completely undecided on what we’re going to use (assembled planks of wood, one giant piece of wood or even some other material like an Ikea countertop, etc), but we’re planning to do some legwork so we can hurry up and work at our new built-in desk. We’ll keep you posted. If one things for sure it’s that we take great pleasure in over-sharing.
Psst- Speaking of over-sharing, we’re spilling all of the names that we considered when I was pregnant with Clara (including the boy ones we debated, and all of the other girl ones we tossed out) over on BabyCenter. And of course we’d love to hear any naming faves on your list. Or stories of epic naming disagreements. Those are fun too.

Leave a Reply