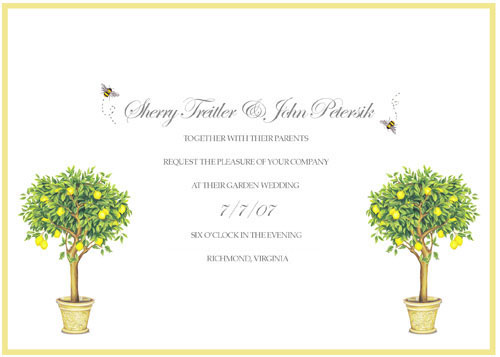
It’s her party and we’ll DIY invitations if we want to. You would DIY them too if it happened to you if you were us. After all, our wedding invites were homemade…
… so how could we phone it in for our daughter’s first birthday party? Even though much-more-talented-invitation-designers like Mrs. Limestone generously offered to lend a hand (so nice), we stubbornly set out to attempt to create our second party invitation ever on our own (well, with the help of a cute baby and a computer). I guess we just have a thing for doing it ourselves (ya think?).
So we started out with a very familiar set-up to our weekly Clara photos like these (see how we make them here)…

… which look a little something like this when they’re not all small and tiled like the ones above:

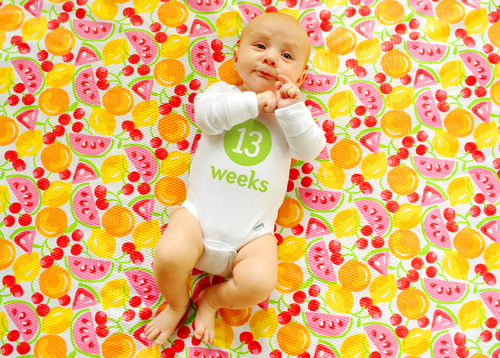
Except this time we just placed Clara in her usual white onesie on basic white fabric (a plain white bed sheet that we already had on hand):

Since Clara’s weekly photos have become somewhat of a theme for her first year of life, we decided to borrow the idea to introduce her big one year old b-day bash in the form of an invitation (her whole party will have a colorful fabric and number theme inspired by her weekly photos, so the invite really sets the tone). The main difference from other weekly pics was that this particular photo required more Photoshop work than most, because we basically created the “fabric” from scratch (since you’re not likely to find fabric with specific party details on it at your local craft store).
I’ll spare you the Photoshop play-by-play (in short: we added type, reduced the opacity so it looked more like it was printed on the fabric, rasterized it so we could erase whatever was “under” Clara, and added some asterisks for “pattern”). Here’s the final result (minus a few private details that have been blurred):
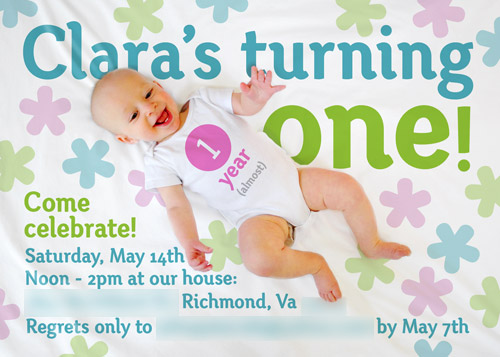
We originally intended it to be all text – just the party details by themselves as the “pattern” behind her. But it felt a bit empty, so we added the colored asterisks.
PS: How awesome is it that her actual birthday falls on a Saturday? Well planned, universe.
As for printing the invite (since you can’t put a stamp on a JPG), it actually took a bit of hunting. We didn’t want to print them at home (or a place like CVS) on photo paper because we wanted a more matte stationery effect (like a real invite as opposed to a picture dropped in the mail). And although we did print our wedding invites at home on cardstock, we worried that printing a more image heavy design like this at home might yield subpar results since they wouldn’t look as crisp and bright as a professional job. So we looked into an online service that could print them for us cheaply but better than we could at home (you’d be surprised how many of those go-to sites for invites and holiday cards don’t give you the option to print something entirely of your own design). Fortunately we stumbled upon Winkflash.
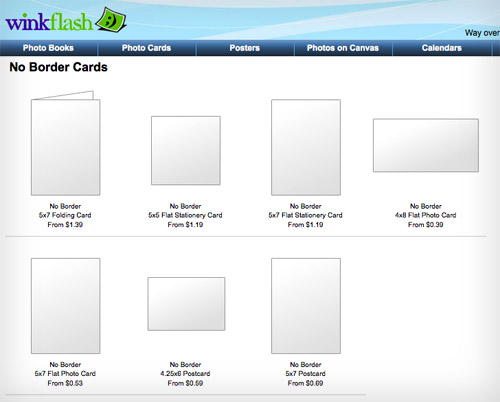
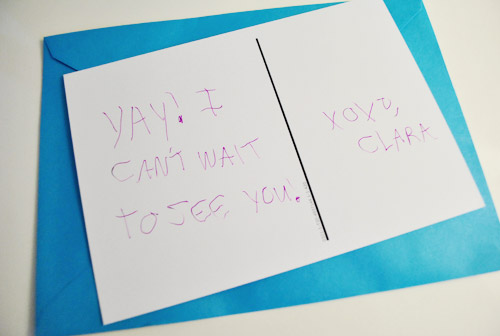
We opted for the 4.25 x 6″ postcard option (in the middle of the bottom row in the screenshot above) because we thought a postcard invite would be a fun twist, plus it would give us the chance to write a personalized message on the back of each one in scribbly kid handwriting “from Clara.” We figured that wasn’t asking for a hand cramp since we’re only sending out about a dozen invites (it’s virtually a family-only party of about 20 people total). But we ordered an even 20 invites just so we’d have some extras for posterity (and the baby book, the hallway frame wall, etc).
The best part was that by googling around for an online coupon code, we scored 60% off (!!) of our order. So the grand total with shipping came down from over 20 dollars to $10.11, which factors out to around 50 cents per invite. Not bad (and possibly cheaper than ink and paper for home printed cards would have been). As for the coupon code, we ordered them a couple of weeks ago, so we can’t guarantee that the “cards60” code is still working, but it did the trick for us.

But that savings must’ve impaired our judgment (call it “discount goggles” if you will) because we realized after receiving our order that postcards don’t always survive a trip through the mail in great shape (no offense, USPS) – especially when they’re white. And since we thought the grandparents might want to hang on to Clara’s invite without any dark smudges or folds, a jacked-up postcard just wouldn’t do.
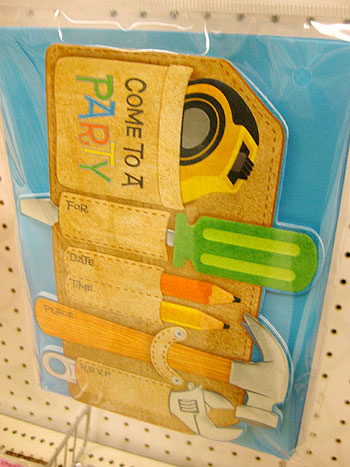
No biggie though, we just hunted down some envelopes that would shield our postcards on their harrowing journey to nearby VA and even to NY and beyond. It was a bit tough due to the weird postcard size, but eventually we did find a set at Target that would work (for just $4). The funny thing is that the envelopes came packaged with some pre-designed party invites. The invite theme? Tools. How funny is that? Maybe we should’ve just used those in the first place. Except that we’re too DIY obsessed to use DIY themed (but not actually DIYed) invites. Go figure.
Even though our postcard was more like a traditional flat invite now, Clara (aka Sherry’s shaky left hand) still wrote some personalized messages on the back.
The invites went out a little over a week ago and have already been received by all – and they seem to be a hit. Woot. We’re psyched that we did it all for a grand total of under $20 (which includes postage, envelopes, and custom printed postcards) – which would have been what we paid for the printed postcards alone had we not found that lucky 60% off coupon code online before ordering. Thanks google.

Leave a Reply