First things first. Thanks for being such great sports about our little April Fool’s Day prank (seen here).

Sherry was giggling the entire time she made that crazy nautical themed doggie mood board (at one point Katie Bower called and I actually heard a laugh-snort or two as she shared her little “project”). And it’s safe to say that every single comment – ranging from those of you who fell for it and those of you who knew it was a joke from the first sentence – made her day. Which made mine. Happy wife = happy life. In fact things were so copacetic around here that I was inspired to start my next big build.
I couldn’t dodge it anymore. The time had finally come get started on a behind-the-sofa-Karl console table for our living room. Having more than a padded ottoman in the room will be a big help, but it promises to be a big task. 140 inches big (er, long), to be exact.
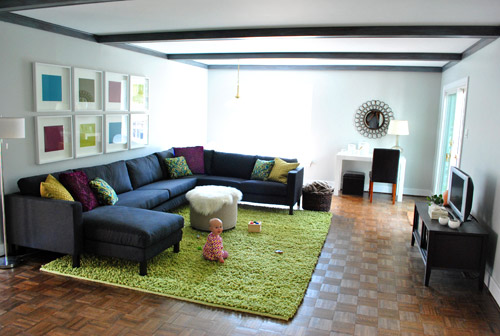
Let me back up for a moment. From the second that Karl arrived, we both agreed that putting a big not-Clara-friendly coffee table (even a round one) would probably be too heavy for the room and might result in more baby bumps and bruises than we were prepared for. And we’ve enjoyed being able to move the ottoman easily to make more room for playing, hosting, and vacuuming – so for us it was definitely the way to go. But we quickly decided that we needed a nice long console table behind the sectional (between it and the wall), to create a solid (and super functional) surface for two table lamps for reading, a spot to drop drinks, a box or basket to stash things like remotes, and more storage and display space for various other living area must-haves (that weren’t exactly hanging out on the non-existent coffee table).
But where does one find a nearly 12 foot long console table (!) to span the entire length of Karl? Um, yeah, nowhere. Unless you want to pay 3K to commission a custom build.
So I spent the last couple of months mustering the energy/confidence/game plan to create a customized DIY solution. We considered just putting a couple of floating shelves up to act as a long “floating console” behind Karl, but figured that left too much unused space underneath (and might not have the homemade weathered look that we wanted in hopes of balancing out more modern things like the green rug and the sleek sectional). So we decided I should build something customized to fit our giant sectional. Something that takes advantage of as much of the space as possible. And that’s when this plan from Wood Wonder Woman (aka: Ana White) caught our eye.
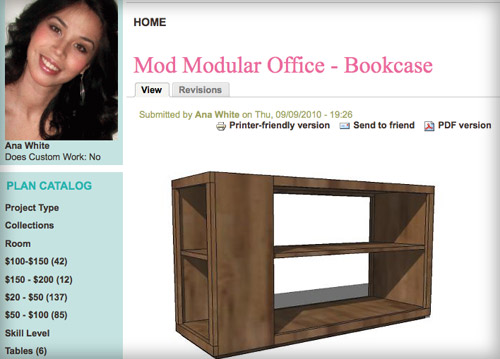
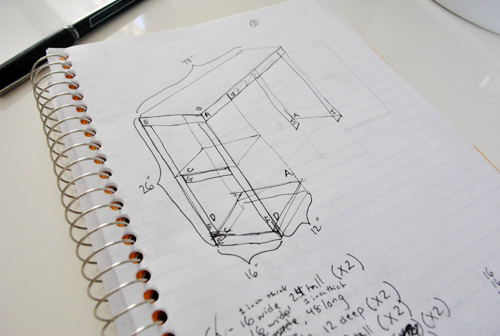
I knew I’d have to build this 140-inch behemoth in multiple pieces since maneuvering 12-ish feet of bookshelf just didn’t sound like a good time. So I hatched a plan to build three 4-foot sections that would be covered by one long “tabletop” for a nice seamless look. And the two end sections could take some serious inspiration from Ana’s bookcase above. Each of my two console table “end pieces” could have those two open shelves on one side (hello bonus storage!) but they wouldn’t need that interior shelf cutting through the entire middle since that wouldn’t be accessible (so we could save some wood, money, and effort by altering the plan a little). My version definitely looked a bit lot rougher when I sketched it out.
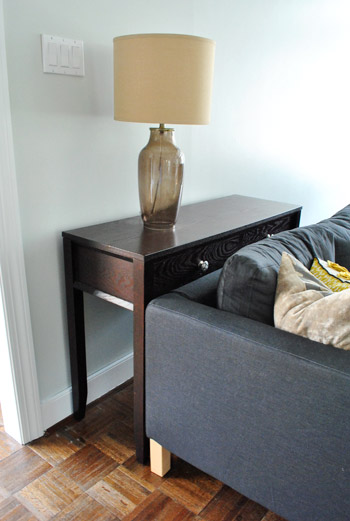
We figured out our measurements by doing a test with our existing console table from the hallway several weeks ago (I originally planned to start this in February… oops). We tucked it behind Karl to see if it was wide enough for a table lamp (it was just barely deep enough with the large sized lamp shade, so we decided to make my version wider – don’t want any head-into-shade issues). We also used the hallway console to see what height would look best (clearly our “test model” was too tall). The new one will sit somewhere slightly above the back edge of the sofa but below the back cushions for a hopefully balanced look with lots of easy-access function.
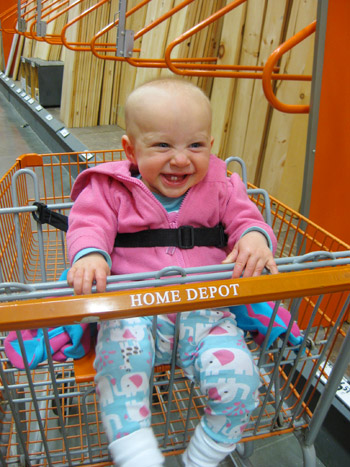
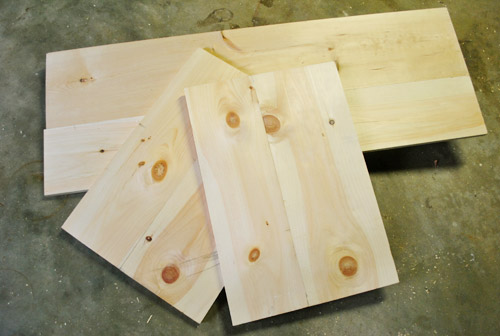
With measurements made and plans sketchily sketched out, we hit up the Home Depot for a bunch of wood – most of which we had them cut to size for us right in the store (for free). It saved us time and enabled us to squeeze everything into the Altima (which definitely wouldn’t have been able to accommodate planks that weren’t cut down). As usual, the happy baby of the group had a blast.
To keep costs down we bought basic white wood for everything except for the 1 x 2″ poplar pieces that we used to trim out the “end” bookshelves that would be seen on each side (no sense using the good wood on parts that would be hidden in the end- and the white wood provided more than enough support/strength/sturdiness). If I were a pro furniture builder I probably would’ve splurged on better wood, but who are we kidding – I’m cheap and this amateur didn’t want the pressure of screwing up the “expensive stuff.”
So here was my supply pile for one of the two end pieces. I’ll spare you an exact breakdown because this piece is so specific to our space. And if my drawing above is any indication, I should not go into the business of posting furniture plans. Like ever.
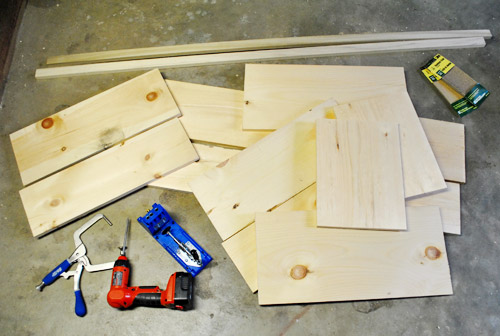
Notice those two semi-thick boards on the far left? Those are a 1 x 8″ and a 1 x 10″ piece that we had them cut to the same length right in the store. We wanted the console to end up about 16″ deep, but the widest board they sold was 12″. So putting two shorter boards side-by-side was our solution, since the boards are actually 7.25″ and 9.25″ wide (so they add up to about 16.5″ when put together – which was pretty much exactly what we were going for). So there’s a tip, even if the sign says that boards are 8″ wide and 10″ wide, they can definitely be substantially smaller.
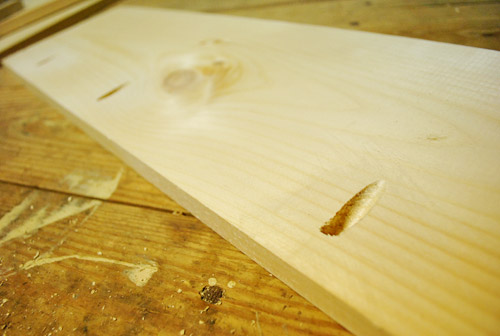
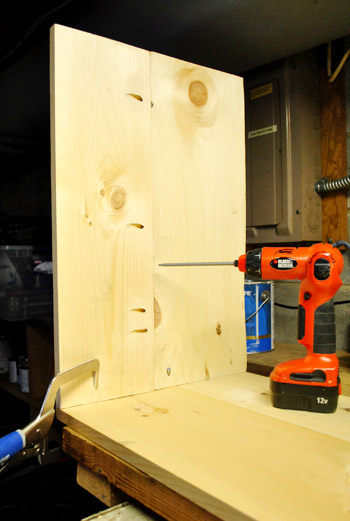
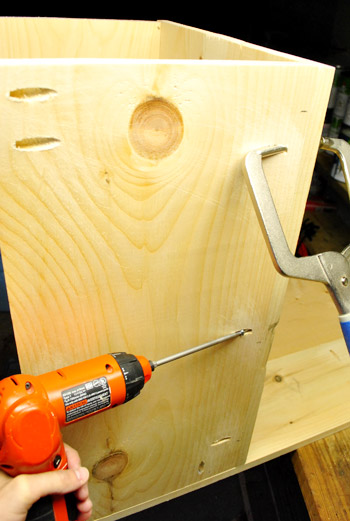
Anyway, when I got home I rekindled my ongoing love affair with my Kreg Jig for the task of joining the boards.

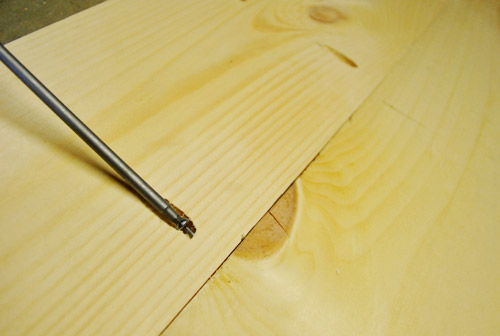
You can read more about what my main man Kreg does in this post, but basically he helps create perfect pocket holes to connect pieces of wood like a pro. They look a little something like this mid-job:
Then I lined everything up and screwed the two pieces together for a super tight hold like this:
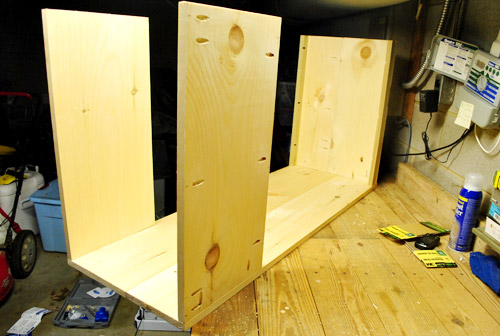
That’s how I ended up with three 1 x 16.5″ planks to form the top and the two sides (aka: wide legs) of the console:
And yes, the top isn’t exactly flush on the left side. But since the whole thing will be covered by a long, separate tabletop in the end, it was only important that things were lined up perfectly on the exposed parts. Actually, since most of this piece will be unseen behind Karl and thanks to the new top that we’ll be adding, it really only had to look pretty on the open shelf end of each end piece that I was building (remember I’m making two end pieces and one middle piece to put together under one long 140″ top for the look of one long 140″ console in the end).
A few more Kreg holes and some meticulous clamping later, I was on to screwing in my first leg (the one that would be hidden on the interior side of this section)…
…and adding some 1 x 2″ rails for extra support.
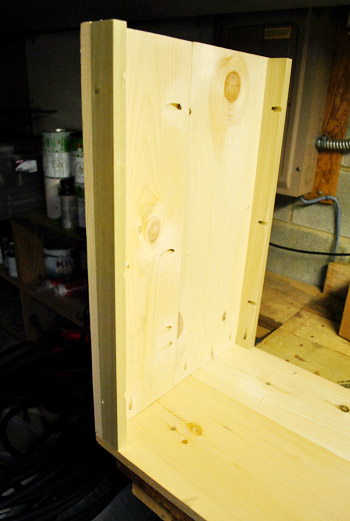
Next up was the bookshelf side. I started with the two sides of the shelf, comprised of two 1 x 12″ boards. Between attaching these to the top and the other leg, plus securing the finishing trim to them at the end, I realized I’d be doing a lot of screwing (that’s what she said). So I had myself a little pilot hole drilling party before attaching anything, just to get that step completely out of the way all at once.
Then my drilling party turned into a screwing party. Um that sounds even worse. But you know what I mean. On went the sides…
…then the back. Typically I’d put all of these ugly holes on the inside of the shelf, but since Karl will be blocking the entire side off the piece (since it’ll be snugly placed between the back of the sectional and the back wall) I kept the inside of the shelf, pristine (since it’ll be seen). Meanwhile the outside can be all busted up and hole-y, since that will be the hidden part (sandwiched between the sofa and the wall).
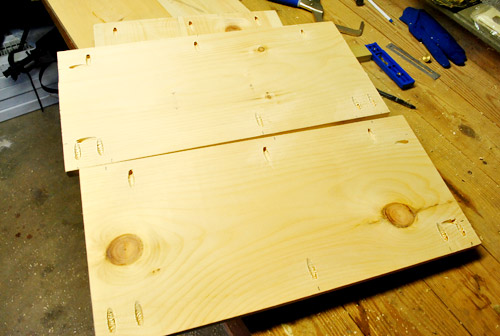
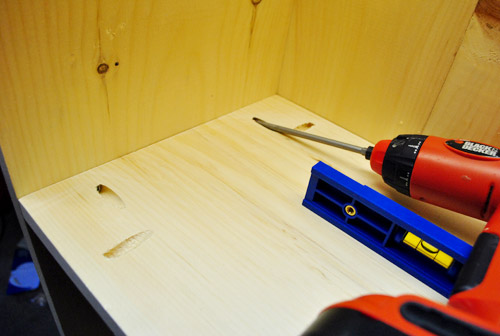
Next up were the two shelves (keep in mind this is all upside for now, so all of these holes will be hidden):
And last up was the trim on the outside to finish things off nicely. I used my miter saw to cut the 1 x 2″ to size and attached them using the holes that I pre-drilled in the sides and shelves. Now is it coming together for ya? I know it’s really confusing to read this step by step play by play, but hopefully now it’s starting to look like my sketch (it’s just upside down in this shot).
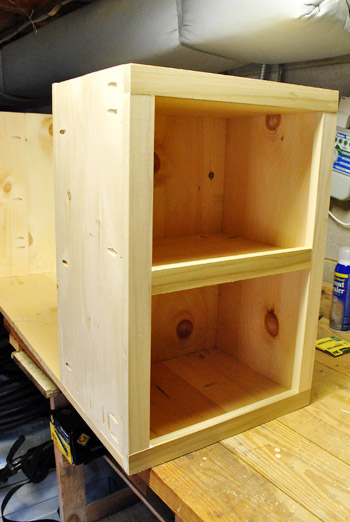
All-in-all, it took me about 1.5 Clara naps (that’s around 2 hours) to get ‘er done. Not all three, just one of my three pieces without the top. She’s not the prettiest thing yet, but I was surprisingly proud about how it turned out and how much less difficult it was than I expected.
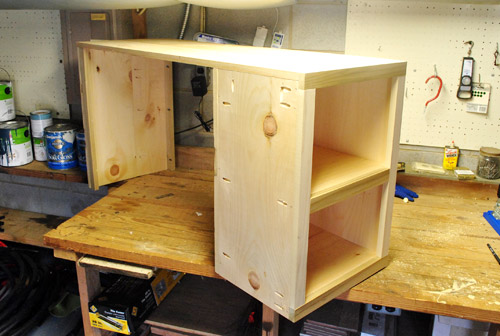
I’ll fess up that the console section that I photographed above was actually the second one that I made (since I need one for each end). I was so focused on not screwing up the first one that I forgot to take pictures. But that one came out really well, as did the second one (and the good news to anyone else who needs to build a console table in three parts is that you get faster as you go).
So since you’ve already seen my second one in the shot above, here’s the first one making its appearance during a test run behind Karl. Oh yeah but in this shot you can see my one “mistake” with my first console creation. Notice how I didn’t think to put all of my holes on the outside of the interior bookcases (which will be seen) my first time arond? Boo. Thank goodness for wood putty.
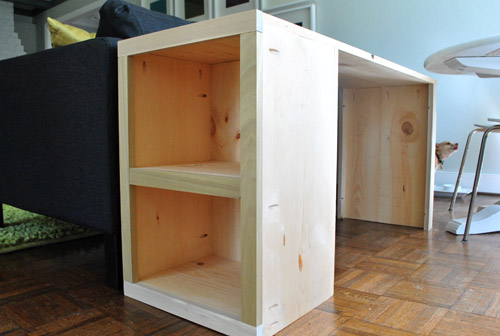
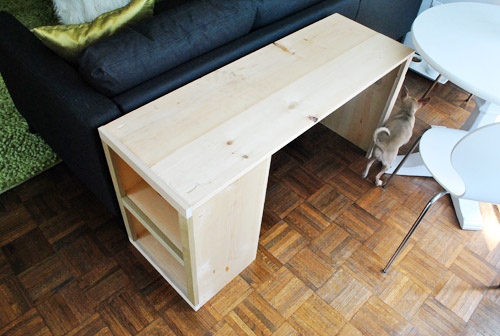
Of course this isn’t the side of Karl that it’ll sit behind eventually (it will go between the back wall with the frames and Karl’s backside), but I was just too lazy to move him out from the wall (he’s a big boy) for this quick test. I mainly just wanted to make sure the height felt right (which it did). When we add the new top it’ll sit just slightly above the sofa back, but below the back cushions just as planned.
And yes, Burger decided this was the perfect moment to eat lunch (despite the traffic jam of furniture going on). He’s not howling in the picture above, just chewing and looking out the window.
The third / middle piece of the console is actually already mostly built too, I just haven’t finished a few last minute details and snapped any pics yet (and let’s face it, this post is already long enough as it is). But we actually incorporated some storage into it even though it’s going to sit between the two side console pieces that I built. That’s right, it’s top-entry storage. More details soon. I still have the entire “countertop” to tackle as well, but we’ve decided to use some reclaimed wood (aka: slats from the old shipping pallets left in our yard) to inject some rustic beat-up style into this a-bit-too-modern-for-us-at-the-moment living room. As for the rest of the piece, we’re planning to stain it a dark wood tone so it sort of blends/disappears behind Karl. You know, so the more weathered and varied looking top can – in the words of my wife – be the star.
And as for the cost, for the two end pieces and the almost-done middle piece we’ve spent around $65, which doesn’t include the top that we’ll add (but since we’re planning to “recycle” the pallets that we have, we shouldn’t spend much more on this build). We’ll share a full budget breakdown (including stain and all that good stuff) when we’re done.
We’ll post more about the console as our work continues, but for now lets talk shop. Have you guys built anything yourself lately? Did you put some Ana White plans to good use while you were at it? Seriously, that girl can build anything.

Leave a Reply