Do you hear that high pitched scream? It’s me, all the way in Richmond, shouting at the top of my lungs that the office/guest room/playroom makeover is finished. Woot! Come on in and take a look around. But wait, for old time’s sake, let’s check out the room as it looked when we moved in:

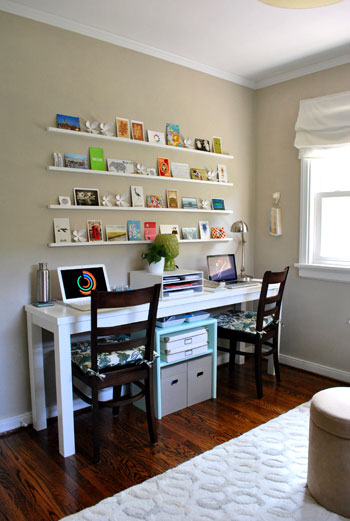
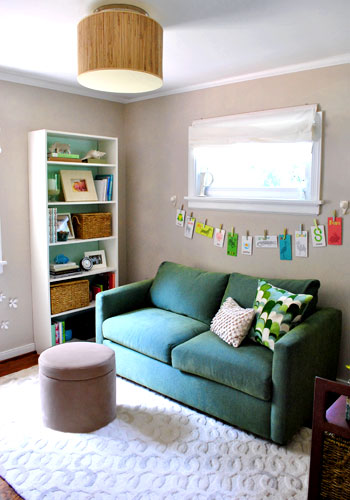
And here it is now, all office/guest room/playroomed out:
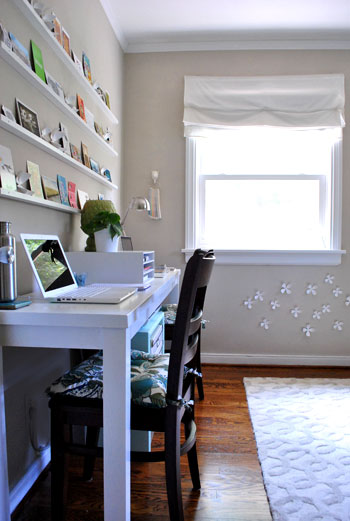
We love this room because although it’s only a 10 x 10.5′ box, it easily gets the best light in the house. So it’s not a bad spot to spend 80+ hours a week logging blog time, playtime, and accommodating the occasional guest or two. It was totally worth all the projects that we took on to get it to where it is today- in fact it was a darn good time.
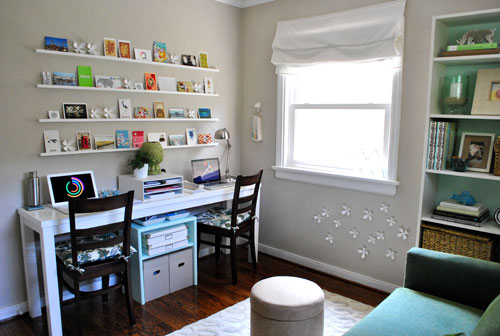
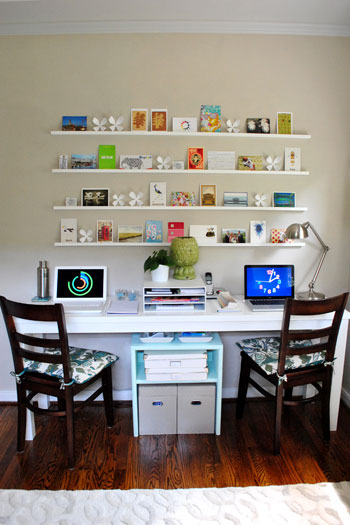
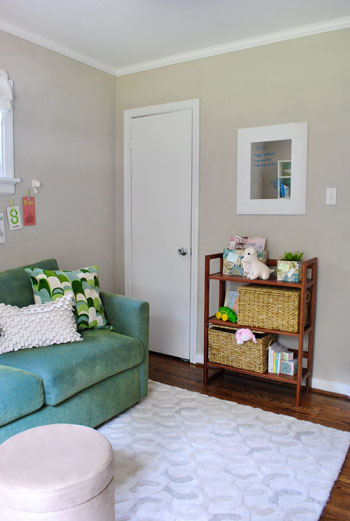
We did our best to squeeze in as much function as we could, from the shallow DIY desk and the magnetic wallflowers under the window to a ton of shelves and bookcases and a storage ottoman that’s filled with Clara paraphernalia (aka: Claraphernalia). And we can’t forget the fact that our budget friendly sleeper sofa (with a comfy full sized mattress tucked inside) really freed up some serious floor space.
The desk that John built with our old bathroom door really saved us money and space (since it’s not too deep to keep the sofa bed from easily folding out when guests arrive- stay tuned for photos of the bed folded out in this afternoon’s post). We also found a lot of room for files and paperwork thanks to some woven baskets on the tall bookcase by the window and the small blue filing cabinet under the desk, which John also built.
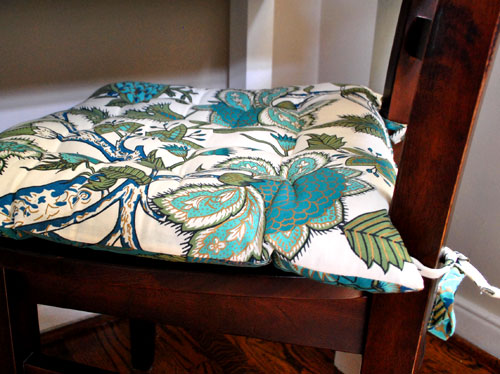
You’ll also notice that we picked up some fun patterned seat cushions that work really nicely with the sofa and the rest of the colors in the room. We already had these chairs at our disposal since we switched them out for a padded bench in our dining area a while back. And happily the cushions were just $12.50 a pop at World Market, and they definitely make our already-comfy dining chairs even easier on the ol’ backside (we’ve put in some super long days on them and can’t complain a bit).
And we can’t forget how we wrangled all of our wires to keep things looking streamlined. The whole office side of the room really works perfectly for us- and there’s enough room on the rug behind us for all sorts of playtime with Baby P (since one of us is usually on Clara duty while the other blogs away at the desk).
John also got to flex his problem solving muscles. A few days ago I was telling him how I wished there was a way to keep paint decks from taking over my side of the desk, and he smartly suggested that we hang a $5 ceramic pig hook (from Mongrel here in Richmond) at arm’s reach. It totally does the trick- and actually looks like art. Especially because we used two other pig hooks across the room to hold up our flash card clothesline and a fourth one in the closet to hang Clara’s growth chart. And you know I love a good ceramic animal (or four) to swank up a room.
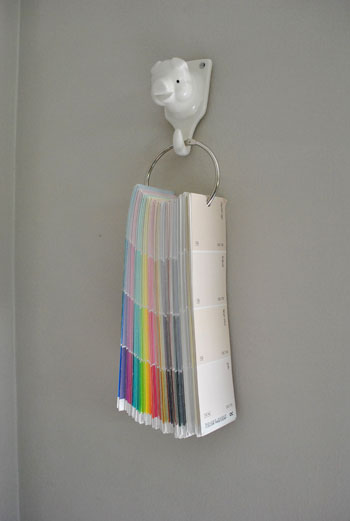
Oh and that’s actually a DIY paint deck that I made by grabbing a slew of my favorite swatches, hole pinching them all in the same spot, and sliding them onto a 3″ binder ring (snagged at Office Max on the cheap).
We’re also really enjoying our never-boring homemade postcard shelves since we can easily rotate things in and out whenever the mood strikes. In fact we’ve already switched out a ton of postcards and other small objects that make us smile. It’s addicting. Thanks again to everyone who generously sent postcards and other notes for the art wall our way!
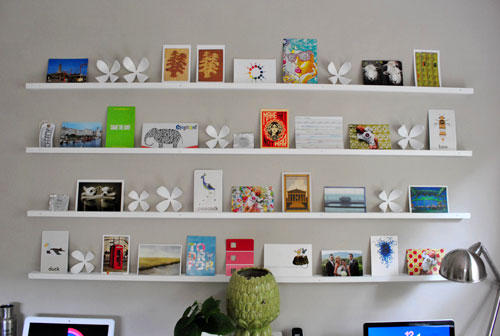
We’ve received them from England, Holland, Switzerland, Afghanistan, Greece, Spain, Austria, Italy, India, Africa, Australia, Canada, and a ton of interesting domestic locations as well. We keep all of the ones that aren’t currently on display in the handy top compartment of one of our filing boxes so we can change things up in a snap. So if you don’t see your card it doesn’t mean it won’t be up on the wall soon!
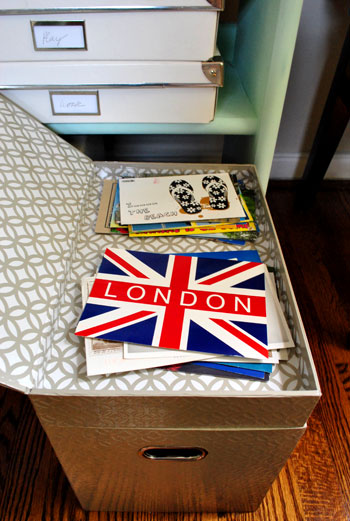
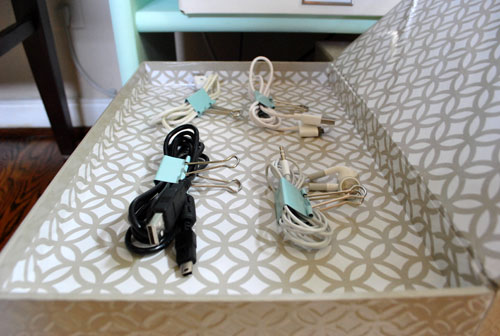
We use the other small compartment in the top of our second filing box to house all of our cords and wires in neat little bundles, thanks to some little blue binder clips from Office Max (which keep them from turning into a huge knotted mess).
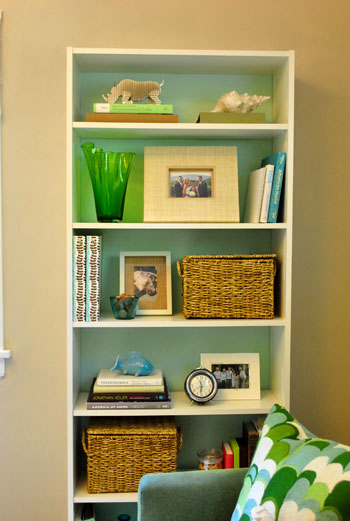
Then we have the Ikea bookcase that we tweaked with a soft blue background and some sawing at the molding to ensure that it would sit flush against the wall. It’s another really important storage piece in the room (those baskets from Michael’s are filled with paperwork and office accessories that we like to have on hand- plus it houses our printer). But we did our best to add some eye-pleasing accessories to keep it from feeling too work-heavy when guests come to stay.
We even have a quick shelf switcheroo that we pull when friends and family members arrive (stay tuned for that info in this afternoon’s post).
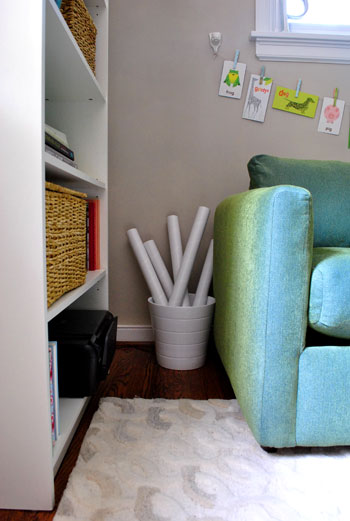
We also used an already-owned white Ikea planter to corral mailing tubes for shop orders that we like to have nearby (they used to be stored in a cabinet in the kitchen, which made for a lot of trudging back and forth).
And of course we have the DIY flash card clothesline that we whipped up. Safety note: twine, wire, or ribbon can be strangulation hazards. Hanging things out of reach and keeping an eye on children who may get hurt is always advised!

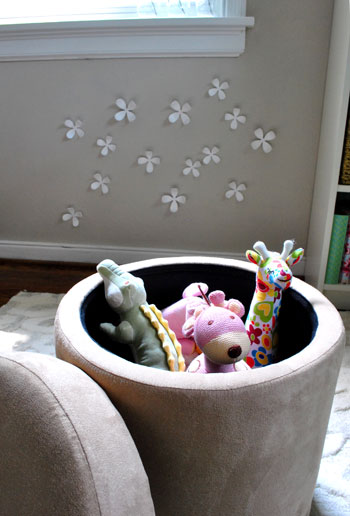
We love that it can also be used to display art that Clara makes as she gets older- or even a strand of colorful paper flags (check out those pictures here). Plus this morning we explained how we made those patterned clothespins over on Babycenter, so be sure to drop in on that post too (just click here)! We really didn’t want to- er, half butt- the playroom aspect of the space by tossing a few toys on the floor and calling it a day. So adding things like the flash card clothesline and the magnetic wall (for Clara to interact with thanks to our already owned magnetic wallflowers) really introduced that authentic playroom feeling. Not to mention that we have tons of spots to stash her books, toys, blankets, and blocks. Like this $27 storage ottoman from Target…
…and the woven baskets on the bookcase by the closet…
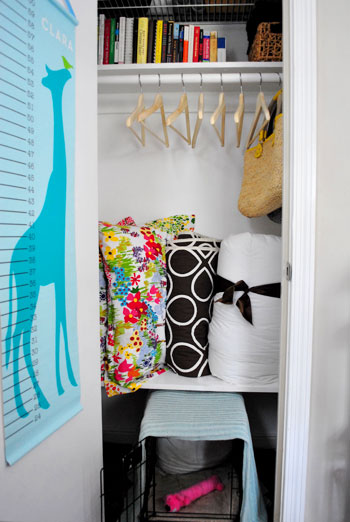
And speaking of the closet, our little makeover last week really transformed it from a dark and gloomy mess to a totally functional place to store linens when the guest bed isn’t in use (and clothing and luggage for our friends and family when it is). Remember, stay tuned for photos of the bed all folded out and ready for company in this afternoon’s post.
Who knew we’d end up with two bookcases in one tiny room? But they really do the trick. This one is perfect for all of Clara’s books, stuffed animals, block sets, and other “playroom” stuff that we stash in those generously sized baskets (from Michael’s) when things aren’t in use. And do you see those two patterned boxes on the top shelf? Stay tuned for a quick tutorial on that fun little project coming soon.
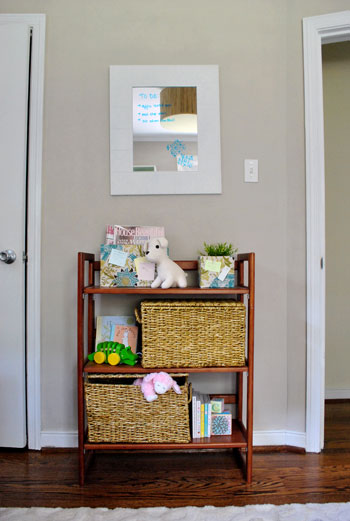
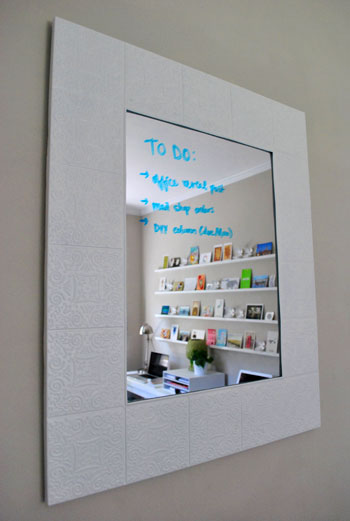
We can’t forget about our mirror/to-do list. A mirror is always nice to have around for guests to check their hair before emerging. And we gave it some office function by using a dry erase marker to write down whatever we need to accomplish and crossing things off as we go. But when guests come to town we erase all of our scribbles and write them a sweet little welcome note instead.
So that’s the big office reveal. But how much did it set us back? Here’s the budget breakdown:
- DIY pendant light: $32
- Homemade desk: $70
- File cabinet: $20
- File boxes & desktop cubby: $42 (from Target)
- Chairs: already owned
- Chair pads: $12.50 a pop (from World Market)
- Post card shelves: $23
- Post cards: free (thanks to you wonderful people!)
- Small bookcase: already owned
- Large bookcase: $69 (from Ikea)
- Baskets: $40 (from Michael’s)
- Mirror: already owned
- Storage ottoman: $27 (from Target)
- Full sized sofa bed: $699
- Pillows: already owned (from West Elm and Crate & Barrel)
- Rug: already owned (from Pottery Barn Outlet for $129)
- Wallflowers: already owned
- Magnetic primer for wallflowers: $21 (from Home Depot)
- Clothesline: $20 (for decorative paper, ribbon, and flash cards)
- Pig hooks: $5 a pop
- Closet shelf: $12
- Eco power strip for cord wrangling: $39
- Wireless printer: $79
- Mailing tube caddy: already owned (a repurposed planter from Ikea)
- Total: $1,238 ($539 without the sleeper sofa)
We’re pretty excited that the entire room makeover came in at a little over a thousand dollars and we were able to add: a two person desk, a bookcase, a sleeper sofa, an ottoman, a wall of built in shelving, a pendant light, a file cabinet, a wireless printer, and tons of storage solutions. We figured that much new furniture would bring the budget to more like 2-3K going in. Especially because many of the sleeper sofas that we researched cost over $1200 alone. And the idea that we only spent $539 after the cost of the sofa has us pretty proud (since someone could easily spend that amount on a two person desk or just an ottoman and a bookcase – and we were able to stretch that amount to include a slew of other furnishings, accessories, and electronics). Now we have a multifunctional space where we spend tons of time each day, and it also works to host our friends and family whenever they swing by.
Oh and we’re thrilled that we were able to take on 90% of the transformation after Clara came into the picture. Hooray for naptime projects and taking turns with the beanette while the other parent applies magnetic paint, builds a file cabinet, or whips up a flash card clothesline. And we’re even more excited to tackle our next mini makeover (did somebody say sunroom?). Stay tuned!
Update: You can check out what this room looks like when it’s all set up for guests or being used as a playroom right here!
Psst- Looking for more info on any of the projects or items that you see above? Click here for the intro post, here to read about the big sleeper sofa hunt, here for the DIY desk play-by-play, here for the homemade light fixture project, here for our hacked Ikea bookcase, here for the file storage we built, here for how we squeezed in some toy storage, here for how we picked out some DIY art that we could agree on, here for how we wrangled our wires, here for the play-by-play of creating our postcard art wall, here for our magnetic wallflower paint project, and here for our closet overhaul.

Leave a Reply