One of the major questions facing us when figuring out how to add some office-y function to our guest bedroom was: where does the desk go? Correction: since there are two of us, were do the desks go? Bear in mind that this isn’t the easiest question when you’re working with such a modestly sized room (it’s just 10′ x 10.5′) that also needs to accommodate our new sofa (which folds out into a full bed for our occasional house guests). So we decided that a little pre-planning would help us answer that very question. Allow me to introduce my simple (not-to-scale) floor plan to demonstrate the desk placement options that we weighed:
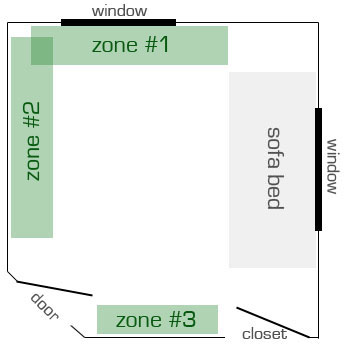
- Zone #1 sounded great because it meant one of us would get to peer out the window and enjoy a nice view of the backyard. But with the couch so close, it meant the other person might be a bit cramped. Plus, we had big plans for a bookcase on that wall (to balance out the height of the uncentered window) so it was on to the next two options.
- Zone #2 felt like a better choice since it was the longest uninterrupted wall, but it would require a very custom sized desk because of how long that wall is and how far the sofabed would need to fold out when it’s in use.
- Zone #3 only offered up space for one desk, although putting one of us there (and the other person in zone #1 or #2) would take pressure off of finding one long two-person desk. But it also meant that we’d have our backs to one another, which isn’t always helpful when we’re working on something together (seeing each other’s screens would be more convenient).
So what did we decide? Zone #2 for the win! It made the most sense since it was the longest space. Plus we loved having a blank wall in front of us to hang art, pinboards or whatever other productivity-inducing wall decor we decide that we need when it comes time to tackle the art-factor in the room.
With that decided, our next challenge was finding a desk to fit that wall. We had about 7ft between the window and the door (when it was fully open) to work with, but only 21″ of depth before we’d start bumping into the folded-out sofa bed. So after lots of hunting (and even some thrift store trolling) we came up with two decent options – the IKEA Besta Burs and something like the Crate & Barrel Sloane Leaning Bookcase Desk (with two work areas instead of one).
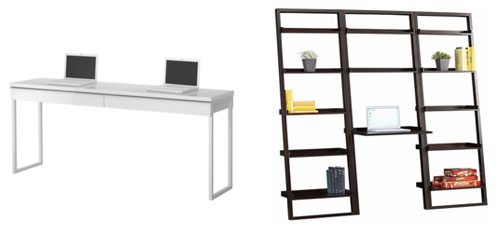
Sadly after checking out both solutions in person, we weren’t won over by either one. The IKEA option was close, but at 5’10” long and only 15″ deep, it didn’t fill the space as much as it could have (and we’ll take all the desktop that we can get!). Plus the $249 price tag was a bit steep for two cheap-os like ourselves. And the Crate & Barrel option wasn’t only more expensive ($379), but it didn’t accommodate two desk areas (so we would probably have to build something similar that would) and it also meant there would be an abundance of bookcases in the room (remember, we’re already planning to place one next to the uncentered window to balance out that wall and add tons of functional storage space. It was beginning to look like we were all out of desk luck…
But then, infused by some of the confidence leftover from my self-building experience, I decided that I should build a custom desk for us. I’d been eager to try out the Kreg Jig on something bigger, so this seemed like just the project. Plus – how hard could it be? Just gotta screw some legs onto a big slab of wood, right? But when it comes to getting “big slabs” of anything home, we always have to think a bit harder since our only vehicle is a Nissan Altima (which isn’t really something that a 7 foot piece of wood just slides into).

So we put on our thinking caps and our figuring-things-out pants and – in a moment of inspiration – Sherry remembered that we still had the hollow-core door that once lived on our bathroom linen closet residing right in our garage. Check it out in the photo below on the left. It was always in the way so it had to go (and you know we have a thing for open storage anyway), but now it was poised for a comeback.
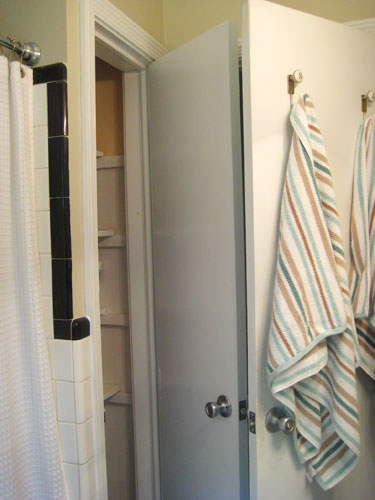
Sherry had seen a few other folks around the blogosphere repurposing doors to create tabletops and desktops so she convinced me that we should join the ranks. And lucky for us, the door was nearly a perfect fit for our floor plan without much altering (it was just under 7ft long, and about 18 inches wide). Plus not only was it free, but it required absolutely zero hauling. Picture us with some serious jazz hands thanks to this fortuitous development.
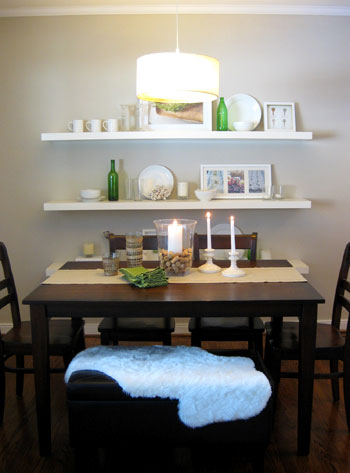
As for the rest of my supplies, I didn’t turn to woodworking plans like a normal person might (I wasn’t planning on doing any fancy drawers on my first attempt at furniture building, so perhaps I was feeling a bit adventurous). Instead, I poked my head under our dining room table since it had the same basic legs and rail design that we decided we wanted for our simple DIY desk. Of course it was a different measurement than our desk would be, but the basic construction was perfect to mimic for my pending project.
With a few quick measurements, we headed off to Home Depot to pick up enough wood for four legs and a rail on all four sides. We came home with a nice little wood collection that looked a little something like this (oh and we added the existing bathroom door to the mix before snapping the photo):
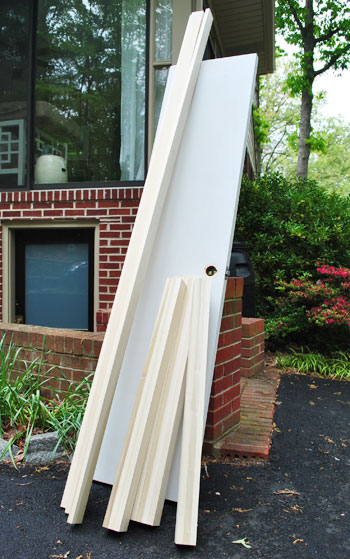
Our bounty included a few planks of 1 x 3″ (poplar) for the rails and four chunky 3 x 3″ lengths (also poplar) that we’d be cutting down to create legs. In total, it cost us about $70 – which would end up being our only out-of-pocket expense for this project. Not bad considering the smaller skinnier Ikea desk was a whopping $249.
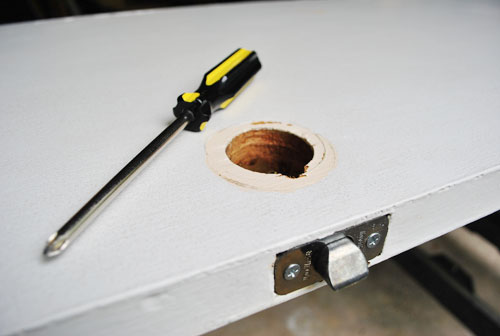
Before I could get to the fun screw-everything-together part, there was quite a bit of prep work to be done. Let’s start with the door hardware. Obviously we didn’t need hinges or a handle mechanism on our desk. So first I removed the hinges and used some wood putty to fill the indentation they left behind (since that side would become the front of the desk). This is because we decided to leave the hole where the handle had been in place so it could conveniently become the spot at the back of the desk that we fed all of our wires and power cords through. And you know this cord-wrangling feature appealed to that type-A wife of mine.
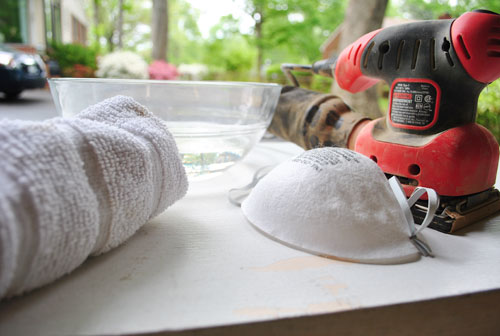
The other prep project that I had to do was whip the door back into shape. Living in the garage for two years meant it had some peeling paint and a bit of scum on it. But it was nothing that a good scrubfest with some vinegar-infused water (for the scum) and a light sanding (for the peeling paint) wouldn’t fix. Well it wouldn’t completely fix it, but it would get it ready for some priming and painting- which would.
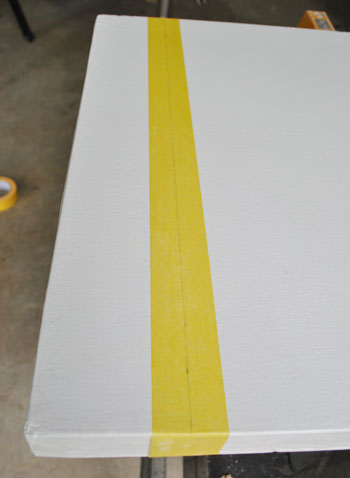
I also had a bit of sawing to do. Even though the door was already slightly shorter than the 7 foot space between the open office door and the opposite wall, we wanted to shorten it by a few more inches just to leave some breathing room on either side of our future desk (so it didn’t look crammed into the space too tightly). I measured and marked where we wanted to cut it, and then – to help prevent the wood from splintering – I taped it off using some painter’s tape (then I just traced my cut line over the tape again so I could see it).
Then out came the circular saw. Hello old friend.

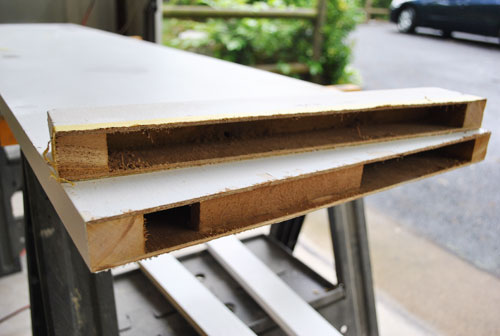
Now if anyone has ever wondered what the inside of a hollow-core door looks like, here ya go. Obviously this needed a bit of sanding to smooth things out, but since this is the end that would face the wall, I didn’t go through the extra effort to seal it over with a new piece of wood. Call it a short cut, if you must. Or a place to hide stuff that you don’t want anyone to find. Oops, I just told the internet about it so that’s out.
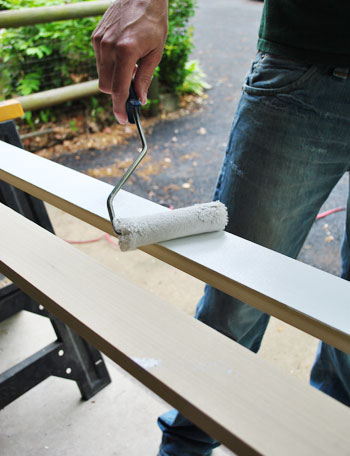
In the above photo, you can already see my other prep project sitting on the bottom of my sawhorse: priming. I decided to prime all of the wood before constructing the piece, but saved painting until after it was all put together. Knowing it would get a little roughed up during construction, I didn’t want to feel bad every time I got a mark on the wood.
Now for the fun part. With everything primed and dried, I could start construction. I began with the legs, using the Kreg Jig to drill one pilot hole on the two inside faces of each leg. Check out this post to learn more about how the Kreg Jig works.

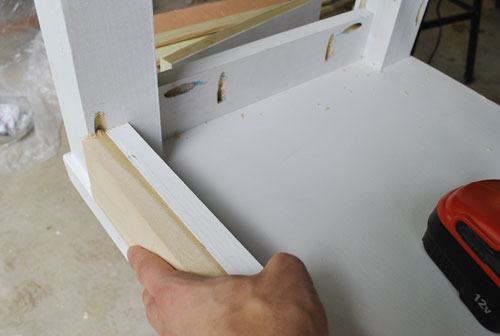
With my pilot holes drilled, it was a simple next step to screw them into the door (which was finally on the verge of become a desktop!). Since I wanted the legs to be set in from the edge (instead of flush) I used some furring strips leftover from our bathroom project as impromptu guides to ensure that I was setting each leg at the same distance from the edge.
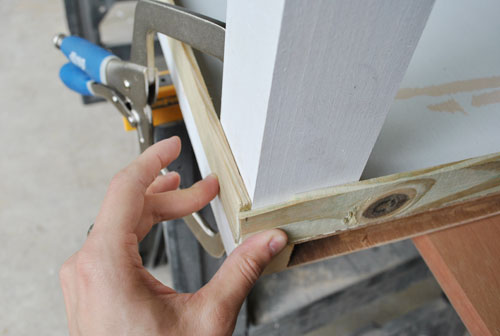
And with the help of my trusty clamp, I screwed the leg into place no problem. Whew. Note that the door is still looking a bit rough in this picture – those are some of the scrapes that occurred as I pieced things together. I had a few more than I anticipated because I realized too late that I should’ve used oil (not water-based) primer. Oops, my bad. But a good once over with the oil-based stuff before painting solved the problem.
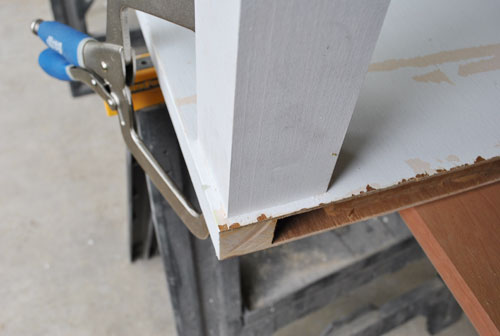
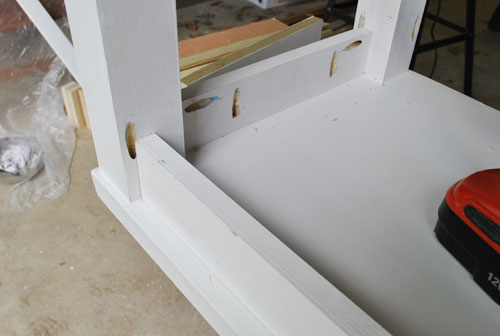
Once all four legs were in place, it came time to attach my rails. I carefully measured and cut those four pieces using my miter saw and then drilled pilot holes using my Kreg Jig again. As you can see below, on each rail I prepped pilot holes to go both into the legs and into the door itself (roughly 8″ apart). And since I wanted the rails to be set back even further than the legs, I used another impromptu guide (this time a leftover 1 x 3″) to make sure I was setting all four at the same depth.
Now, since this is a hollow-core door I feared that I wouldn’t be going into solid wood with these screws. But fortunately, with the exception of the end where I sliced off a few inches, all of my screws were angled enough that they went into the solid frame on all sides of the door. Here’s what it looked like with two of the rails in place.
Now this is the part where “through the magic of the Internet” I put my ingredients in the oven and they come out fully baked (mainly because I won’t bore you with some wood puttying, repriming with the oil-based stuff, painting, and poly-ing – but we used the same method that we used to paint the top of this dresser). And voila! Here’s our brandspankingnew desk:
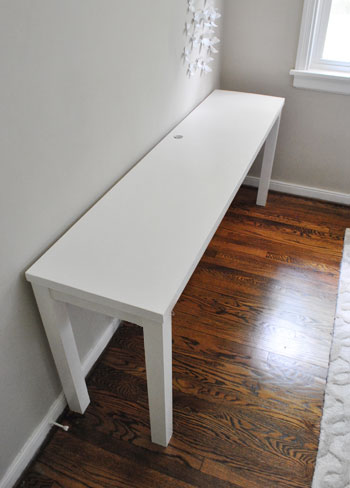
I realize it’s a bit hard to get excited about a plain white table – but we were pretty pumped back when I finished this project (yes, this is something I actually tackled right before Clara’s arrival – she just distracted me from writing the post about it once she came along so it’s just hitting the blog now). Anyway, it fits the space perfectly (since we made it, gotta love custom measurements) and it provides plenty of room for the two of us. Plus it’s out of the way enough for the sofa bed to be fully folded out. We realize it looks crazy skinny in the shot above, but it’s actually 18″ deep, which easily accommodates our two laptops (which are only 9″ deep) along with everything else we’ll need to have on hand. It was also the right price (just $70- since we already owned the door, all of the screws, wood filler, primer, and paint). And we have the satisfaction of having done it ourselves. Score.
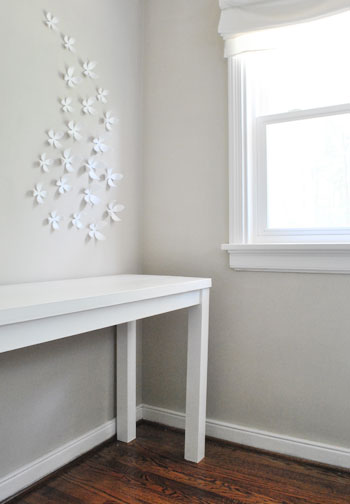
Oh and now we’re getting to the best part – turning it into a actual functioning workspace for both of us. That means chairs, storage, more storage, electronics, wall decor and anything else that we find ourselves pining after in order to be productive parents / bloggers. We’re gradually piecing everything together, and although we’re taking a slow-and-steady approach to this project (kinda out of necessity, given that we have a newborn daughter and all) we can share that we’ve already clocked a few days of work at our new door-turned-desk and so far it’s working out fantastically well. In fact I’m writing this very post on said desk right now. Of course the walls are still bare and we have a ways to go, but I can also divulge that we’ve taken on two more office projects (since Clara’s arrival no less- we’re so proud!) so stay tuned for the play by play on those two exciting undertakings soon…
But enough about us. Have you guys seen any other unique desk solutions recently? Or have you creatively solved any of your own where-do-I-put-my-workspace dilemmas? Feel free to throw in any other fun and/or functional office ideas that might come in handy for others who are planning their home offices as we tackle ours. Share and share alike.
Psst- Wanna follow the entire office/guest bedroom/playroom makeover? Click here for the intro post and here to read about the big sleeper sofa hunt.

Leave a Reply