Updated 2016
Our toilet is no longer the mild-mannered everyday toilet that you’d assume it was. Thanks to being born on the planet Krypton two simple DIY projects that we tackled last weekend, our former Clark Kent of a throne now boasts two new superpowers. Can’t you just picture the comic book?
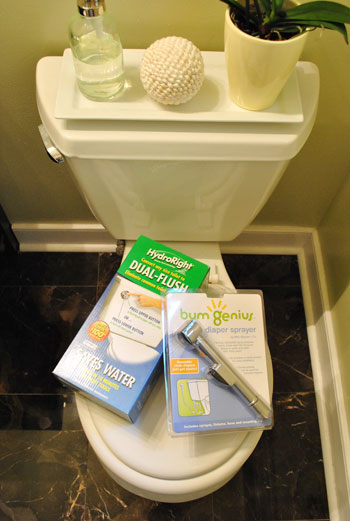
Here’s a rundown of the two blissfully “tool free” (more on that later) projects that we took on.
Converting Our Toilet To Dual Flush
The first was to convert our toilet into a dual-flush tank using a simple $25 dual flush converter kit that a reader mentioned to us (thanks Allison!). It works on any old, regular toilet, so anyone can install it about an hour.
Why Convert Your Toilet To Dual Flush?
If you find yourself thinking “whaaaa?” let me explain. Splitting the flushing power of your toilet is a water conservation trick that allows you to tell your toilet when you need either a little or a lot of water to, um, take care of your business.
Since flushing “liquids” doesn’t require as much water, a dual-flush toilet has a setting that uses a lot less of it. Word on the Interweb is that a dual-flushing function allows your toilet to use 30% less water, which can save the average household 2000 gallons of water a year. And the box that came with our dual flush converter states that the average family can save up to $100 a year just by adding one of them to one toilet in any household (which means it pays for itself five times in the first year alone). And just imagine how much you can save installing one on every toilet.
How To Install A Dual Flush Conversion Kit
Step 1: Remove the old flush handle
The box also claimed that this installation would be totally tool-free. But sadly we quickly required a tool to remove the tightly-screwed old handle. The good news is that it was still a super easy undertaking.
Step 2: Remove the toilet flapper
The next step of removing the flapper. That’s the gray thing that you can see a sliver of in the bottom-right, which was far less involved (no tools required at all). Oh and turning the water off was optional, but I did decide to do that so I didn’t have to keep sticking my hand into toilet tank water.
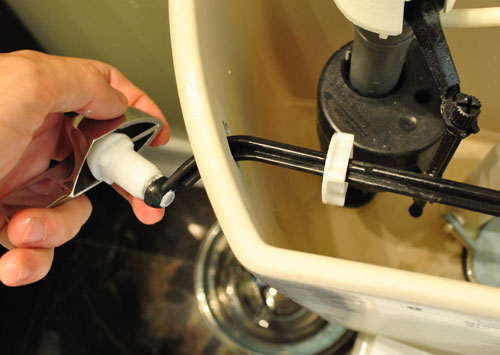
Step 3: Attach The Dual Flush Converter
With the old pieces removed, the first task was to slide the bottom part of the dual-flush tower into place where my old flapper had been.
Then I wiggled a tight, black rubber band over the fill tube to keep the dual-flush piece in place and firmly pressed against the opening. There’s also a zip-tie at the back of the piece that I pulled tight to help keep things in place. I had accidentally cut the tie off at first, thinking it was part of the packaging, but thankfully the kit actually supplied a back up! They must have known people would jump the gun like I did. Lesson learned.
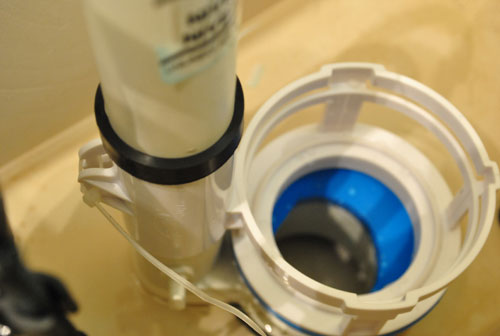
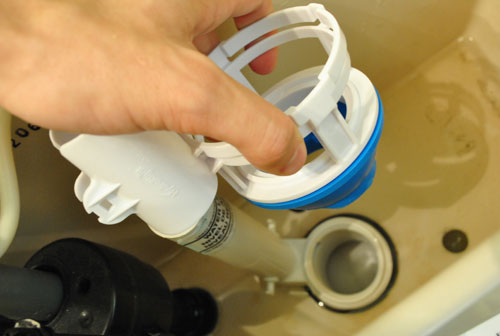
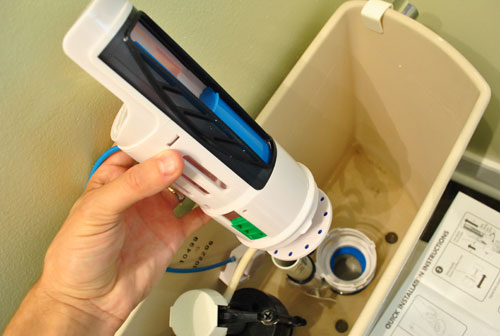
Step 4: Install The Flush Tower
Then it was time to set the rest of the tower. It looks like quite a beast, but it clicks into place very easily with a simple drop-and-twist motion. You can see some of the technology in this shot – the adjustable blue slider is what helps to regulate how much water should be used in the quick flush function, and the green switch does the same for the full flush.
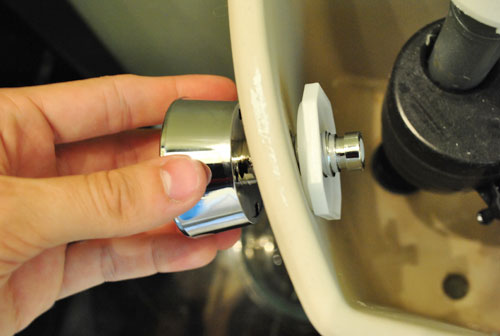
Step 5: Attach The New Dual Flush Button
My next task was to put in the new button where the old handle had been. I was able to securely hand-tighten this (again, no tools required). Oh and hand-tightening is always a good approach because over-tightening things can potentially crack the porcelain of your tank or bowl. Not good.
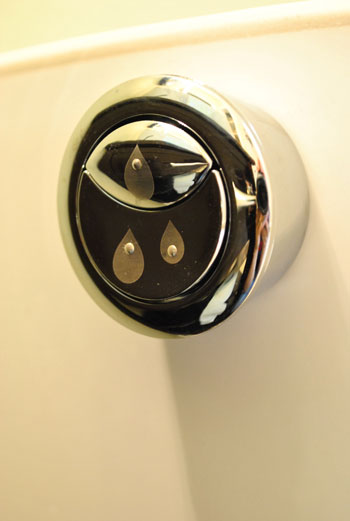
Here you can see what the button looks like. It’s split for what we’ve been calling a “single flush” (for liquids) and “double flush” (for, as the packaging describes, “when you need more power”).
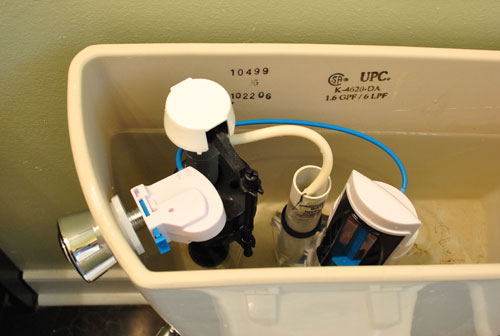
From there you just pop the button device (the white box at the other end of the blue cord) onto the back of the button. And there’s no electricity or battery involved, despite the fact that it all started to look somewhat bomb-like at this point.
It took me about 20 minutes to get this far, but my eagerness to start flushin’ was damped by the fact that the buttons didn’t work at all at first. But through a few minutes of trial and error (which is pretty much how we do everything around here at Casa Petersik) I realized that the level of my blue slider was very important. If it was too close or too far from the water level, my button pushing wasn’t strong enough to lift the tower’s built-in flapper. Fast-forward about ten minutes and this John was happy with his john. Both buttons worked every single time once we found that magical placement of the blue slider.
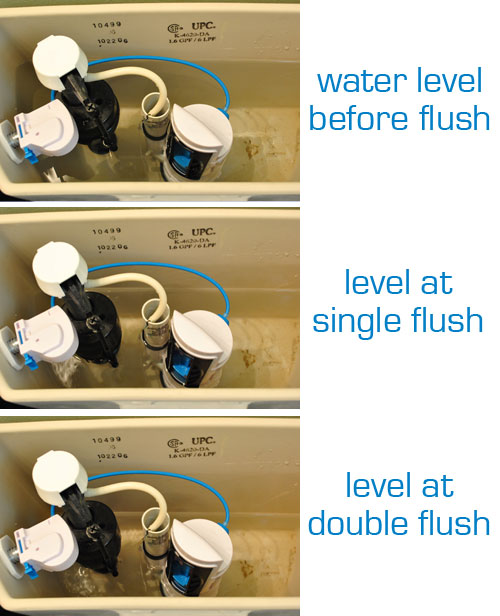
Step 7: Observe Your Water Levels
To demonstrate exactly what this dual-flushing function means when it comes to saving water, check out the difference between how little water is used at the single flush setting, and how much more goes out on the full flush setting. There was definitely an obvious difference in the water level, and you could even hear the toilet working a lot quicker for the single flushing action. Score.
Update: We enjoyed having this dual flush converting installed on this toilet so much, we installed it two more times when we moved to our new house! Both in our guest room toilet and our hall bathroom toilet .
Installing A Cloth Diaper Sprayer
Our second potty upgrade was adding a Bum Genius diaper sprayer to make our cloth diaper clean-up a bit easier (that toilet add-on was $45, but we luckily got it as a shower gift). This task was so simple that it barely requires step-by-step photography.
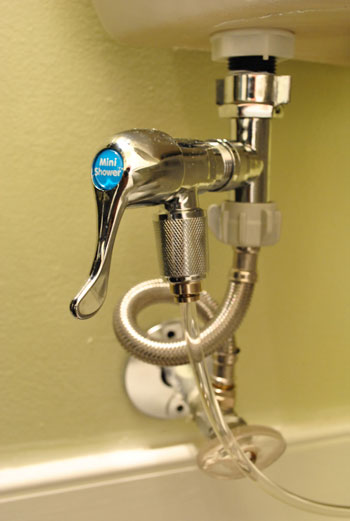
The “Mini Shower” simply installs on the bottom of your tank right between your water line and the tank itself. Then a clear, plastic tube (which you can cut to a desired length) attaches with a firm push into the device on one end, and the sprayer on the other. Here it is installed – you can see it even comes with a handle to adjust the water pressure. Very handy indeed.
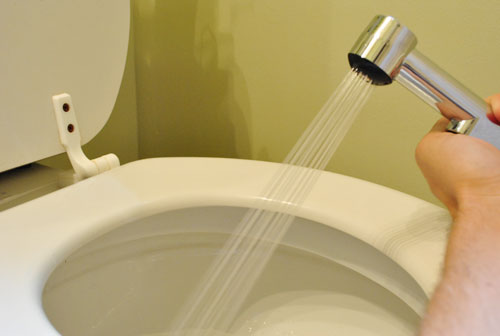
If you’re still wondering what the heck a diaper sprayer is (as I admittedly was at first) it’s supposed to be a huge help for cleaning cloth diapers. In fact, many of you even recommended it to us on this post. Without getting too descriptive, it lets you spray “stuff” off of the diapers and into the toilet so it doesn’t go into the laundry (which is then done at a certain temperature to completely sanitize the diapers for their next use). Here’s a demonstration photo (and yes, I did accidentally spray the ceiling while attempting to take this picture).
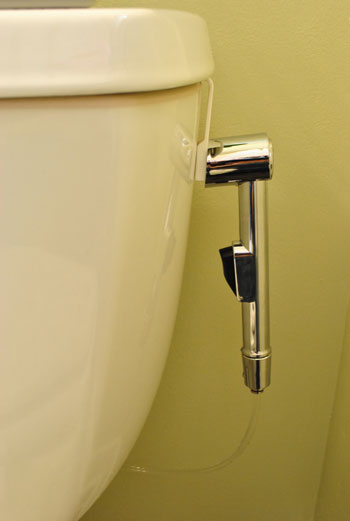
The kit even comes with a little sprayer holster that can be installed onto a wall, but we opted to use the more subtle hook that hangs on the side of the tank since it feels less permanent (hopefully we won’t be diapering for the next few decades). You can also see that we chose to run the tube behind our tank to make the whole thing less of an eyesore, and this way we can keep the sprayer on the right side of the toilet (which is virtually invisible from almost every angle of our bathroom- plus it’ll also come in handy on that side for two right-handers like us).
So here’s our pimped-out potty one last time in all of its super-charged glory. We love that the upgrades were fast (60 minutes max), easy (almost 100% tool-free) and cheap ($20 converter + gifted $45 sprayer). And since the changes are fairly inconspicuous, our little loo can still keep its secret identity mostly under wraps. In fact, our half bathroom will be getting the same dual-flushing treatment asap because we’re so in love with the eco friendly (and wallet friendly) benefits of such a simple $20 upgrade. Especially when you consider that people pay big bucks for dual flushing toilets and this kit allows you to keep the toilet that you have out of a landfill, but upgrade it with the same cost and water saving technology.
I don’t know if it’s the man in me, but the idea of an upgraded throne is actually quite appealing. It’s the whole “my toy is better than your toy” frame of mind. And since I’ll never win the award for the biggest flatscreen TV or the biggest biceps, at least I can brag that my toilet is smarter than my friends’ toilets. Have any of you tackled either of these john-centric projects (or others like ’em)? We’d also love to hear if you have other tips for conserving water, saving money with an easy upgrade, or heck, cleaning cloth diapers for that matter. Share and share alike.

Leave a Reply