Q: Do you guys have any tips for photographing your rooms? I’m actually listing my house for sale and thinking of snapping some photos (for memories and also to help with the flier) but I want them to look great. Any and all tricks, tips and suggestions are appreciated! – Leslie
A: We totally feel your pain. When we started our blog and were suddenly tasked with sharing photos we had no idea how to make rooms look their best (hence all the fugly pictures way back in our archives). But we did learn our fair share of simple tricks (mostly through trial and error) along the way- and we’re happy to share the goods. First of all, we’re definitely not professional photographers and we don’t have a fancy expensive camera. We snap every picture that you see on our blog (including all the “after” pictures on our House Tour page) with a Canon PowerShot SD1100-IS Digital Elph. It’s a small 8 megapixel camera that has great little features like a macro setting, an image stabilizer, and a manual setting (which we use 100% of the time so we can turn the flash off- pictures look so much better without it!).
So that’s tip #1: turn on all the lights and take your photos during the day without the flash. Opening up the blinds to let in the light stream in and turning on all the lamps during the day will create a soft glowing ambiance instead of blowing things out in the foreground while leaving everything dark in the background (which often happens when you use the flash). Sunny days are great for room photos so aim for those but try not to take pictures when the sun is shining directly into the room onto the rug or the furniture and casting harsh shadows (you might want to wait a few hours for it to shift slightly).
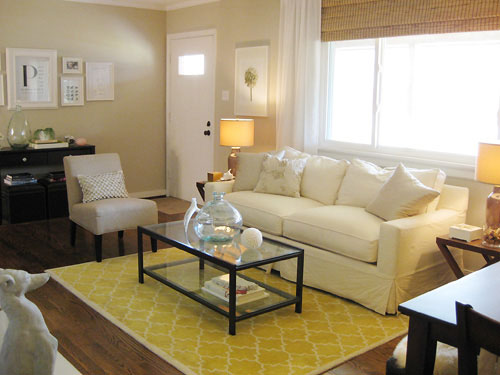
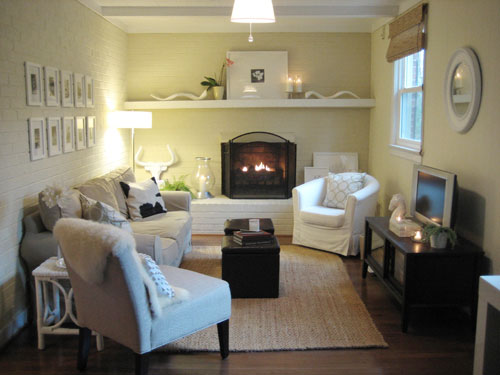
Now for tip #2: tweak the room first. Really look around the space and see what you can do to enhance the look of the room before picking up the camera and snapping away. Some seemingly obvious (but often forgotten) ideas would be lighting any and all candles, fluffing pillows, picking up dog or kid toys on the floor, and even making a fire in the fireplace (or lighting some large pillar candles in lieu of logs). Little flickering touches of light around the room are like jewelry- they’ll add a nice warm sparkle and a certain je ne sais quois that the same space wouldn’t have when they’re not lit. At the same token, small toys on the floor and flat mashed couch pillows take a little bit away from the polished image that you might be trying to capture. And it definitely saves you time to make these small changes before you take all of your photos and upload them only to notice a bunch of little things that you wish you had changed.
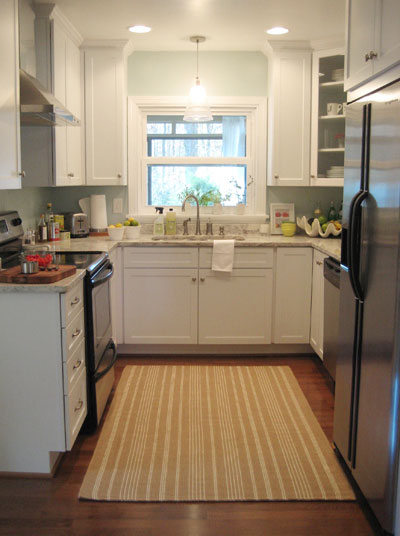
And now for tip #3: take a test shot. It just takes one picture to really “see” a room in a way that you can’t see it in person. By grabbing one shot in the beginning and looking at it critically, you might notice other details in a room that you’d like to change (instead of spotting them after snapping away for an hour). We’ve identified everything from wonky curtains (which were easily shifted on the rod to look more balanced) to the fact that we needed a shot of color in a bland corner (easily accomplished by switching out a throw pillow). This little test shot is a great “last look” before you really give your fingers a workout and snap your final room photos (and it really can make all the difference in your after pics). For example, after shooting a test shot of the kitchen below, we added the dishcloth draped over the sink and the cutting board with tomatoes on it for more interest (and to balance out the splash of red in the art to the right of the sink). Oh and on a side note, bowls of fresh fruit- we love real lemons and limes- make great (and cheap!) centerpieces in a dining room, eat-in kitchen, and even on a living room coffee table. Especially if you’re staging your house to sell.
This brings us to tip #4: work those angles. We take a lot of pictures just to get one that we love. And when I say a lot, I mean anywhere from 25-75 or more (especially when it comes to capturing “after” photos for a big reveal). Try standing on a chair to get an alternate angle or squatting down a bit to make the ceilings feel higher. Shooting from each corner of the room and the center of each wall will also help you evaluate which points of view look best. You can even put the camera on a tripod if your hands aren’t very steady (especially when you have the flash off, you’ll need to keep the camera still to get crisp delicious photos).
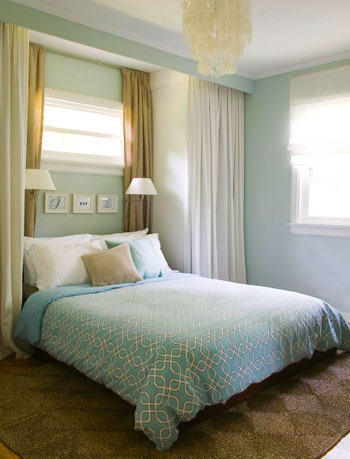
And now for tip #5: don’t forget to go tall instead of long. You’ll find a fair amount of vertical after photos on our House Tour page, which might seems strange since you can get a wider shot with more furniture by turning the camera and grabbing a horizontal pic. The key here is again to take a plethora of pictures, both horizontal and vertical. Sometimes the furniture layout just looks better (and the ceilings look higher) in the vertical photos. And sometimes the wide shots will win out for their overarching views. We’re consistently surprised how often we’re drawn to certain vertical shots though, so they’re definitely worth taking (they might just be your favs in the end).
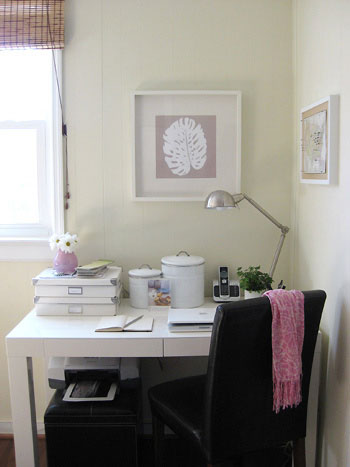
Then there’s tip #6: think about zones and function. Sometimes your instinct will be to cram as much of the room into the shot as possible, but if you’re shooting a small office area that’s within a larger den, you might not want to capture half of the TV and the seating area when the focus should be on the desk. Try taking a few steps forward to spotlight that specific zone instead of capturing half of another area that could look disjointed and busy if it’s wedged into frame.
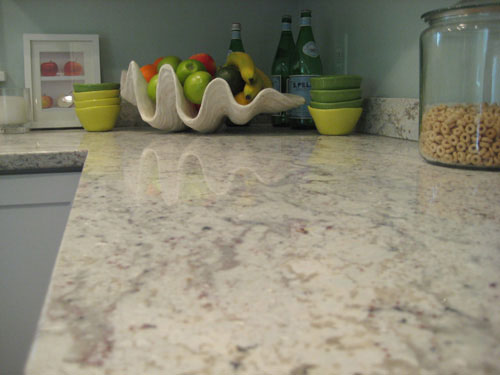
Oh and we can’t forget tip #7: it’s all in the details. We love using the “macro” setting on our camera if we’re doing a close up detail shot (like trying to capture the weave in our jute rug or the soft veining in our granite counters). This built-in camera setting makes things look extremely clear and crisp when they’re up close without any photographic skill required on your part (except for keeping the camera nice and still of course). While this might not be as applicable for snapping wide room pictures for listing your house, it’ll definitely come in handy if you’re taking any shots for memories (and have a particular detail or arrangement that you want to remember long after you move).
And now for tip #8: practice makes perfect. We’re still learning different angles and approaches to picture taking as we go. Don’t wait until you’re under pressure to snap a gorgeous picture (to sell your house or document your baby’s first birthday). Just pick up the camera and start clicking away so by the time something imperative pops up you’ll have more experience and more confidence with your cam. If you go back into our archives it’s obvious that we were terrrrrrrrible photographers when we started blogging back in 2007. But thankfully over the course of a few months we definitely started to hit our stride (heck, we’re still hoping to get better after more than two years of regularly clicking away).
So that’s our non-professional-learn-on-the-job approach to photography. Now we wanna hear what you guys do to get the shot. Any additional pointers for Leslie (and us). Do tell.
Psst- The link to our camera included above is an Amazon Affiliate link.

Leave a Reply