After my tile laying extravaganza, the tasks of grouting and sealing seemed tiny by comparison – especially considering I had taken off the entire week between Christmas and New Year’s and had several days to accomplish them. But for some reason, I really dreaded grouting. From my dad calling it “the pits” to Katie Bower admitting it’s the hardest part of tiling for her and Jeremy, it really had me nervous. Even the guy at a the home improvement store kinda hinted that it wouldn’t be pleasant. Couldn’t we just leave it like this?
Unfortunately, it had to be done. And I had already put it off twice. Once when I mixed the grout wrong (I read “3 cups/1.4 Liters” of water as “3 Liters” – oops) and a snowstorm kept us from getting more. Then the next day, I picked up a replacement box with plans to grout after work, but then an accident (train + SUV = bad back up, but no injuries) got me home too late to tackle it before bed. The funny thing is that in the end these two twists of fate ended up being a lifesavers.
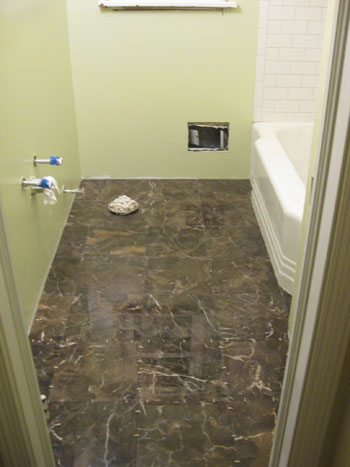
See, long before we even demo’d our first wall we had purchased our grout – nonsanded Polyblend grout from Home Depot. We opted to use nonsanded grout on both the shower walls and floor because it’s recommended for 1/16th” grout lines and because sanded grout can scratch marble. So we had had our box of “bright white” (for the shower) and our box of “nutmeg” grout (for the floor) all ready to go from almost day one… even though the nutmeg was a little redder than we would’ve liked. But sometime over Christmas break we got the tip that we should check out a specialty store like The Tile Shop for better grout that would last longer and was more mildew and mold resistant – plus they offered a wider color selection. Why didn’t we think of that?
We can’t speak to the quality yet (it’s supposed to be more durable and mold/mildew resistant according to the label) but our tipster was dead-on about the color selection. Not to mention they had a handy color guide that allowed us to hold up our tile against real grout (not just a colored label) to see how they’d look together:
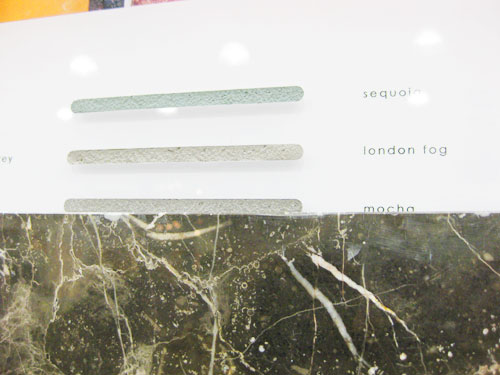
So thanks to this trip we scored a batch of “standard white” (a more subtle white, which is much closer to our actual tile color than the “bright white” from Home Depot) and “mocha” (a much browner version of nutmeg without the garish red undertones). And it was the same price as the Home Depot stuff! Not bad. We’d later count our blessings that we hadn’t used the previous grout that would’ve made our shower lines look like over-whitened teeth and our floor ones look like bad auburn streaks, but first we had to actually get down to business and grout everything. So with better grout in our possession (and after allowing all of the tile in the room at least two full days to set) I couldn’t put off the dreaded project any longer. I semi-enthusiastically gathered my supplies, almost all of which were inherited from my dad’s previous bathroom projects (most of which were purchased at The Tile Shop), and this is what my little arsenal of grouting tools included:
- A grout float
- Sponges
- Buckets (at least one for grout, one for water)
- Paper towels & rags
- Flexible Grout Admixture
- Grout Release
- Marble Sealer
The first step was actually to use the last two items to prep the surfaces. The grout release acts as the “Pam” of the process (to borrow a baking analogy we once heard) when it comes to protecting your tiles. By applying it beforehand, it makes it easier to clean the excess grout off of your tiles later. The marble sealer did the same thing for our marble floors (oh and it’s the same product we would later use to seal the grout too- gotta love a multitasker).
Once the release had been applied to the shower walls and the sealer had been applied to the floor in advance of grouting, it was time to mix the grout. This go-round we were determined to follow the instructions on the box quite carefully (which had been a challenge to me in my previous attempt). Luckily this time I mixed the correct amount of liquid and grout powder to form some nice toothpaste-like grout. You can opt to mix powdered grout with water (like we did in our previous attempt) but after talking with the tile specialists we decided to use Flexible Grout Admixture since it was recommended with the grout that we bought and we already had some leftover from my dad’s bathroom projects. The perks? It’s supposed to help reduce shrinking, cracking and the discoloration of your grout in the long run. Always a plus, right?
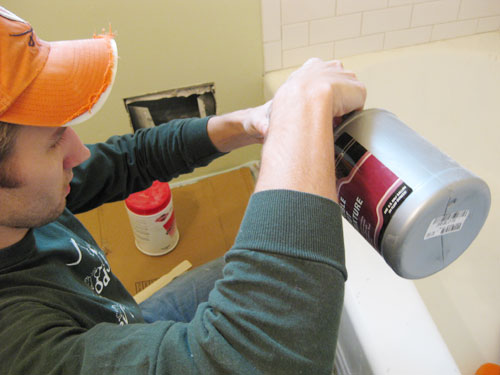
More than one person had warned me that mixing grout sucked – especially by hand (which I was doing because I didn’t want to buy a special tool for the little amount of grout that I was going to be using). So I trepidatiously measured out as much grout as I thought I could use in a 25-minute span (since more time than that could cause it to dry out) and added the corresponding amount of Flexible Grout Admixture. Then I began mixing with a simple paint stir stick and, well, it really wasn’t that bad.
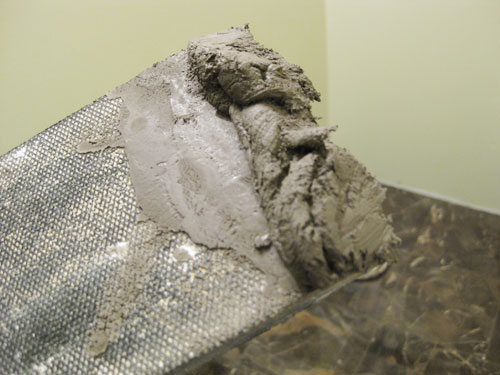
It took a little bit of arm power (okay, and one broken stick) to get all the lumps worked out and achieve what appeared to be the correct consistency- I’d read it should be somewhere in the neighborhood of a cream cheese, cake batter, peanut butter or toothpaste. I personally don’t consider all of those to be the same thickness, so I figured there was room for interpretation. The key is just to avoid anything too gooey/drippy or anything too dry and non-spreadable. Below is a shot of the mocha floor grout at what I deemed to be an acceptable take on toothpaste-cream-butter-batter. So after letting it set for ten minutes in the pail as instructed, I mixed everything up again and armed myself with the grout float.
The grout float is like a rubber trowel. I like to think of it as the notched trowel’s friendlier, less ornery cousin. As I anxiously awaited impending disaster, I followed everyone’s instructions of using the float to pick up a small glop of grout and firmly press it against the tile. Holding the grout float nearly flat against the tile, I spread the glop back and forth against the lines between the tiles letting it generously fill all of the cracks. With such small grout lines, this took little time and effort (although you should apply firm pressure to be sure to really pack those cracks). Then it took just a few scrapes of the float – this time at a 45 degree angle- to swipe away excess grout from the faces of the tile. Nothing too difficult yet. I started to wonder if I was doing it wrong.
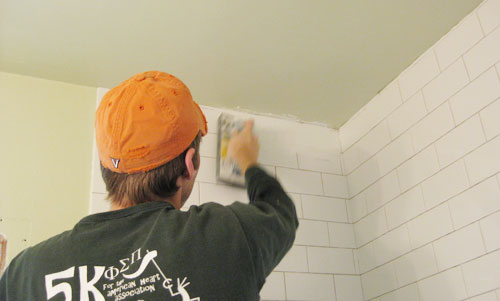
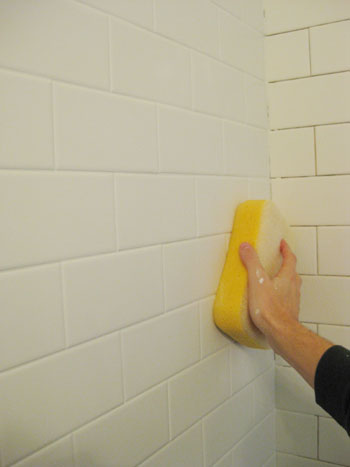
Even after using the float to remove excess grout, there’s still going to be some left hanging around on the faces of the tile (remember, you just want it in the cracks). This is where the damp sponge comes in after you’ve done about eight to ten minutes of grouting (you don’t want to wait over 15 minutes since the grout is harder to wipe off once it starts to set). Using another bucket filled with water, I lightly dampened a big yellow sponge (lightly is key, I learned). Then with a few light passes (again, light is key) I was able to not only lift most of the remaining grout from the faces of the tiles, but also to smooth the grout lines in the process. Seriously, the ease of this step amazed me. As long as I kept my sponge clean (which involved freshening my water bucket a couple of times) and didn’t get too water-happy, the process was remarkably effective. Maybe it was the Pam-like Grout Release that I applied beforehand? Either way this project was a lot less miserable than I thought it would be.
Now before I make this sound like a walk in the park, I’ll admit that it was a bit tiring and boring to do this across the entire shower. Not to mention having to stop a couple of times to clean my bucket and mix new grout (in the end, I used about 3lbs of a 5lb container for the tub/shower surround). But when I was done, the effect was AMAZING. It actually looked like a place people could shower! And all the dark negative spaces between the tiles were filled with clean white grout which promptly shifted the emphasis away from the lines between the tiles and back where it belonged: to the tiles themselves.
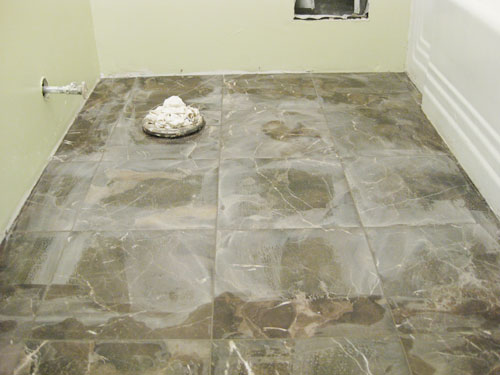
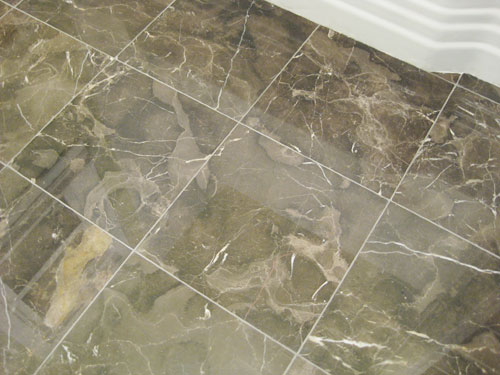
When I managed to stop admiring my own handiwork on the subway tile long enough to repeat the process I turned my attention to the floor. Although mixing this batch was a bit more challenging (darker color = more powder to mix and more color consistency concerns to worry about), the actual grouting was much faster. I barely used 1.5lbs to cover the minimal amount of grout lines (since they were only 1/16th” wide and much less abundant than in the shower since the tile was a lot bigger). Once again, the difference was incredible.
That was, at least, until the haze started to make itself visible. No matter how awesome your sponge skills are, you’re bound to leave some degree of grout film on your tiles that may only show its ugly face once things start to dry.
But this is where that previously applied Marble Sealer is supposed to make your life easier. Whew. I used a damp sponge a few more times to wipe away the haze, which helped but still moved the haze around more than actually removing it. Hmm.
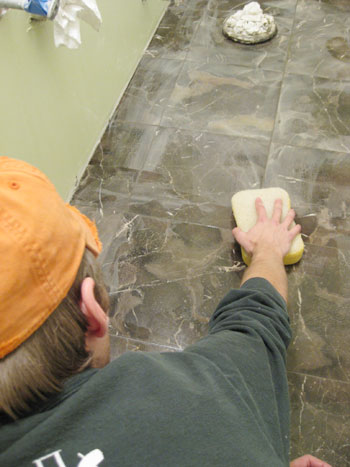
We did have a bottle of Haze Remover borrowed from my dad, but I was hesitant to apply yet another chemical to our marble floors so I tried another pass with a dry paper towel instead of a moist sponge. Voila. It took a bit of elbow grease and quite a few passes, but the dry towel technique did the trick on both the floor and wall when it came to removing the slight haze that was left behind after multiple spongings. Both surfaces even passed the white glove test (okay, we didn’t really use white gloves, but I didn’t have any haze left on my bare finger after dragging it across the shower walls or the floor). Victory!
After 48 hours of curing, the last step was to seal the grout. It actually ended up being 72 hours later for us, since about 12 hours in we had a minor “water incident.” Explanation: while I managed to work in the bathroom for weeks on end without this happening, Sherry joined me for about three hours to caulk and paint trim (more on that later) and somehow her posterior came into contact with the water valve for the sink, turning it on and sending a jet of water shooting up onto the ceiling (and therefore some heavy drips of h20 back onto the floor). She then ran screaming out of the room while I fought to turn off the valve. Needless to say, we thought an extra day of curing time couldn’t hurt.
But back to the sealing process: that was also a super simple and straightforward job, and I applied a few extra coats to both the floor and the shower wall to keep our grout protected and hopefully mildew & stain free for the long haul (we also plan to reseal things every few years for added security). Note: after sealing the grout it was slightly darker, so it blended in with the mocha tones in the tiles even more than it appears to in the pic below- score).
So as I wondered what all the fuss about grouting was – maybe working with super thin grout lines in a small room made our experience easy? – I finished applying a couple coats of grout sealer (the same Marble Sealer on the floor, and a product called SurfaceGard on the tub/shower surround). Believe it or not, the room could almost be called showerable again. We just needed to install the fixtures and caulk some of the edges first. Hello light at the end of the tunnel, it’s nice to see you.
Psst- Wanna read about the first few chapters of the big bathroom makeover? Check out Chapter One, Chapter Two, Chapter Three, a little teaser post, and Chapter Four right here.

Leave a Reply