As promised, we’re back to detail the simple steps that anyone can follow to DIY some chic and cheap vintage-looking wood signs. We first unveiled these guys in our big bathroom reveal post yesterday morning, but now we’ll divulge the step-by-step process so you can follow along at home. Just remember to sing “I saw the sign” by Ace of Base the whole time you’re making them like we did. Good times.
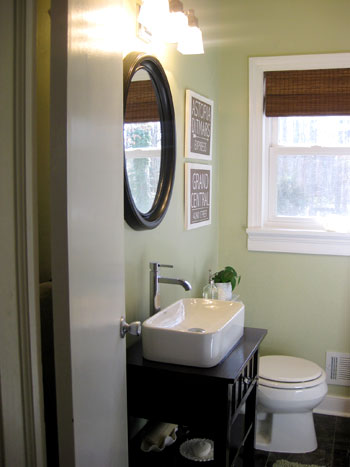
John actually came up with the idea of creating vintage-looking wood signs (isn’t he quite the artisté?) after I lamented that square frames next to the rounded mirror might look a bit chaotic. We wanted something simpler (nothing with reflective glass or a strong raised edge to compete with the frame of the mirror) so John’s one-plane-only wood sign idea was the perfect fit.
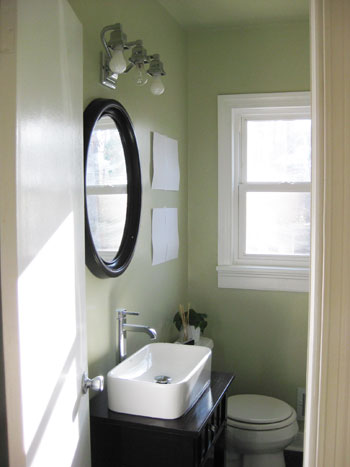
And speaking of the perfect fit, we didn’t have a clue how big we wanted our art to be (or even how many pieces we wanted to make- two? three?) so we simply taped up white paper cut to different sizes in a few different arrangements until we settled on a layout that we liked. Two rectangles on top of each other would subtly mimic the shape of the window and feel balanced and inviting next to the mirror (and my fears of creating something that would compete too much with the curved mirror happily faded away). Hooray for fast and free paper templates to take the guesswork out of art size! The next step was just to measure those pieces of paper (they each turned out to be 16″ x 13″) and figure out what the heck our signs would look like…
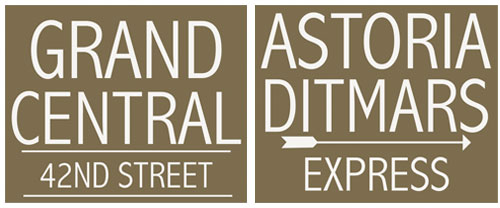
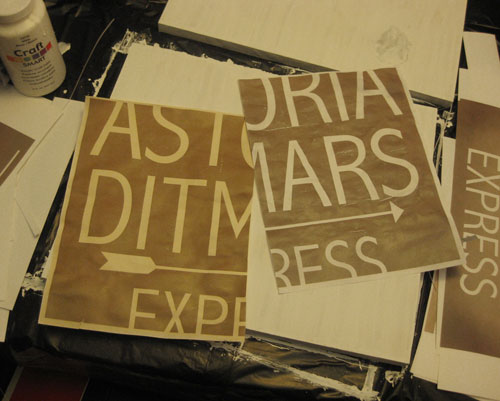
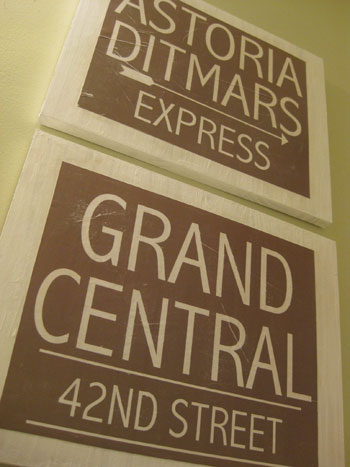
We knew we wanted to draw inspiration from our time spent in NYC (where we met and fell in love) so we decided to try our hand at making signs that would resemble the look of old NYC subway signs, like these that we hunted down on google.
Did you guys click over and check out the $1600 price tag?! Yowsa. But when it came to inspiration, they were dead on. Of course we adapted ours to be horizontal in format and a bit less dark to complement all the white and neutral tones in our bathroom (and in our house for that matter). We also picked two subway stops with the most meaning to us to add a customized vibe that we love (we met working together near Grand Central and both lived in Astoria Queens at different times). We created our signs in Photoshop (but any program that allows you to edit type a bit should work). We also integrated some fun little details like the arrow and the horizontal rules around 42nd Street just to keep things interesting, but they still looked pretty flat as jpgs on the screen. Not to worry though, we had a few ideas for adding a bit more vintage character to them once we printed ’em. Note: the typeface that we used was Abadi MT Condensed Light in case anyone wants to duplicate them that closely.
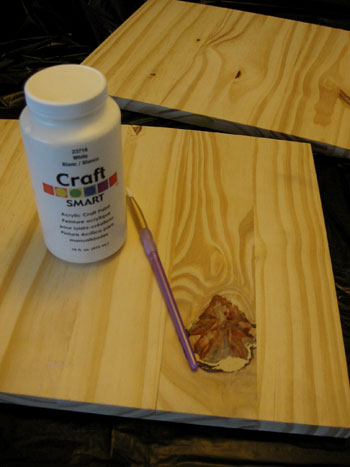
After we printed them out ourselves for free on regular old printer paper (we ran off a couple of extras so we could experiment with them a bit) we headed off to Home Depot. There we picked up one $6 piece of 1″ thick plywood (it was in the area near the chair legs among a ton of differently sized plywood options). The plywood sheet that we selected happened to be 16″ x 30″ so it was easily sliced down by the kind folks in the wood cutting area. They quickly transformed our plank of wood into two 16″ x 13″ rectangles with only a bit of scrap wood leftover. Gotta love getting two pieces of art out of one piece of $6 wood.
After bringing home our pre-cut planks it was as easy as painting them white with craft paint that we already owned (it was thinner than latex wall paint so some of the wood grain still showed through)…
… and trying our hand at a few different aging techniques to bring our “vintage signs” (aka: modern day computer printouts) to life. As you may be able to tell from the print on the left below, we had some fun brewing tea and rubbing the empty tea bags on one of our “tester”printouts but opted against it since it made the prints look so yellowed that they didn’t feel as crisp as the white painted wood that would be behind them (and we really wanted to maintain a clean and airy look, even after the “distressing” stage).
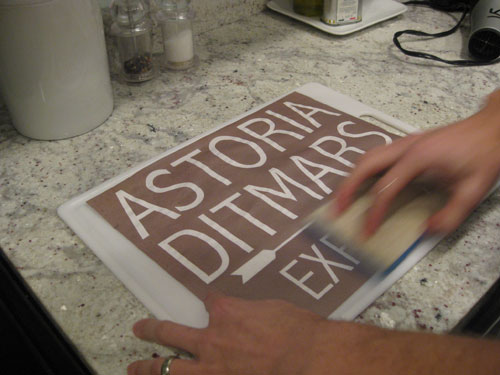
So after just saying no to the tea-staining process, we moved on to trying to rough up our prints with some good old fashioned elbow grease. First we placed one of them on a slightly textured (ie: nubby plastic) cutting board. Then we simply ran a sponge over it to wet it down and slightly wear away at the perfectly printed finish. We thought it might smear the ink, but happily it just buffed the surface for a pretty convincing timeworn look.
Next we rubbed a paper towel across the surface, being careful not to rip the paper but doing it vigorously enough to rough up the surface of the dampened piece of paper to further wear away at the formerly crisp appearance.

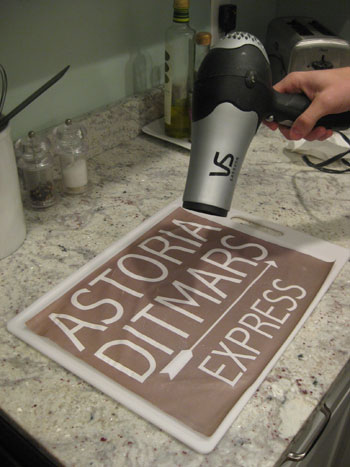
Then it was time to break out the ol’ hairdryer to get rid of any remaining moisture so the sign was ready to be attached to its designated wood plank.
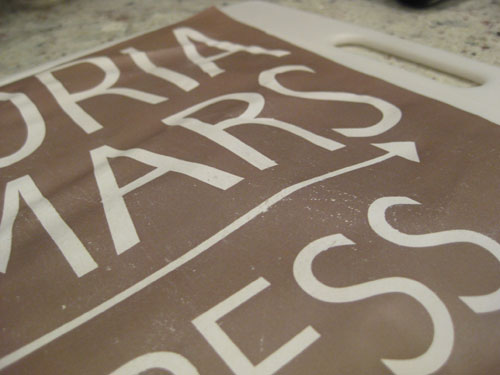
It dried a bit lumpy bumpy but that’s all part of the plan. Of course at this stage we thought it might be ruined but we just went along with it and what do you know, it all worked out in the end. Trial and error is the name of the game here. Anyway, this is a detailed shot to show you what the sponge + paper towel technique did to the finish of our prints. See those worn down areas and those slightly rubbed off spots? These babies were looking less freshly printed already!
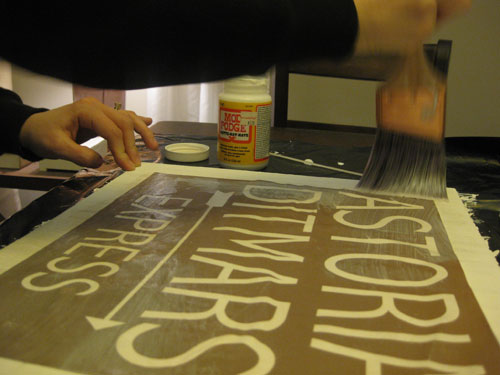
Then it was Mod Podge time. We already owned a big tub of it (and actually used one of our paint brushes) so this step was also free like the printing and distressing phases. We flipped the paper over and applied a semi-thick coat of Mod Podge to the back of the print and then flipped it over again, carefully placed it in the center of our wood plank, and applied a thick layer of Mod Podge to hold everything in place. The great thing about the stuff is that although it looks like white Elmer’s Glue going on, it actually dries clear, so not only did our top coat of Podge hold our print in place, it also created a glossy hardened appearance (which is perfect for a bathroom since it “sealed” the sign from any future moisture-related problems).
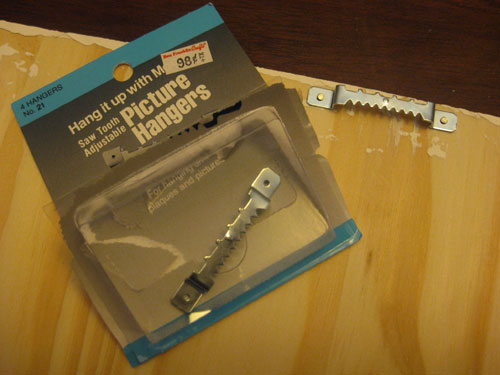
Once everything was dry we flipped over each sign (on an old towel so as not to scratch the front) and gently hammered in two little nails to secure 98 cent picture hangers that we already had in our hardware drawer. Presto, an easy way to hang our new bathroom art for zero dollars and zero cents. Note: If you don’t already own white craft paint, Mod Podge or Picture Hangers, they can all be picked up at a craft store like Michael’s or Hobby Lobby for around five dollars total.
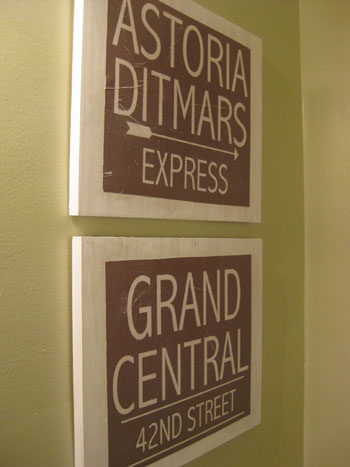
Here are our new “vintage” wood signs hanging happily in the bathroom. One of the coolest things about the fact that our prints were a bit bumpy from the wetting, distressing, and drying stage was that when we Mod Podged them they each got a wrinkle or two which looked oh so worn and weathered (see the one through the D in Ditmars and the G in Grand Central?). This was, well, perfect for the imperfect look we were going for and once the Mod Podge dried it was seamless and sealed (so there wasn’t a big wrinkle that stuck out from the wood or anything- everything looked flush, flat and pretty darn fantastic).
There you have it. The story of our $6 homemade wooden sign art. We hope you guys are inspired to try your hand at something similar. And you don’t have to stop at subway sign ideas either, you can always pick a small shop in your hometown that has special meaning to you, create a message of some sort (like a “please remove your shoes” reminder by the back door), or even whip up a personalized sign for your son or daughter’s room with their name on it. The possibilities are pretty much endless.
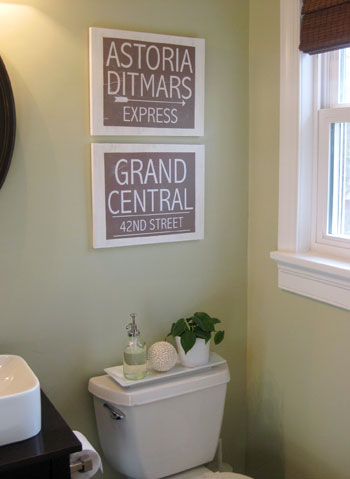
So we’ll leave you with this detail shot which further shows our gently distressed signs hanging happily above the toilet (a place that all art aspires to be hung, we’re sure).
Isn’t it funny how two pieces of paper that we taped up on the wall could so easily turn into this with six bucks and a bit of let’s-see-what-happens spirit?
But enough about our little Mod-Podge-Meets-Ace-Of-Base DIY fest. What kind of art have you guys been whipping up with your own two hands these days? From painting colorful canvases to framing collections like bottle caps and matchbooks, we’d love to know what made-it-myself masterpieces hang proudly on your walls.
Psst- Speaking of DIY art, here are a few other homemade art projects you might enjoy: making a magazine monogram, whipping up custom pet art, making free inspiration art, using chalk for freehand wall decor, painting pop art over old art, and creating a bunch of other cheap wall art.

Leave a Reply