As John mentioned on Monday, our full bathroom is in need of the full monty. Sure it’s great from afar…
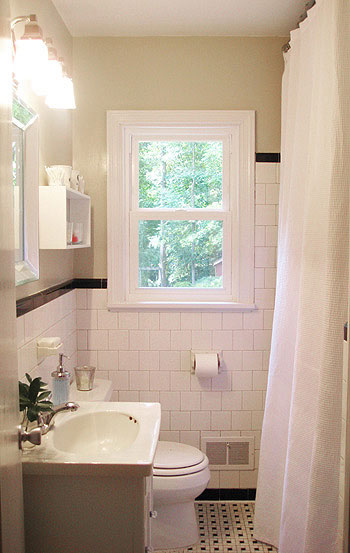
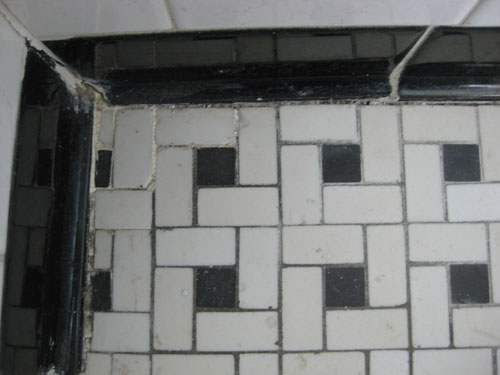
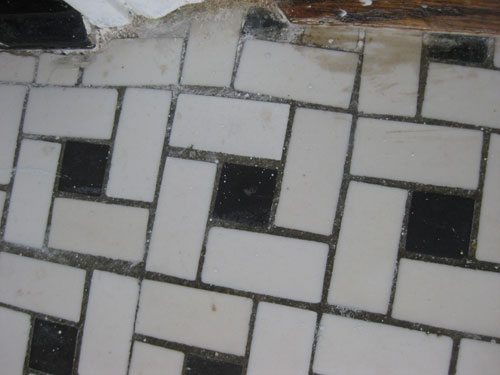
… but up close it’s a bit more, um, not great. Sadly, after over fifty years of use, the once wonderful black and white basketweave floor tiles are cracked, stained, and worn down beyond repair…
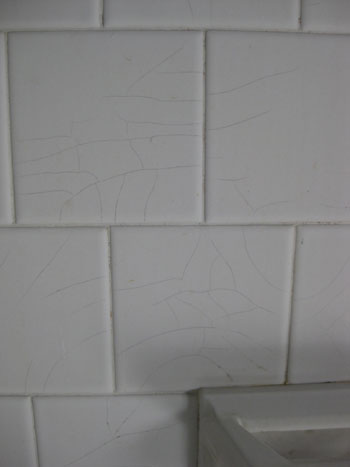
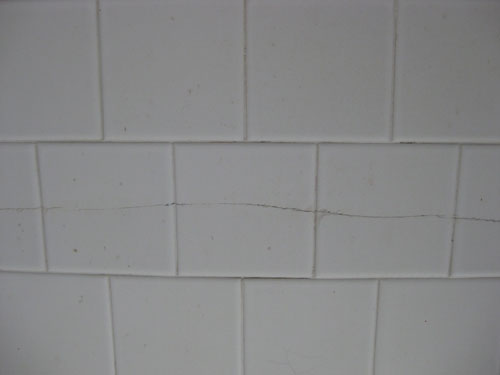
… and the white tiled walls are in pretty scary shape (shattered in some areas and dingy and worn almost everywhere else).
We’re all about saving what you can and working with whatcha got, but in this case we’re sorry to say that after a pretty serious cleaning and recaulking effort a few years back- which certainly tided us over for a while- the time has come to bring the bathroom up to speed. But of course that doesn’t mean that we’ll be bringing in materials and colors that feel all futuristic and out of place in our half-decade-old brick rancher. Our plan is to walk the line between classic and current while choosing tiles and accessories that should fit right in with our 50’s home without feeling “so 2009” in a decade or so (since we hope to enjoy this new bathroom for at least as long as the old one lasted, which happened to be half a century).
And since we know you guys love the play by play when it comes to our actual planning process, this post is all about the brainstorming and beginning legwork that we put into the bathroom waaay before we even picked up a hammer and got to the smash-em-up demo part. As many of you know, one of our favorite first steps to any makeover is to hunt for inspiration images in magazines and online. We get tons of emails each week from people who just don’t know where to start and we always suggest what works for us: look for rooms that you love and let them be your starting point.
And not just one. It helps to hunt down at least five or so. Sure they might all be a bit out of your price range, but you’ll notice patterns start to emerge as you add more images to your inspiration folder (ex: you’re drawn to white cabinets for example, or you seem to like mosaic tile) and you might even find the “jackpot room” that you can literally follow to the letter if you’d like (grabbing a paint color that matches, choosing similar tile, snagging nearly identical window treatments, etc). And of course you can duplicate the look for less thanks to lots of stores like Target, Z Gallerie, Ikea, TJ Maxx and HomeGoods which carry high-end-esque items that don’t break the bank.
So since we knew a bathroom makeover was in our future for the past six months or so, we slowly but surely built up a little folder of inspiration and recently sifted through it when the time came to settle on tile choices and a color scheme. Here’s the single most inspiring image from our hunt (found on Canadian House & Home’s eye-candy riddled site).
Now at first glance you may laugh because this luxe and spacious floor plan is nothing like our own, but the reason we were so drawn to this room were the mocha floors paired with lots of airy light colors everywhere else. Because our entire house has dark hardwoods (even our half bathroom, laundry nook and kitchen) we loved the idea of carrying the deep mocha tone into the bathroom for a more seamless feeling. No more stepping into a little box of light tile after roaming around a whole house full of mocha flooring. And the bathroom above showed us that you can mix light tile with dark floors for a stunning and open effect. Yes, part of the reason it looks open is because this bathroom is about as big as our entire house, but we’ve learned over the years that contrary to the “lighter’s always looks bigger” rumor, keeping flooring cohesive in a small house makes things flow more easily, breaks things up less, and- you guessed it- can actually make rooms appear more expansive and open because there’s not a hard and fast boundary when you step from one space to another. Plus dark floor tile means dark grout which is a dream to keep clean compared to the white stuff.
So it was settled: we were gung ho about a dark mocha floor. But we didn’t want hardwood in our home’s only full bathroom (tile is notoriously better when it comes to moisture & water- and because it’s the only shower/tub that we have, it definitely gets a lot of use). So we set out to Home Depot and Lowe’s to scope our floor tile options in the dark mocha family. Of course we had no intention of coming home with anything… we were just doing a bit of legwork before possibly checking things out online or hitting up a specialty tile shop. Home Depot had a few basic porcelain and ceramic options in brown-ish tones, but they all sort of mimicked the look of travertine (which is a bit more new-traditional than the classic meets modern effect that we’re leaning towards).
So off to Lowe’s we went. Which is where we literally struck gold. Ok, we did not literally come into a small fortune thanks to discovering gold bars in the tile aisle, but we did find gorgeous mocha tiles (marble ones to be exact!) that were normally over $10 per square foot marked down to $2.50 each in the clearance section. It was love at first sight. And we did save a fortune so we might as well have actually struck gold. Since our bathroom only calls for about 30 square feet of tile for the floor (there are some perks to a small bathroom!) the cost to retile the entire room came in at around $75 (of course we’ll have some other flooring materials to add to that price, but because we’re doing all the work ourselves – well, with the help of John’s dad- we’ll definitely make out like bandits).
But did we just buy 30 square feet of the clearance floor tile? Heck no. We actually employed an old trick from my house-renovation-loving mom and step dad and purchased twice as much tile as we needed. Home Depot and Lowe’s are great about taking back full boxes of tile that have been opened as long as they’re undamaged and not missing any tiles, so my mom her husband always purchase twice as much as necessary when it comes to tile with irregular patterns (like veiny inconsistent marble) because there are always tiles that you love mixed in with oddly spotted or colored ones that you’re less crazy about. And when you have twice as many tiles to choose from, you can hand select the ones you like best and return all the rest to the store unharmed in their original boxes for a full refund. Not a bad system, eh? And it’s totally above board! In fact we’ve heard of many a contractor who does the same thing (and even chats about their approach with store employees as they return half of the tile). As long as it’s undamaged and back in the original box it’s a great way to ensure a floor that you love instead of having to hide a few tiles that you’re less crazy about behind the toilet. Note: buying at least 10% more tile than you need is always a good bet because you might have breakages during installation and will also want to keep a few spare tiles on hand for replacement down the road.
But what about the rest of the room? Well from the beginning we’ve been sold on classic white subway tile for the shower surround (it’ll go all the way up to the ceiling for added height which makes a room feel taller and less broken up). The perks of subway tile are nearly endless. It’s affordable and timeless and perfectly appropriate in a 50’s ranch (in fact the white tile that we’ll be replacing is pretty similar except that it’s square instead of rectangular). And you can’t beat the price. It’s just 21 cents a tile at Home Depot (compared to a few cents more per tile at Lowe’s- yup every penny counts!). And when it comes to the tile you see around the rest of our bathroom (behind the toilet and the sink) we’ll be demoing that out and replacing it with drywall for a less broken up effect so we can paint those walls floor to ceiling in the same tone for a streamlined and open look that’s still totally workable in a bathroom (who needs tile behind a toilet anyway?). Using semi-gloss paint will keep it just as wipe-able as our half bathroom walls (the toilet and sink in there get tons of use and the semi-gloss wall paint is super durable and perfect for the job).
But onto the vanity. From pretty early on we decided that we wanted to make our own using a sturdy piece of furniture like a cabinet or an end table and retrofitting it with a sink and faucet (just like my mom did in her bathroom over ten years ago).
We love the classic lines of a dark wood cabinet paired with a crisp and current clean-lined sink. And after a full day of driving our bums all over town (we literally visited three thrift stores followed by TJ Maxx, Marshall’s, HomeGoods, World Market, two Pier 1 locations, West Elm, Pottery Barn and Crate & Barrel over the course of about five hours) we finally discovered the perfect base for our DIY bathroom vanity. So for anyone at home who wonders how we find what we do, there’s usually a bit of old fashioned legwork involved (and we like to do it all at once in one chunk of weekend time so all of our options are fresh in our minds and we don’t have to spend ten evenings in a row ducking out for a half-hour each night).
But back to the vanity we found after some pretty decent store hopping. We were looking for a very specific size (around 18″ deep , 23″ wide, and 30″ high) so it wasn’t all that easy to find. And of course it had to be sturdy enough to support the weight of a sink full of water and adaptable enough to accommodate the pipes that will need to be integrated into the base. So when we stumbled upon the perfectly sized night table at Crate & Barrel we were both thanking our lucky stars. Plus with a 15% off coupon that we happened to have in the car (tip: keep coupons in the car so they’re most likely always with you- and they don’t clutter up your purse) we snagged it for just $165! Not bad when you consider that many of the wood vanity bases sold at places like Home Depot and Lowe’s are around $500 (which don’t include the above counter sink and faucet, btw) like this one and this one. Heck even this tiny one is $199, so we’re feeling pretty good about our lucky Crate & Barrel find.
And once we add a discount sink that we tracked down (hundreds cheaper than this one from Home Depot) and an affordable ebay faucet, we’ll have a totally customized classic-meets-modern vanity for around $380. Which is cheaper than most of the vanity bases (not including the sink and faucet) sold at Home Depot and Lowe’s! And it’s even more of a deal when you compare it to similar pieces sold for around $1500 at stores like Pottery Barn and Restoration Hardware. Crazy, huh?
But enough jibber jabber. Here’s our little mood board of sorts for the bathroom so you can start to see how it’ll all (hopefully!) come together…

1. We plan to bring in soft gray-blues and light taupey-green tones in the accessories and the wall color while the floor is that delectable rich mocha tone and the shower/tub tile (along with the shower curtain) are crisp white for an open and airy feeling. Status: no specific paint colors or accessories have been selected as of yet- we plan to get the tile up before crossing that bridge.
2. Here are our tile choices together (the cheap 21 cent subway tile for the shower walls will hail from Home Depot and the clearance $2.50/square foot mocha marble from Lowe’s will go on the floor). Status: all the tile has been purchased- and our wallet hardly felt it!
3. We searched high and low to find a clean-lined white sink that’s hundreds cheaper than most of the others we hunted down, and when it’s paired with an affordable ebay faucet the savings will really start to add up (without sacrificing an ounce of style). Status: we already received the sink and LOVE IT, and as for the faucet we ended up snagging a similar but less bamboo-ish version right here.
4. Here’s the night table that we’ll be turning into a vanity sink base thanks to the perfect size and sturdy construction (and also thanks to a 15% off coupon that helped us snag it for $165 total). Status: it’s here in a box just waiting to be assembled.
5. We already have an extra long white floor-to-ceiling waffle curtain that we’ll stick with for the new bathroom remodel (you can read about how it came to be right here). And adding some softly patterned towels in taupey-green and gray-blue along with a few accessories, a bit of art, and other finishing touches will really tie everything together. Status: as mentioned we already have the curtain so we just have to grab towels along with accessories after the tiling is completed.
So that’s the plan for the big bathroom overhaul of 2009- and of course we’ll include a big budget breakdown when we actually take things from mood board to reality. We can’t wait to get started and share every detail with you guys along the way. And since we’re all about bathroom steals and deals, we’d love to know what cheap-o projects you’ve completed yourselves. Or what sorts of discounted items and accessories you’ve found that have resulted in a so-fresh upgrade without emptying your piggy bank. Do tell.

Leave a Reply