So the basement has made it known that it’s not going to cooperate without a fight. The current score is something like this. Basement: 3. John and Sherry: 1. Good thing we love a challenge. Here’s where we are when it comes to our big underground overhaul…
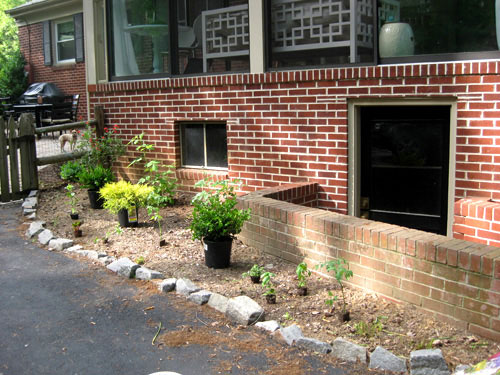
Many people requested more nitty gritty details about how we go from before to after. Not just a source list and a budget breakdown, but our actual thought process when it comes to figuring out what functions are most important to us, brainstorming a workable floor plan, detailing the pitfalls that we encountered along the way, etc. So we’re not planning to spare a single detail when it comes to transforming our bleak cobweb filled basement into a more finished and functional storage room fit for a king (or at least our beloved extra furnishings, bikes, accessories, and seasonal decor that we wouldn’t want covered in spiders and mold). First the details about where our basement is actually located: it’s directly below the sunroom off the back of our house (accessible by descending a little brick staircase which you can sort of see here in this old photo from when we planted our edible garden).
At 19′ x 13′, it’s a generously sized room (actually the biggest in our house, along with the sunroom above it of course). But that’s about where the positives stop. The challenges in this room far outweigh any other space that we’ve tackled, from the flooding issue (we’ve seen inch-deep puddles down there after a raging storm) to the insane spider situation (webs galore doesn’t even begin to describe it). And then there’s the mildew problem- it’s on the walls, the floor and anything we store down there (we tossed two extra wood chairs down there and were horrified to notice them covered in gross mildew a few weeks later). We also have a giant unsightly water heater in the middle of the room…
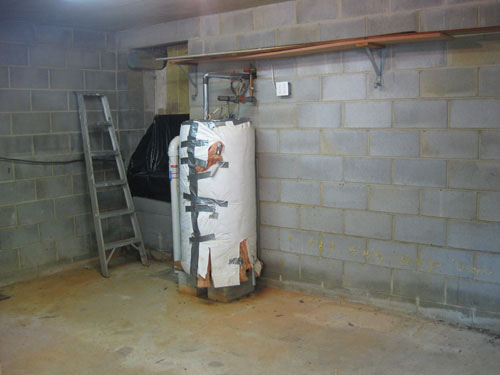
…a radon mitigation system to work around (that white pipe to the left of the water heater in the photo below), a strange trap-door in the wall that leads to the crawl space…

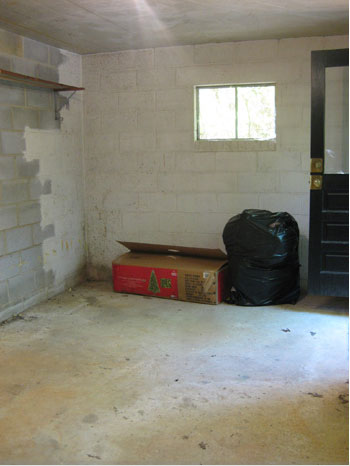
…and just two tiny windows to let light into the cavernous cinder block dungeon of a room. Not such a good starting point.
But we’re determined to turn all of those cons into pros- or at least minimize them while gaining a lot more function and form from the soon-to-be spruced space. As we mentioned, because the room has a separate entry from the rest of the house, it will probably never be an area that we use as actual living space, but we’re psyched to turn it into a massively convenient storage room where we can stash things without a second thought… and we have higher expectations than unsightly wire shelves and bowed wooden boards so stay tuned for a room that we hope has more of a built-in look than a tossed together hodge podge of shelving systems. But before we move onto sharing our layout ideas and storage solutions, we had to tackle the issues that made the room completely unworkable. The wetness problem and the mildew invasion, which are actually stemming from the same issue: nasty moisture that gets trapped in our little underground lair.
After a bit of research we learned that there were three major things we had to do to address the water/mildew issue:
- kill the mildew for good
- seal the cinder block walls and the cement floor so the raw stone could no longer absorb up to an inch of water in a bad storm
- keep moisture and mildew from coming back by bringing in a dehumidifier to keep things nice and stable down there (preferable something Energy Star rated so we don’t have to spend an arm and a leg running it during the moister months).
After a bit more research (thanks google!) we learned that the most often recommended way to seal cinder and concrete basements is Drylok, a thick milkshake-like paint of sorts that goes on slowly and stinkily, but after two heavy coats it really does the job. As in no more moisture seeping through the cement and the cinder for at least ten years or more. It even claims on the can that it can stand up to a 22 foot high wall of water. Is that not downright heroic?
But the stuff isn’t cheap. Thank goodness for our spot on the True Value DIY Blog Squad.

Remember we promised we’d be blogging about a series of DIY projects that we would undertake over the next few months using a $1000 gift card courtesy of True Value? Well, their generousity really came in handy when we realized we needed to purchase at least nine (count them, nine!) gallons of $25 a pop Drylok just to seal everything up down there. Yup, that’s at least $225 spent just to solve the seepage problem alone. But doing the work ourselves really saved us a lot more cash-money. By filling any cracks beforehand with exterior caulk and cement crack filler and then rolling the two thick coats of stinky stuff on ourselves, we probably saved at least 1K and up to 3K (based on the estimates we got when we called around for basement experts who come in, caulk, and roll on the Drylok for ya). Not bad for a few days of sticky messy work, eh?
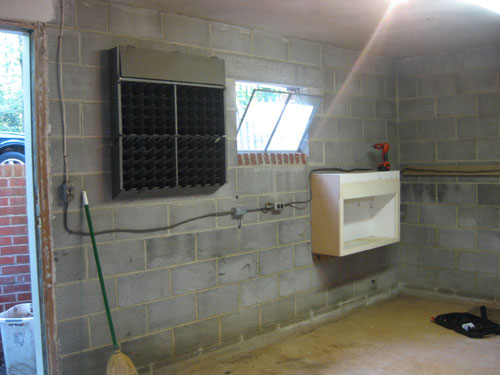
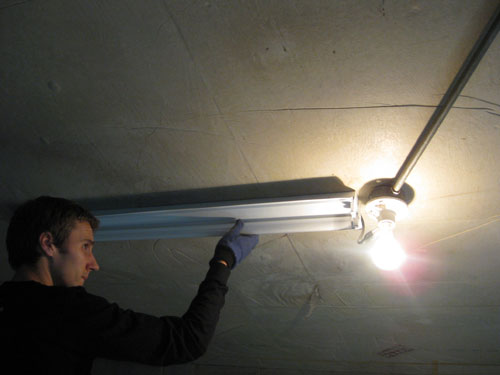
But first we had to prep the room and remove anything we didn’t want in the space so we could Drylok behind it for a seamless look. This meant removing the strange extra light fixture on the ceiling that looked a bit less than symmetrical…
… and taking down the quirky little metal time-card-slot thingie that the previous owner used as a tool organizer (which we freecycled- we have bigger plans for maximizing that wall)…
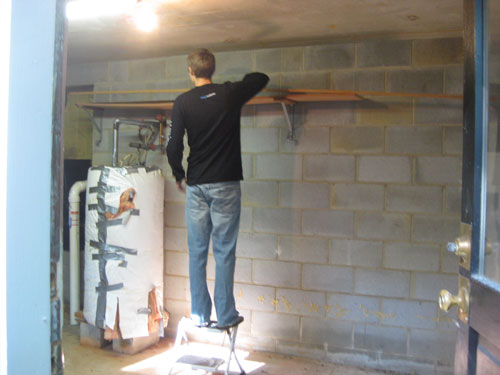
… and pulling down the old brackets that ran across the opposite wall with a few ancient pieces of bowed wood resting on them…
Then it was time for sealing up any and all cracks with concrete filler and exterior caulk and moving on to the messy Dryloking process. And in working with Drylok we learned a few things. It actually comes in two different varieties, one that’s oil-based and one that’s latex-based. It also comes in a range of colors if you select the oil-based option (white, beige, blue and gray) while the latex-based one is only available in white.
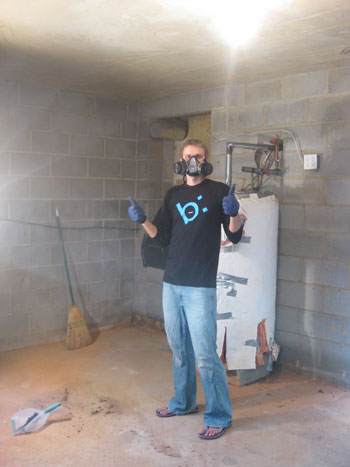
The oil-based stuff is muuuuch muuuuuuch stinkier (with all sorts of crazy warnings about brain damage and death on the label) while the latex-based stuff is supposedly just as good (although some skeptics aren’t convinced) and even though it also stinks to high heaven it’s about half as bad as the crazy oil-based fumes. We actually did our first coat in the latex-based stuff, and even though it’s the lower odor option of the two it still had us nervous so we actually threw in $30 a pop for our health and purchased high-grade gas masks to block 100% of the fumes and toxins from entering our lungs and brains. Thank goodness we did! That stuff would have brought King Kong to his knees. And we just can’t bear to spare any more brain cells, especially when we’ll need them to overcome the rest of our issues in the basement after we have this moisture/mildew thing under control…
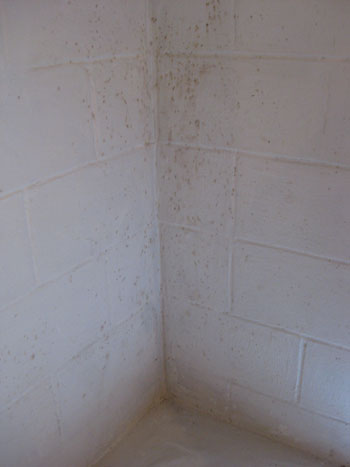
Now here’s where the basement earned its “won’t cooperate without a fight” reputation. No sooner had we brushed on our first coat of white latex-based Drylok (to the tune of $125) when we noticed little tan dots slowly coming through our snowy white finish. It was mildew and it was popping up in every corner and even along some expanses of wall even though we had sprayed it down with a 2-parts-water-1-part-bleach homemade spray beforehand (which seemed to kill it for a while, but then we added the Drylok and bam, it was back). Needless to say it was a bit demoralizing to realize that our über expensive paint job was blocking exterior water seepage but not quite solving the mildew problem (and we know getting a dehumidifier will also help, but we were intent on killing off all the mildew before finishing our paint job).
So then it was time to pull out the big guns. We decided to do the necessary second coat of Drylok with the oil-based beige option instead of the white latex-based version. We learned that painting Drylok is not recommended since you can’t re-Drylok over it ever in the future (so if in 20 more years we wanted to reseal the basement, Drylok wouldn’t work if we had painted the walls down there). This made us opt for the tinted version since it’ll hide more dirt and the occasional singular spiderweb better than a blindingly white backdrop… it’s sort of like paint and Drylok in one step.
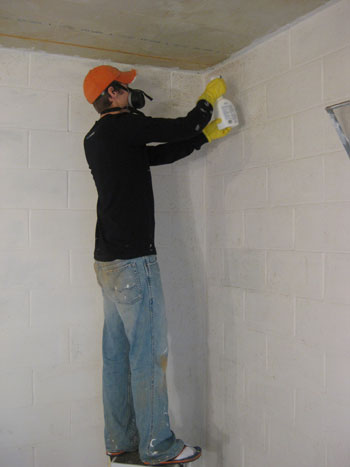
And everyone knows we don’t have a white wall in the house (hey, how else would all our white ceramic animals and painted pedestal tables pop?). Plus one of the experts at True Value recommended the oil-based variety since it may even block more mildew and create an even stronger barrier against moisture and future mildew growth, especially when paired with a dehumidifier. We’re planning to get that last coat on the walls tonight and tomorrow night (gas masks in tow of course- we’re prepared for quite a stink-fest) and then we’ll be back to share the hopefully mildew-free and much-more-polished-looking results. ‘Cause the leopard print look just isn’t doing it for us. And we’ve even sprayed down the mildew one more time with our homemade watered down bleach cocktail and given it a good ol’ scrub to be extra thorough before our second coat goes on later today (note: check out John’s patented socks-with-flip-flops approach, which protects him from spatter without causing him to sacrifice a pair of shoes that he actually likes).
Oh and for those who wondered how we chose beige as our color among the other options (blue and gray), we thought gray would just make the room look like a cinder block fortress (which it is, but we’re trying to play that down) and the blue was just a bit too pastel for our tastes- meanwhile the beige is a nice neutral color that will really work with the white storage systems we’ll be bringing in for a light and airy look. So that’s how we made that call. And the ceiling will also go beige for a seamless look while the floor gets a nice coat of chocolate floor paint (leftover from this project) for a bit of definition. Here’s hoping we’re on the right track…
What about you guys. Any basement projects looming on your to-do list? Any previous experience with nasty mold and mildew or moisture issues like flooding? Let’s commiserate. And of course we’re open to any and all basement conquering advice as we charge ahead. Fingers crossed that we can score a few points in the next round…

Leave a Reply