Remember this old post about all the fun projects we were daydreaming about taking on with some bonus cash from BHG’s 48-Hour Challenge? Well 20,000+ votes later (!) we didn’t win the 5K (congrats Nicole!), but the good news is that plenty of those projects are still on the agenda. In fact, two of them are already completed! Remember we spruced up our patio a few weeks ago with a DIY firepit and some cheap-o lounge chairs? One down, four to go.
Well, better make that three because we’re back to share the second project that we tackled on the sly. We hinted at wanting to “introduce some layered, textural interest in the half bath” but then decided not to delve into details and surprise you guys instead. Well… surprise!
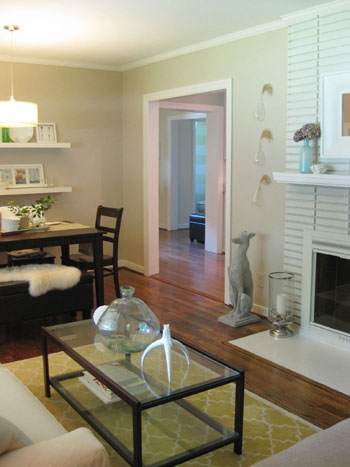
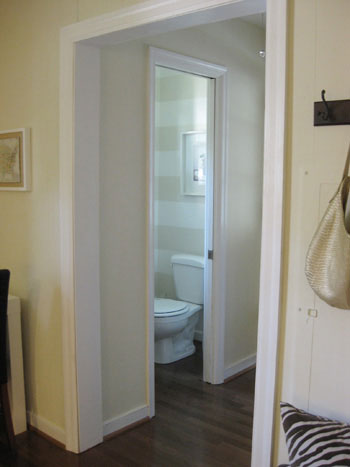
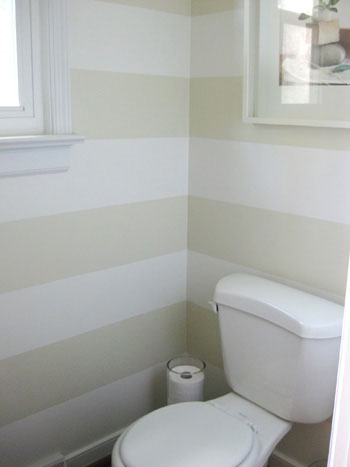
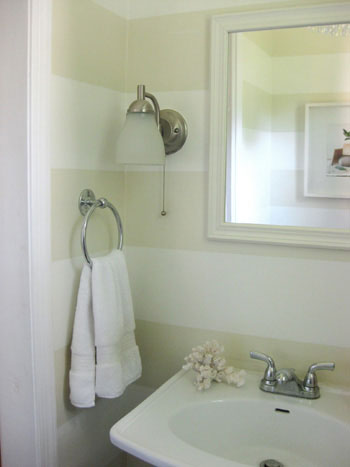
See that cream on cream texture that’s visible all the way from the front door? Let’s get closer shall we?
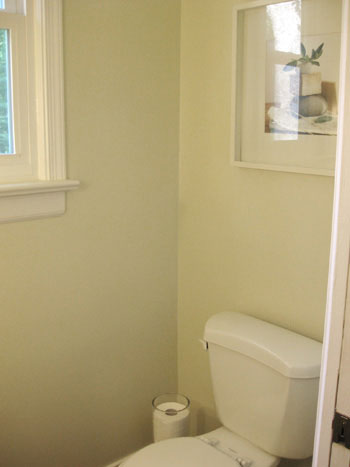
Yup, we painted cream on cream horizontal stripes in the half bathroom! It used to be the same tone as the hallways and the adjoining den (Wishes by Glidden) but we decided to amp it up in that jewel box of a bathroom with some lighter stripes to make the room feel a little more expansive (horizontal stripes have a way of creating that effect) and a heckova lot more interesting. Jenn’s Design Star makeover from last summer was actually our inspiration- it just took us twelve months to make it happen. Here’s the bathroom before our little paint intervention:
The entire project took just 4 hours one evening, and the steps were really simple:
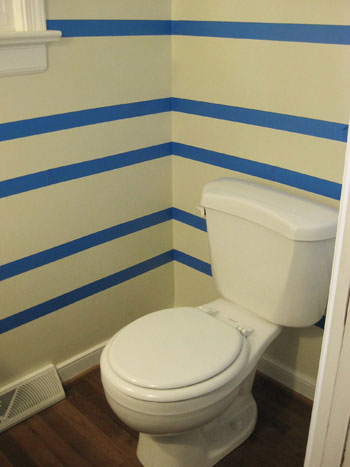
Step 1: Divide & Conquer- Measure the full length of your wall and divide that number by twice the number of stripes that you want to have minus one (ex: our ceiling is 98″ tall and we wanted six horizontal stripes so we divided 98 by 11 (6 x 2 = 12 – 1 = 11) to get the thickness of each stripe. Ours came out to about 8.9 inches.
Step 2: Make Your Mark- Use a ruler to mark off every 8.9 inches starting from the floor and working up to the ceiling (we made two small pencil marks on each wall, one on each side).
Step 3: Tape It Off- Grab some blue painter’s tape and connect your pencil markings to create taped off stripes (once the tape is in place rub it a few times so you know that it’s flush with the wall for cleaner lines). The main thing to remember is that the tape should go outside the marks for the stripes you’ll be painting but inside the marks in the negative space that you won’t be painting. This might sound confusing, but just ask yourself if you’re taping off the stripe or the negative space as you go, and make sure the taped stripes are the right distance apart (ours were 8.9 inches) while the tape for the negative spaces is closer (once you remove the tape both areas will be the same width).
Step 4: Roll With It- Grab a good roller and some slightly lighter or darker paint (subtle is key for this look, so just going a shade or two away from the wall color makes for a soft layered look). Then apply two even and thin coats of latex paint between the tape that’s further apart to create your stripes. You’ll also need to use an angled brush to cut in near the base molding and the ceiling.
Step 5: Take It Off, Baby- This is a very very very important step. It’s crucial that you remove every strip of tape as soon as you’re done with your second coat of paint while the paint is still wet (assuming the coverage is good enough that you don’t need a third coat). Waiting to remove the tape until after the paint has fully dried will cause peeling and uneven lines that are less than crisp (which will make you want to cry after all that taping). In short: as soon as your roller is down, start pulling that tape off the wall for a clean stripe that looks seamless and sleek.
There you have it. Horizontal wall stripes. Easy eh? Oh and we used a quart of Valspar’s Honeymilk for the stripes because we actually had a $10-off coupon to Lowe’s. And thanks to that $10 off coupon, this entire project came in at just… (drumroll please)… $2.48. Gotta love that bang-for-your-buck upgrade!
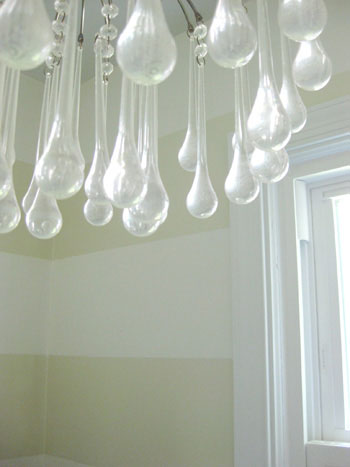
We really like how our crystal tear-drop chandelier (a cheap-o Urban Outfitter’s score from a while back) looks even more dreamy with the soft stripes around it.
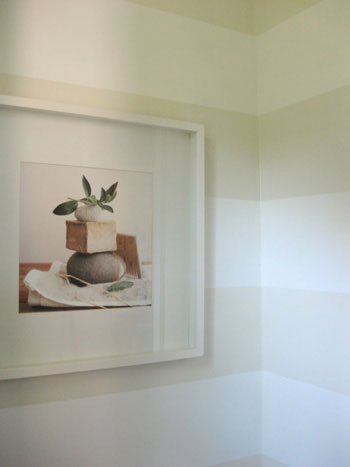
And our $9.99 art somehow feels even more spa-like with the tone on tone stripes:
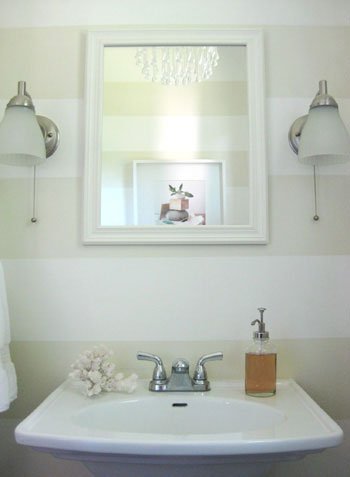
We also feel particularly lucky that our stripes ended up framing our wall sconces perfectly (of course this is something you can ensure by starting your stripes in that area and working up or down to tape off the rest of them so nothing cuts through your lighting at a funny spot).
So there it is. Our under $3 bathroom makeover. We’ve always had a soft spot for stripes (take our blog’s background for example, or our recently striped porch) and I guess we just had to bring ’em into our tiny half bath to fully embrace the linear love.
What do you guys think? Did any of you take on any cheap-o projects this weekend? Any striping stories of your own? Do tell.

Leave a Reply