Our recent sunroom floor staining debacle led us away from semi-transparent floor finishes (which are fabulous for raw concrete but don’t work as well over previously stained concrete) and towards solid floor treatments that are yummy and glossy and opaque. So here’s how we got it done.
We quickly learned that oil-based porch and floor paint was the best candidate for the room (since latex based floor paints can’t bond to a previously stained concrete surface) and at Lowe’s we happily discovered Valspar’s High Performance Oil-Based Porch & Floor Paint in a perfect chocolate brown color called Brownstone (here’s an affiliate link to it over on Amazon if you can’t find it in stores).
We’d been longing for a rich brown tone to tie into the adjoining room’s hardwood flooring, and Brownstone was a match made in floor paint heaven. Since the stuff is “extremely durable and resists scuffing while retaining its high gloss appearance” it was the perfect solution for our high traffic sunroom. And not only is it great for concrete floors, it can also be used on wood floors and primed metal so it’s definitely something to keep in mind for any of the floors in your home that have seen better days.
So without further ado, we bring you the simple five step tutorial to painting your floor:
Step 1: Ensure that the floor is squeaky clean. This can be accomplished by thoroughly vacuuming and then going over your floor with a mildly soapy wet rag and waiting for the floor to dry completely before moving onto the next step. Additionally, if you’re painting a wood floor, any splintered or rough parts should be sanded or patched before moving on to the painting process.

Step 2: Edge the perimeter of the entire floor (about 4 inches or so) with a good quality brush that won’t leave any bristles behind. Oil based paint is deliciously glossy, which can makes things like errant paintbrush bristles stuck to the floor more obvious than a matte floor finish would.

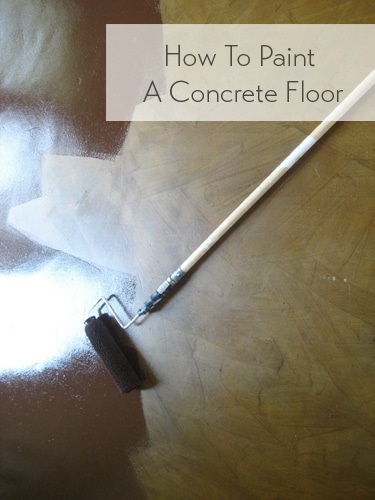
Step 3: Use a paint roller with an extended pole attachment to coat the entire floor with one coat of paint. Roll in long even strokes and make a “w” pattern on the floor with the roller to eliminate any obvious paint globs from the side of the roller. Don’t forget to be smart about painting yourself out of the room as oil paint takes a looong time to dry before you can walk on it again.

Step 4: If you’re lucky, one coat of paint will do the trick. In our sunroom it would have except that we missed a couple of teeny slivers of the floor and wanted to go over the whole thing again for good measure and a uniform finish. You must wait at least a full 24 hours before applying a second coat, and even after 24 hours you may notice that your first coat isn’t completely dry (you may see subtle footprints as you walk across the floor) but you can proceed with your second coat since it’ll gloss over everything and leave it looking shiny and perfect again.

Step 5: Wait at least 6 full days to walk on your new floor. It may feel like torture, but it’s better to be safe than sorry. And after almost a week of avoiding the space, you’ll be super excited to move in all of your furniture and make yourself at home. It should be noted that oil-paint is especially toxic and super stiiinky, so keeping a ceiling fan going and the windows open for the full 6 days is a smart idea (which means implementing that plan before the second coat since you won’t have access to the room afterwards).
So there you have it, a simple five step process to fantastic new flooring. Here’s ours looking all glossy and fabulous (like melted chocolate, I tell ya). We love the rich, uniform tone and the luxe sheen, and we’ve both noticed that the room looks a whole lot more “finished” with the newly painted floor.

We also love how it ties in with the dark brown window sashes around the entire room, and makes our white furniture pop even more than it did against our old orangey-gold floor.

And perhaps the most exciting thing of all is how the newly painted sunroom floor so perfectly ties into our existing hardwood floor in the adjoining laundry nook and den. It’s an almost seamless transition which makes the sunroom seem a lot more cohesive (it no longer screams “add-on”) thanks to the uniform floor color and super luxe sheen.

We hope our fast and furious floor painting tutorial has been of help. And of course feel free to send us your floor painting before and afters (we eat that stuff for breakfast). Happy rolling!
PS: If you want to learn how to just stain your concrete floor, we have a full tutorial for using a semi-transparent stain.
PPS: You can also see how we later added a decorative stencil with paint to this floor to add even more interest!

Leave a Reply